Page 2
Tools and connectors
August 7, 2005
There isn't any particular order to this. Plus you have to keep in mind that I'm free to state any opinion I have. Others may not agree!!
Crimp connectors and the tool required;
Normally people just buy crimp splices or connectors that come with insulation over them. The reason that there are three different colors of the insulation is so that you can tell what size wire the connector is for. Yellow is for the big stuff, blue for normal size (at least for cars) wire, and the red ones are for the small gauge wire.
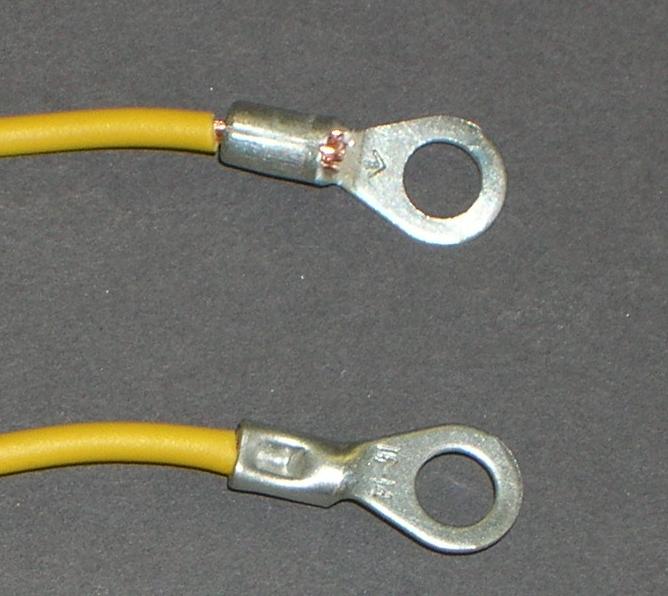
Now here is where one of my opinions come into play! I think that anybody that doesn't solder the connection is just asking for trouble at a latter date. So, what I do is buy non-insulated connectors. I crimp them, solder the connection, and then use heat shrink tubing to cover it. Non-insulated connectors are available through McMasterCarr, so don't say that you can't find them!!
Another issue that I have with what others may recommend is that you should use the correct crimp tool and not just a pair of pliers (or even a cheap crimp tool).
Now this is what I'm talking about;
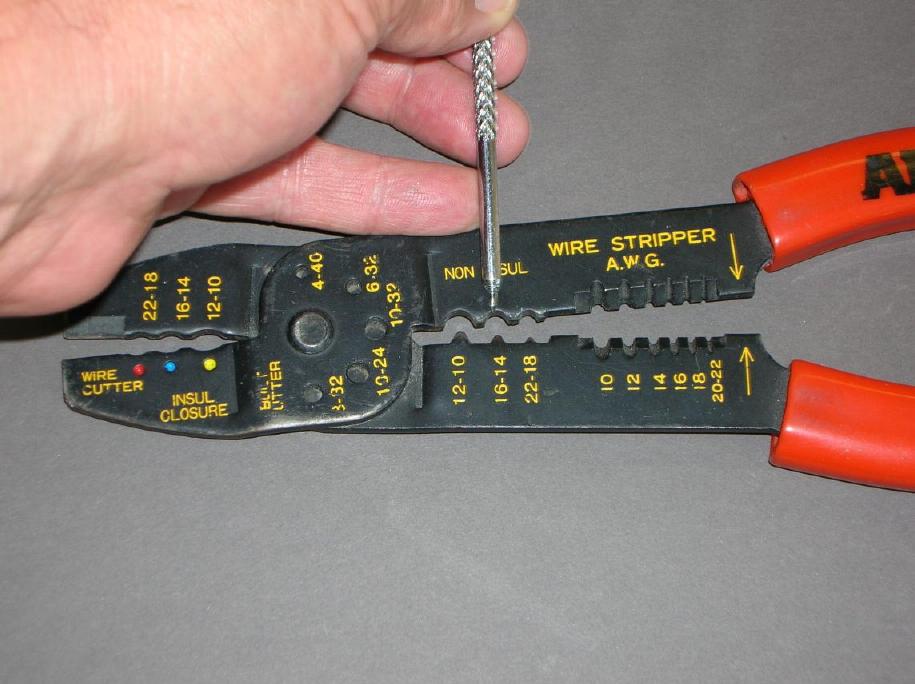
I'm pointing at the area where you would put a 16-14 gauge connector. Notice that one side has a curve and the other side has a "bump" in it.
Here is a photo of a lug connector to show why I think it's so important.
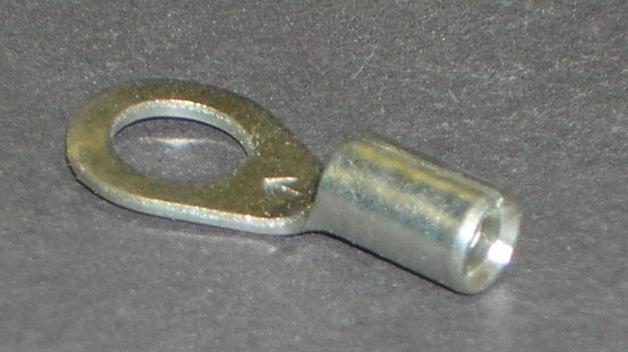
Now the reason for the shape of the tool and why it's important is that the circular part of the terminal that gets crimped isn't a complete circle!! Using a pair of pliers to crimp it can lead to it just opening up and not holding the wire correctly. Plus, if you are using insulated connectors, you couldn't even see that the crimp is faulty!
The "bump" in the crimp tool should be on the opposite side of the "gap" in the terminal as shown in the photo below!
Ya, it takes more time to do this, but it's the correct way!
Molex connectors and the tools required;
I really don't care much for Molex connectors, but they are easy to do and you almost always see them used in stereo stuff. You need a totally different type crimp tool and also need a special tool to remove the wires if you need to change anything. They pretty much come in two different sizes and you can get them with anything from one wire on up.
Here is a photo of a Molex connector and one of the pins.
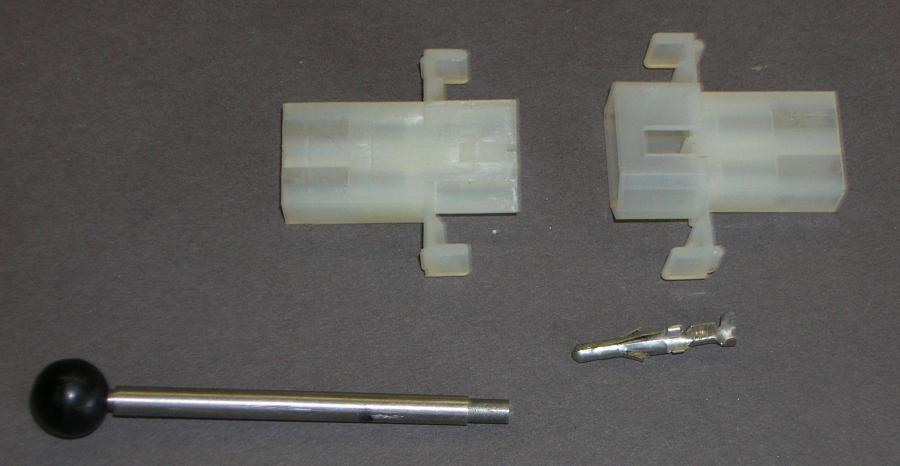
That thing with the black ball on it is the removal tool. I'll talk about it more later.
The following photo is the connector.
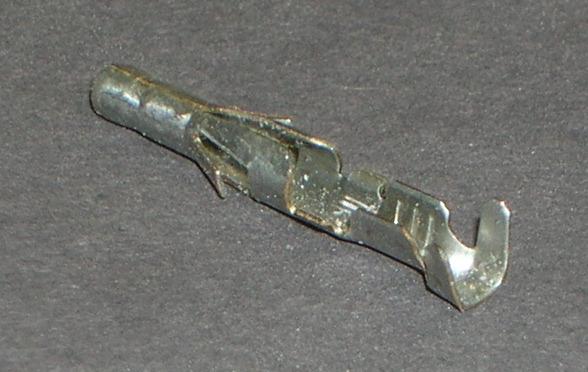
What is important to notice here is that starting from the right, there are two pairs of bend over "tabs". The first one (on the right) gets bent over the insulation of the wire. The next one is the one that gets bent over the wire.
Here is the crimping tool.
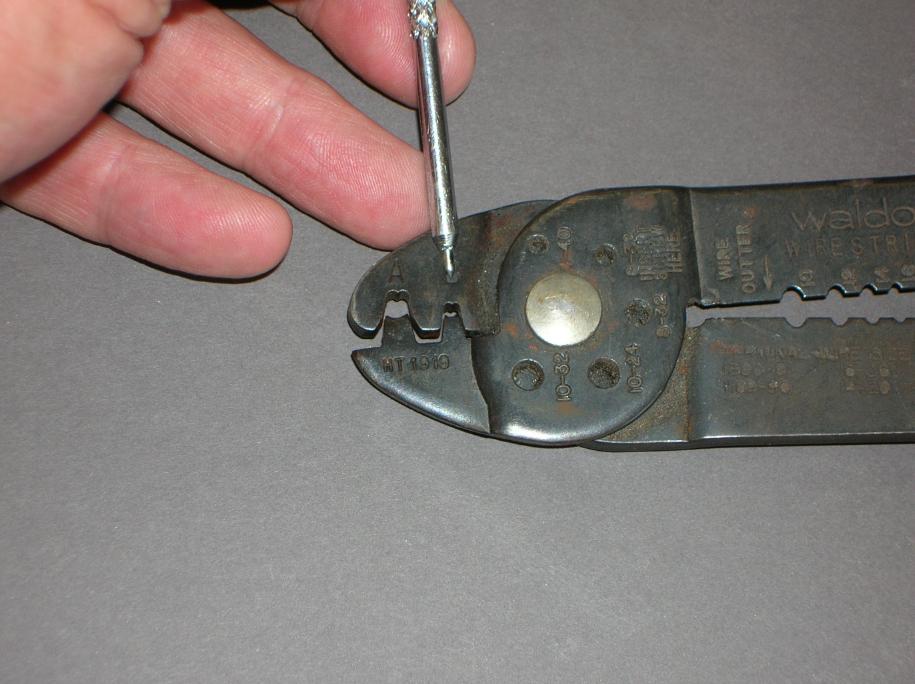
Notice that there are two different "sizes" of crimp blocks! The one pointed to is for the wire section. The larger ("A") one is for the wire insulation section. Ya, you have to crimp each terminal twice.
Notice the shape of the tool!! The idea is that the terminal flanges go upward and as you crimp it, the flanges fold around and then downward.
Here is a photo of a crimped wire.
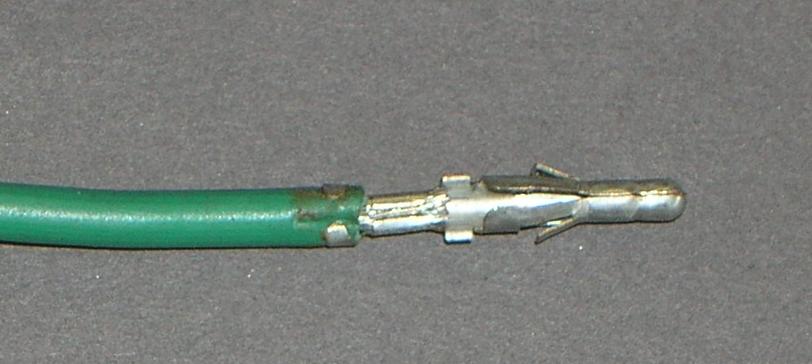
Normally, I crimp the wire first, solder it, then crimp the insulation. Then slide it into the nylon block until it clicks into place.
Notice the two "wing" kind of things. It's those that hold the terminal in the block. They are also why you need to buy a removal tool to remove a wire from a Molex connector.
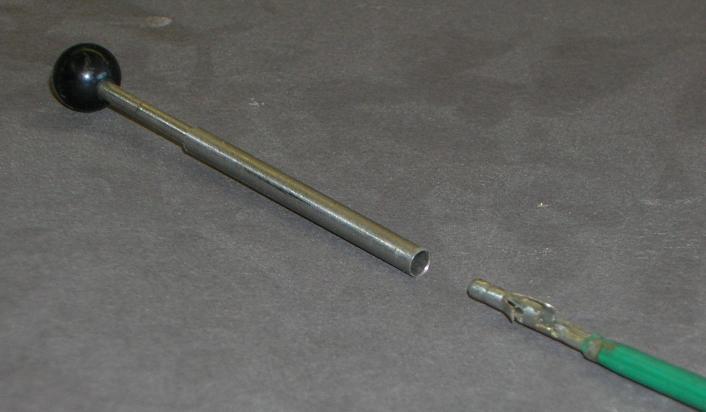
To use the removal tool, you first slide the outer tube in. It compresses those lock tabs. Then push on the black ball and it pushes out the terminal from the nylon block.