Rebuilding 911 Rear
Brake "M" Calipers
Originally written; March 3, 2009
To start off;
I'm no hero in regards to knowing everything about Porsche stuff!
Rebuilding a set of disk brake calipers like this should be easy and that's true, if you have the correct parts!!!!!
I've got to call the project a "comedy of errors" or I'd just get pissed off. The easy solution (and recommended by a lot of people) is to send your calipers to Eric Shea at PMB Performance and have him do them for you.
Not listening to what others said, I wanted to do them myself for a couple reasons. The first is that the calipers I had would have been questionable as cores. Another is that I wanted to step up to stainless steel pistons (which Eric could have done). The last reason was that I could purchase parts as my wallet would allow. (and it shouldn't be that big of a thing)
I want to make clear also that I am happy with all the suppliers that I did business with. Trying to figure out what Porsche (and ATE) did 30 years ago is not easy. In spite of difficulty getting the correct parts, they all were helpful and there was never a question about returning anything. Most knowledgeable was Dennis at Zim's and I found it kind of freaky some of the stuff that he knew off the top of his head!
Worthwhile links
PMB Performance; Run by Eric Shea, He is the guy if you want to just send your calipers out to be done. I've never purchased anything from him, but everybody that has recommends him. He's very knowledgeable and his calipers sure look nice!!
Zim's Autotechnik; They sell Porsche parts (some OEM) and are also knowledgeable (however I'd recommend asking for Dennis!).
Stoddard Porsche; A factory Porsche dealer that sells items over the internet. Their site can be very helpful researching Porsche part numbers and such.
Pelican Parts; If you own a Porsche (and work on it), you already know who Pelican Parts is.
ARP; Manufacturer of high quality bolts and hardware.
Taking apart the ugly;
I pretty much got the calipers for free (a trade for something I didn't need), but they were pretty much just a pile of parts. They were from an early 911, for the rear. One was totally apart and the other had the pistons frozen in the bore.
Stuck pistons are not a problem. All you have to do is blow them out with compressed air. The issue is safety!!!!!
You have to keep things like your fingers out of the way and also know that when the piston comes free, it will fly across the room, breaking what ever it hits. Here is a link to a page I wrote (Honda related) just to get the point across, killing a hot dog in the process.
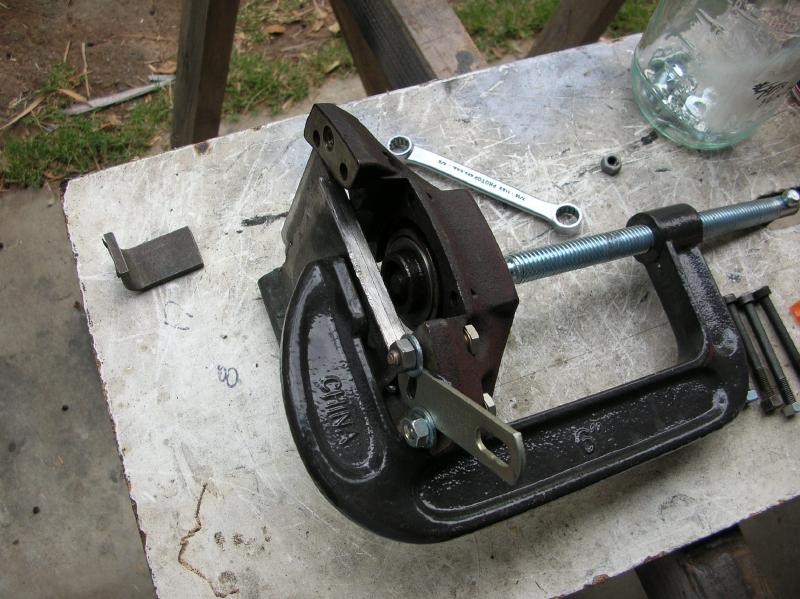
Here are photos showing what I did;
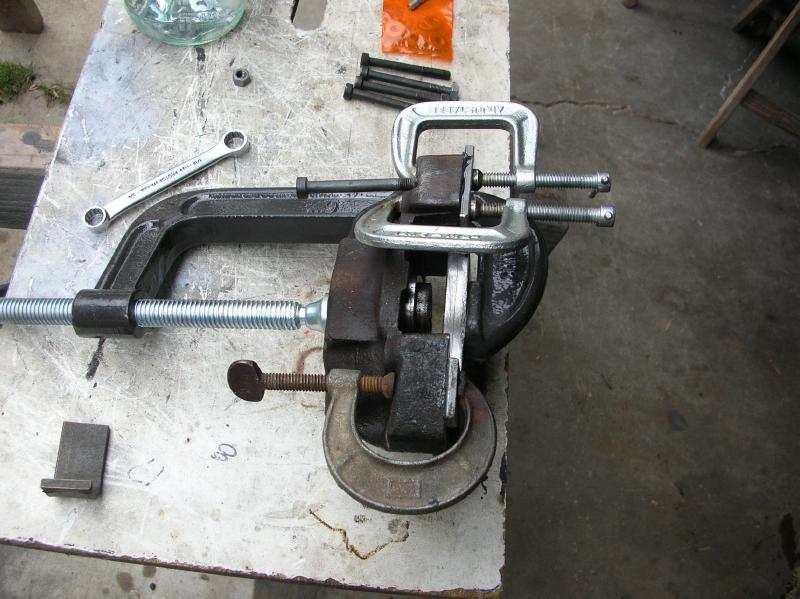
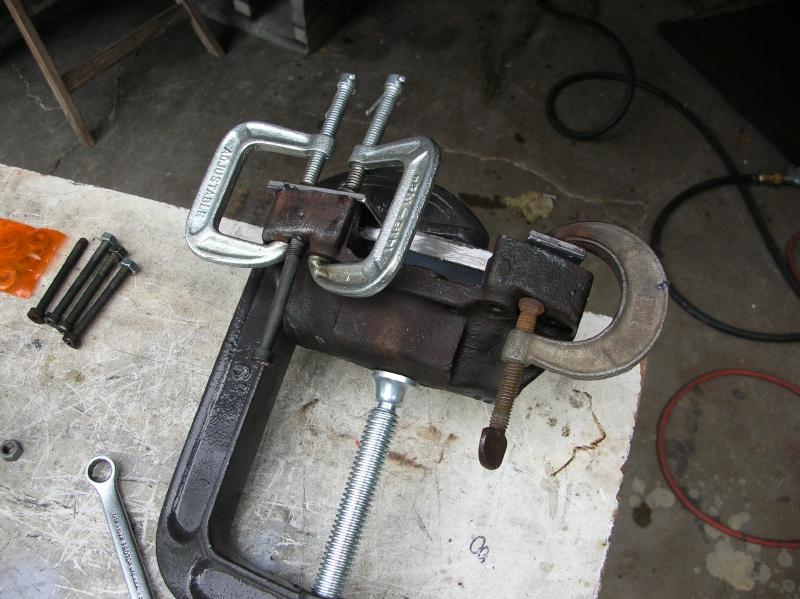
The big C-clamp is holding a large piece of steel that prevents the piston from blowing across the room.
The smaller C-clamps are holding plates that are blocking off the pressure "cross-over" holes.
The long bolt that is visible in the last two photos is filling off one of the holes.
Once all this is done, it's a simple matter of blowing compressed air into the one remaining open brake fluid line.
What pistons to use?
There are two different configuration pistons used on the rear calipers. One of them has a "mechanism" within it that is designed to keep the piston and pad from backing off too much. That's what was in my calipers. None of this would matter if I didn't want to step up to stainless steel pistons (the original pistons were pretty "rough" and needed to be replaced anyway).
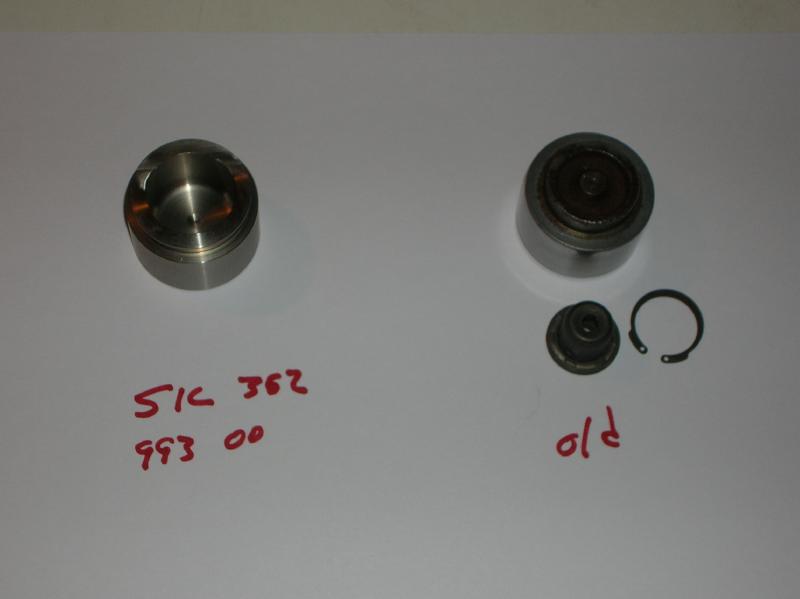
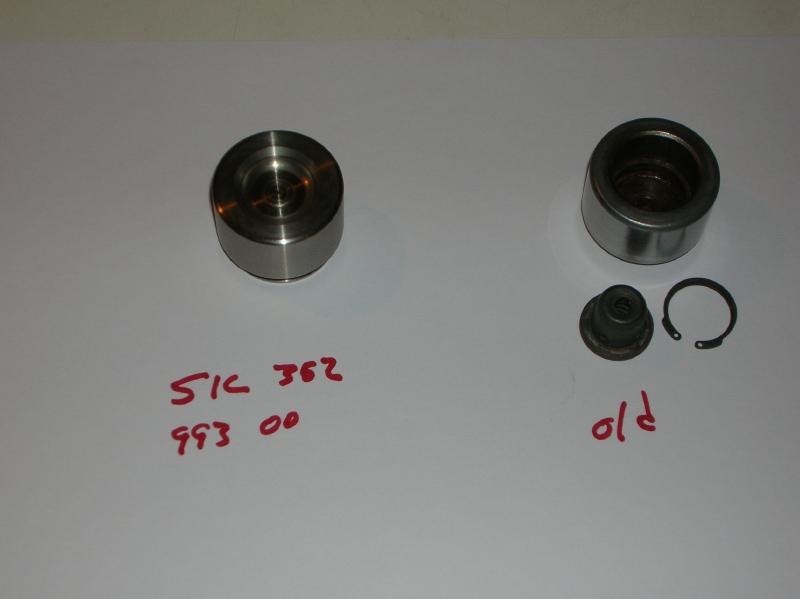
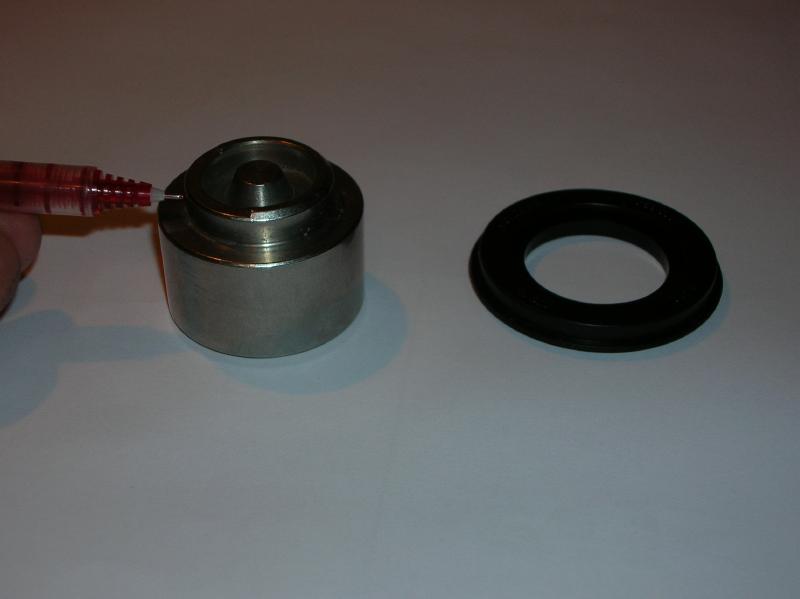
The photo on the left shows the two different pistons as would be viewed from the brake pad. The photo on the right shows them as if you were in the caliper bore.
The circlip and item to the left of it is that "mechanism".
What I'm trying to show is that they "cup" differently. If you want to keep the mechanism, then you have to get the correct piston (I got a wrong one from Stoddard and that's how I ended up being able to shoot this photo).
In the next photo, you can see how the caliper body has a shaft within the bore that works on the mechanism.
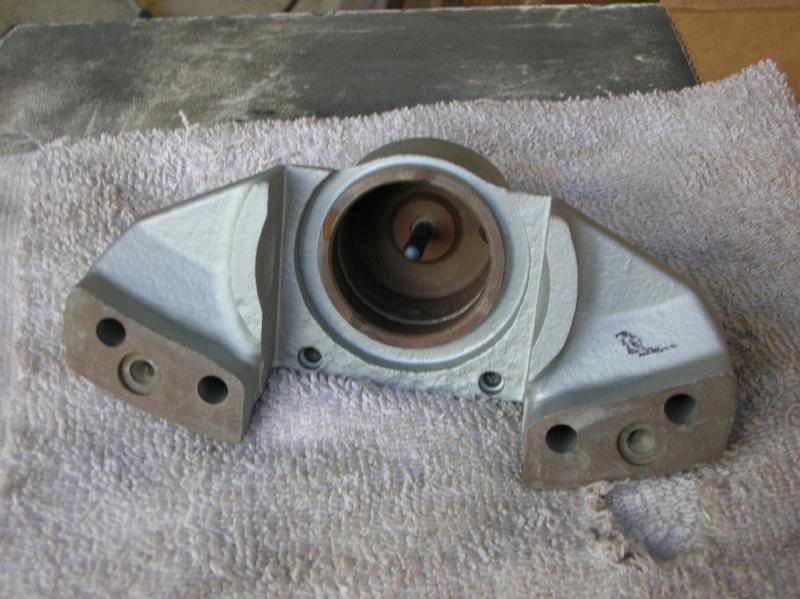
Now I originally couldn't see the need for the mechanism and thought about simplifying the whole thing and going to the other piston. ATE stopped using it in some of the latter calipers and it isn't use in any of the front calipers. It wasn't until talking to Otto's (JW) that I got a "reason" for the mechanism that drove me to keep it. That reason was that due to the fact that you can't adjust the rear wheel bearings, there was more "run-out" of the rear rotors. The mechanism was to prevent this run-out from backing off the pads and pistons. Made sense to me.
Those through bolts that hold the caliper halves together
"You're going to die". That was one of the comments directed to me on the 914World site when I posted up my plans to use bolts from ARP. So, I'm adding a disclaimer here that it's up to your own judgment as to if you want to do this.
Here is the situation.
The original four bolts that hold the caliper assembly together are of two different lengths. They have "Ribe" heads on them and are 7mm (0.25" measured on the shank).
Although a Ribe head is similar to a Torq head, if you want to do it all correctly you would have to find the correct tool to fit it. I did a small amount of searching and that tool isn't easy come by, plus it's rather pricey.
Porsche no longer sells the bolts in the two required lengths.
So, that leaves an individual with having to find used (30 plus years old) bolts that are of good condition.
I live (reasonably) close to ARP and decided to go by there to see if there were any options. What I came away with were 1/4-20 black oxide bolts and flanged nuts.
The following photos shows the original 7mm bolt and one of the ARP 1/4-20 bolts. Both have a shank that is 0.25".
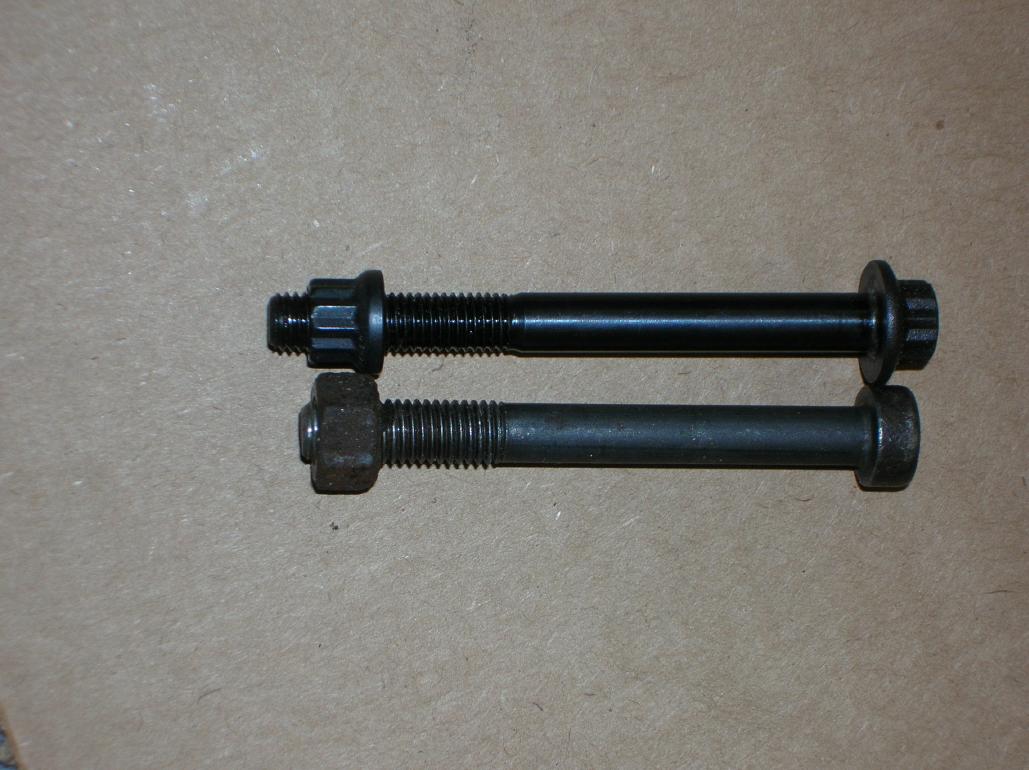
The photo was taken from directly above.
It's up to you, if you want to use this bolt!
The "comedy of errors" getting parts
1. I ordered the "rebuild" kits from Pelican Parts and also ordered the 8 (4 per caliper) round seals (O-rings) required. They promptly showed up. The rebuild kit was an FTE kit number RKS3801. The o-rings were part number 901-351-928-10.
2. I called Stoddard Porsche and after talking at length to the sales rep about wanting the piston that had the mechanism, ordered one. I only ordered one due to being unsure as to if it was correct or not. The idea was that once I had one in my hand and could verify it was correct, I'd order the other three required. It proved to be a good idea!!!
(a week goes by)
3. When I got the piston from Stoddard, it was the wrong one! The new piston in the photos above was that in-correct one. It was cupped the wrong way. I called Stoddard and got the sales rep that I originally talked to. He remembered me and the conversation we had in regards to wanting the piston that would take the mechanism. He told me that what I had was correct and that I'd just have to swap over the mechanism. I ended up having to take the photos above (that's why the part number is written in felt pen) and e-mail him them to show that I wasn't crazy. He apologized and authorized the return of the wrong one. He sent me out the correct one "priority" mail. I paid for the new one and wouldn't get reimbursed for the wrong one until they got it back.
(better than a week goes by)
4. The correct piston never shows up from Stoddard. Maybe it was lost in the mail? I just don't know. I call Stoddard and talk to the same sales rep. and doesn't question the fact that it didn't show up. (by this time, that other one got back to Stoddard and they reimbursed the purchase price) He authorized reimbursing me the purchase price (which they did). I told him -- "what the heck, just send me the required 4 pistons". To this he informed me that they were totally out of stock due to somebody in Europe buying all of them. What to do?
5. Eric Shea turned me on to Dennis at Zim's as a source, so I called them. I talked at length to Dennis in order to be real clear as to what I needed. (the guy really knows his stuff) Part of what was discussed had to deal with the fact that the rebuild kit I got from Pelican Parts didn't seem to fit snug on the shoulder section of the original piston I had. It ends up that are pistons with two different dimensions here!! He said that it sounded like the kit I had from Pelican would be correct for the new pistons.
(another week goes by)
6. The new pistons from Zim's show up. The re-build kits from Pelican are wrong for the new pistons, so I call Zim's to get the correct ones. Dennis was on vacation so I talked to another sales guy. I made it clear that I needed the kit for the pistons that I had already received from them. I made it clear that the problem that I had was the fitment of the seal on the piston shoulder. After I had him pull out one of the pistons and the kit to verify fitment, I ordered the kits.
(a week goes by)
7. The re-build kits show up from Zim's and they are wrong. Ya, it fit snug on that shoulder, but it was for the wrong piston size. I call Zim's and get Dennis. He admits that the kit the other guy sent out was wrong and gets the correct kits (part number 901-352-998-00). He sends me the correct kits and I send back the wrong ones (I pay for the new ones and wait for the wrong ones to get received back before getting my credit card reimbursed).
(a week goes by -- see a trend here?)
8. The correct re-build kits show up from Zim's. I'm happy at this point and think I have everything ready to go together.
9. I've lost the O-rings I ordered from Pelican Parts. They are nowhere to be found and all I can think is that I may have put them in one of the package that I returned. They just grew legs and went for a walk. After looking for several days (not constantly) I give up and decide to call Pelican and order replacements. I get a sales rep on the phone and he tells me that they are no longer available. "They haven't been available for a long time." I tell him that I got them from recently and had to have him pull up the old order to prove it and get the part number. I ordered another 8 of them.
(a week goes by)
10. The O-rings show up and I can finally put the calipers together!! Yahoo!!!
Putting it together
I masked off the caliper parts and painted them with VHT "very high temperature" paint. I even followed the baking instructions, which have a final bake at 600 degrees F. (using a friends dental casting oven) The stuff still doesn't like brake fluid. I'm not impressed, but I'm going with it.
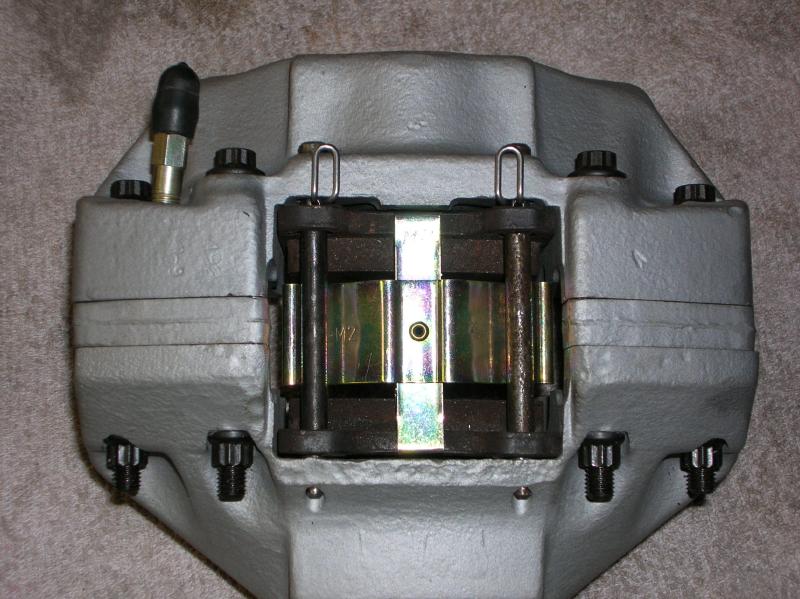
A couple quick note about the seals that are in the re-build kits; (things to check before putting it back together)

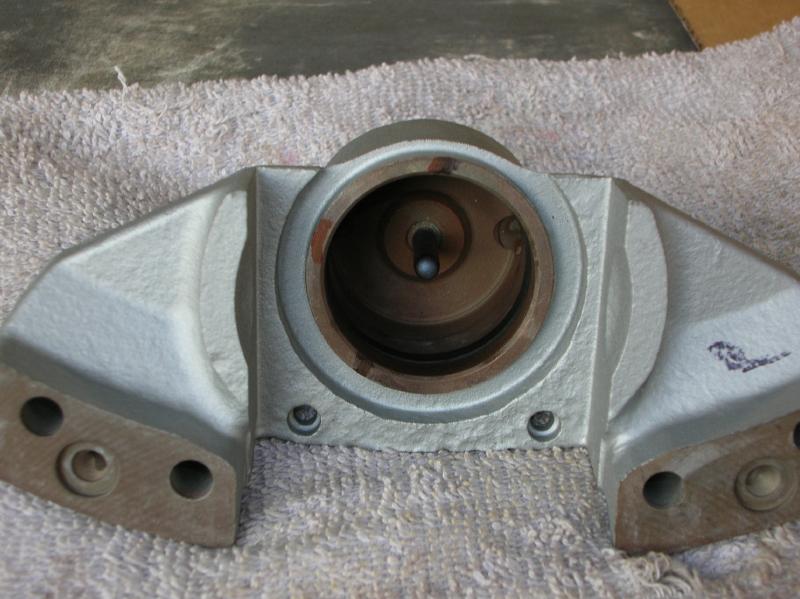
The dust shield (or what ever you want to call it) shown in the photo on the left should fit snug on the piston shoulder, where I'm pointing with the red pen.
The piston seal (ring) shown in the photo on the right is loose before installing. It's the groove in the caliper bore that presses it in tight against the piston, once installed. Also note in this photo that there is a step in the surface of the piston where the brake pad will come in contact. I'll get to that in a moment.
I used some fine sandpaper and a wire brush on a Dremel to clean out the caliper bore.
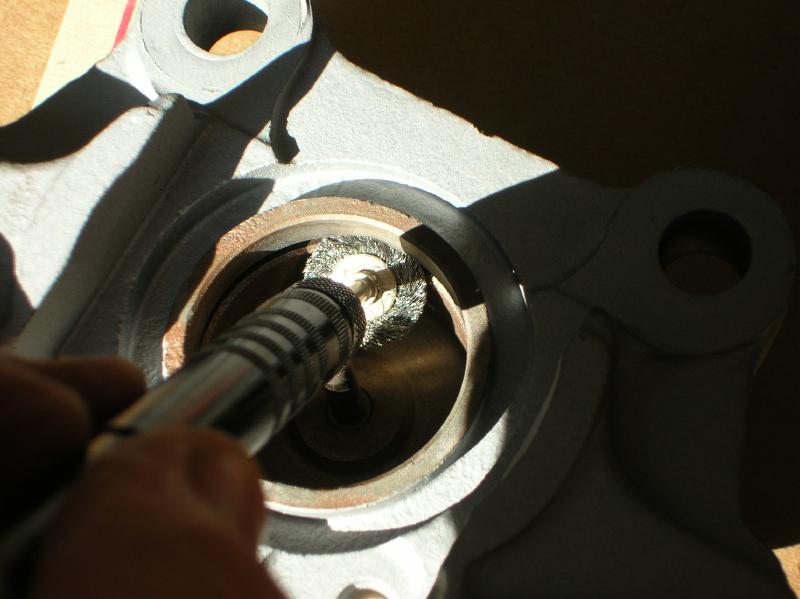
It's not really critical that the bore be perfect due to the fact that the moving part is the piston, and it seals against the piston seal (I don't like to use the term "O-ring" due to the fact that it's not round in cross-section).
The piston seal seals against the "upper" surface of it's groove in the bore (as the fluid tries to push out the piston). That's why I'm doing what is shown in the above photo. I'm cleaning out the upper surface of the groove, which you would need a dental mirror to see.
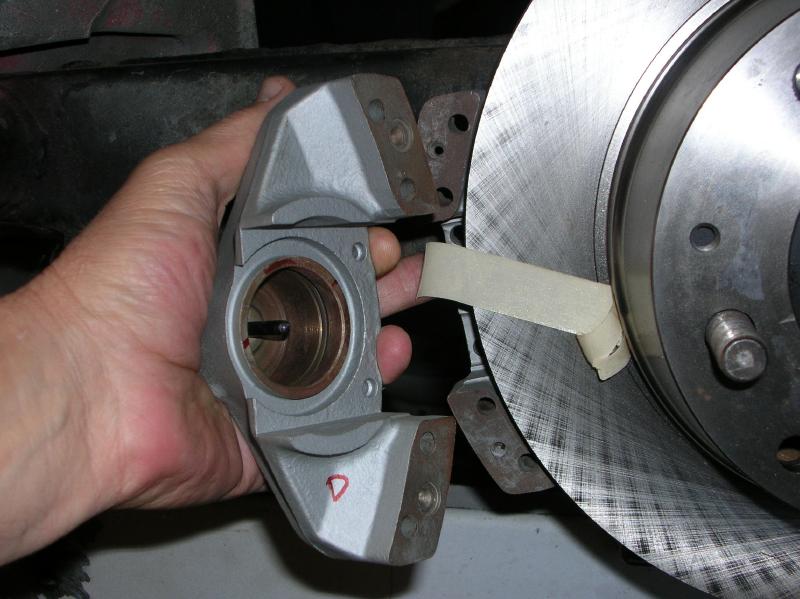
Now comes some "fore-thought". When you install the pistons, they have to be oriented as shown in the following diagram. I went so far as to put masking tape on the rotors to make sure I did it correct (and marked the calipers as right and left).
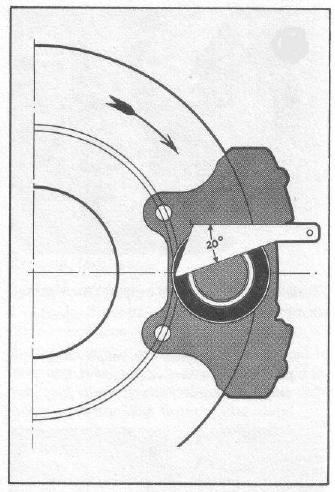
What you are doing is making sure that the "step" in the piston face is correctly positioned. You want the leading edge of the pad to not "load" first, when the brakes are pressed. (look at that photo of the piston with seal a little higher on the page)
I installed the "mechanism" (damn I've got to get the correct wording for that) in the new pistons, re-using the circlips.
Now come photos showing the process;

On the left is the caliper half ready to go.
On the right I've installed the piston seal after wiping down the bore and groove with brake fluid.
Next set;
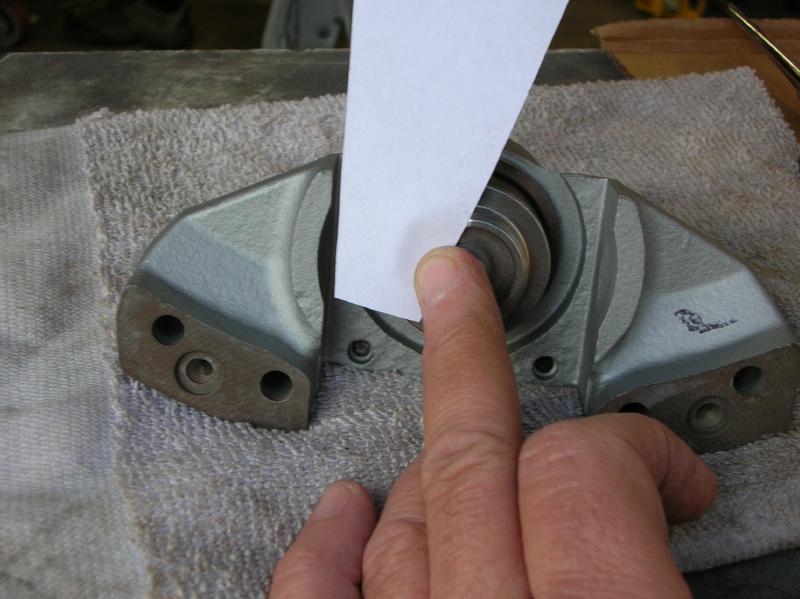
On the left, I'm using a piece of paper that I cut at the required 20 degree angle to get the rotation of the piston correct. (If you have to know, I used Autocad to print out the 20 degrees)
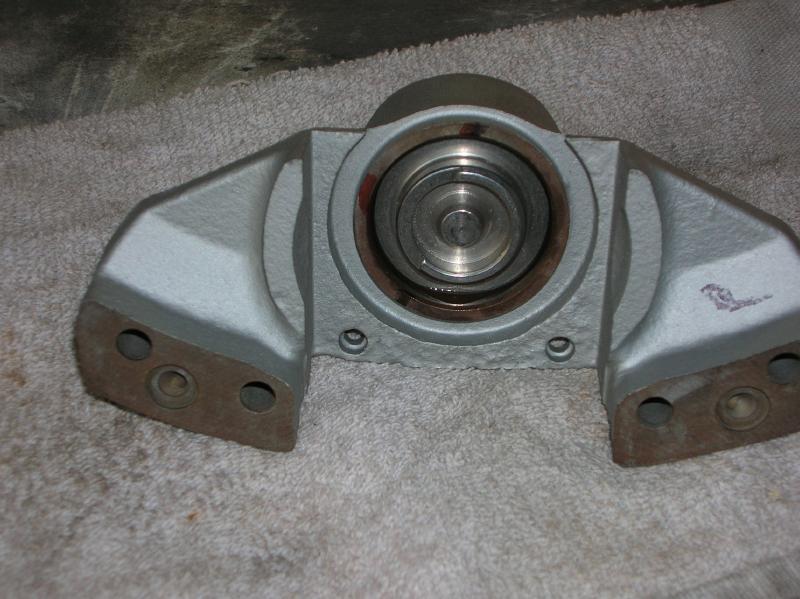
On the right the piston has been pushed into place (I used a C-clamp to push it in). (after coating everything with fresh brake fluid)
Then the outer dust shield is installed and held in place with the round metal retainer, as shown in the following photo.
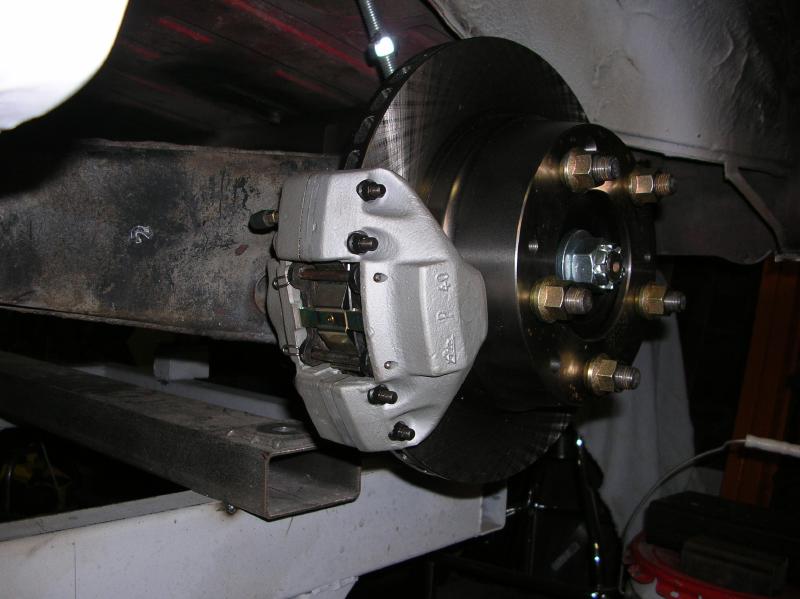
After putting the four (total) sides together, I bolted the inner half to the trailing arm, slid on the spacers with o-rings (more brake fluid), and then the outer half with O-rings. I then torqued down the bolts.
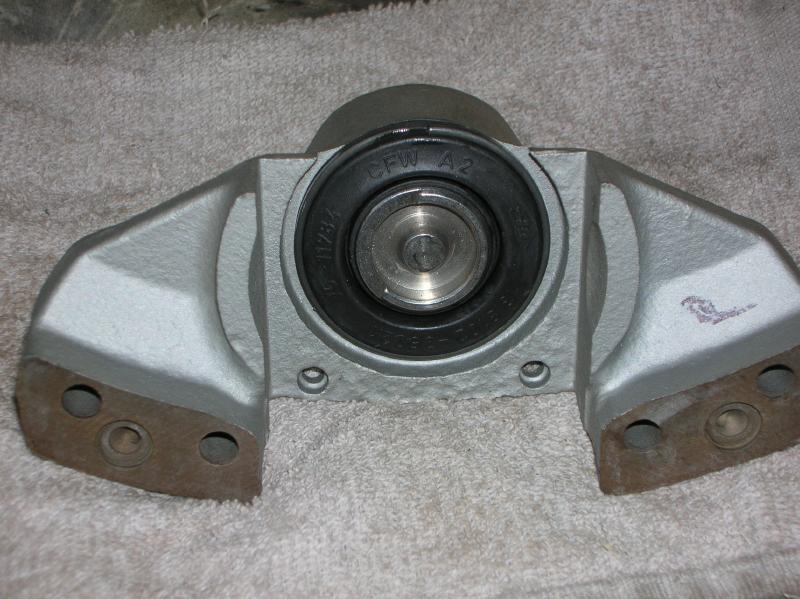
Although the following photo is out of sequence, you get an idea of where I was at and what it looked like.
Funny tid-bits
I ordered new pad retainer spring plates and also had new clips that hold the "pad pins" in place. I also picked up new bleeder valves.
Dang, there is a left and a right clip. I guess that if you put want to put everything together exactly correct, it matters.
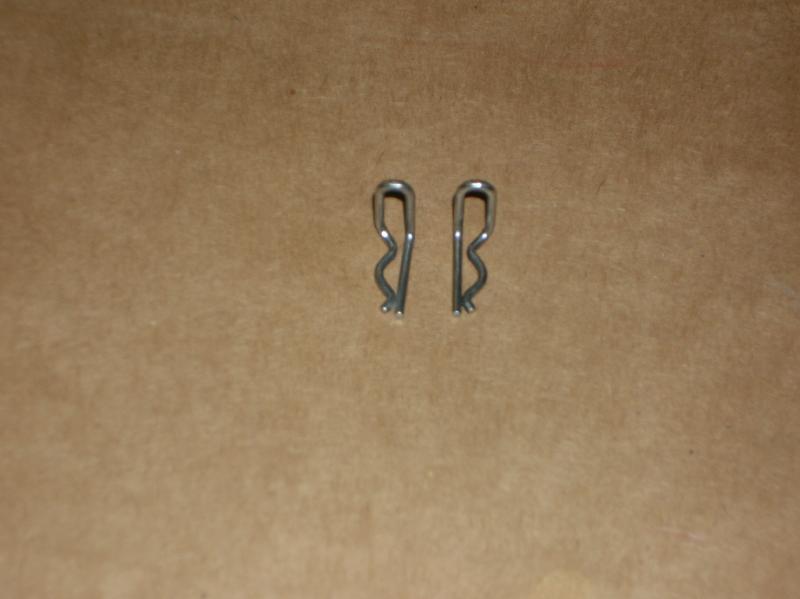
My guess is that they go inward.
So there you go.
return to my site's entry page
Wes Vann