Rebuilding Honda brake calipers
Revised; August 05, 2007
To start off;
Buy the factory manual! This is very important if you are planning on re-building the rears. The manuals you get a Kragen will be of no worth.
Don't skimp any corners. It may be silly to have to say, but; these are your brakes and you need them to work reliably.
The brakes I'm doing are originally from an Integra DA, but it really doesn't matter.
The fronts are easy. The rears are a major pain in the ass if you take them totally apart!!
This isn't intended as a total "how-to" but to help you out with things that are not totally covered in the factory manual (which you bought).
The "Tyson Trick" (added 8/05/07)
Normally I don't "repost" stuff that others have done, but this is something different and worth including.
A friend of mine (Tyson) told me how he installs the caliper piston and gets the rubber dust shield around it. I haven't personally tried it, but it looks just too good to not pass on.
The diagram below was drawn by Fireant and shows how Tyson does it. (ya, I got Fireant's permission to post it)
So, there you go. A simple way to get the dust shield around the piston.
Rebuilding the front caliper;
You are going to have to buy two rubber seals for each caliper. One is the actual seal that seals out the brake fluid. The other is in reality a dust shield. You should also think about buying new crush washers for the banjo fitting.
Disconnect the brake line from the caliper. Loosen the bleeder valve. Remove the two bolts that hold the mounting bracket to the spindle.
At this point the caliper is free to be removed.
Remove the two brake pads. Slide off the outer bracket. Remove the two bolts that hold on the slider pins. Remove the three sheet metal plates.
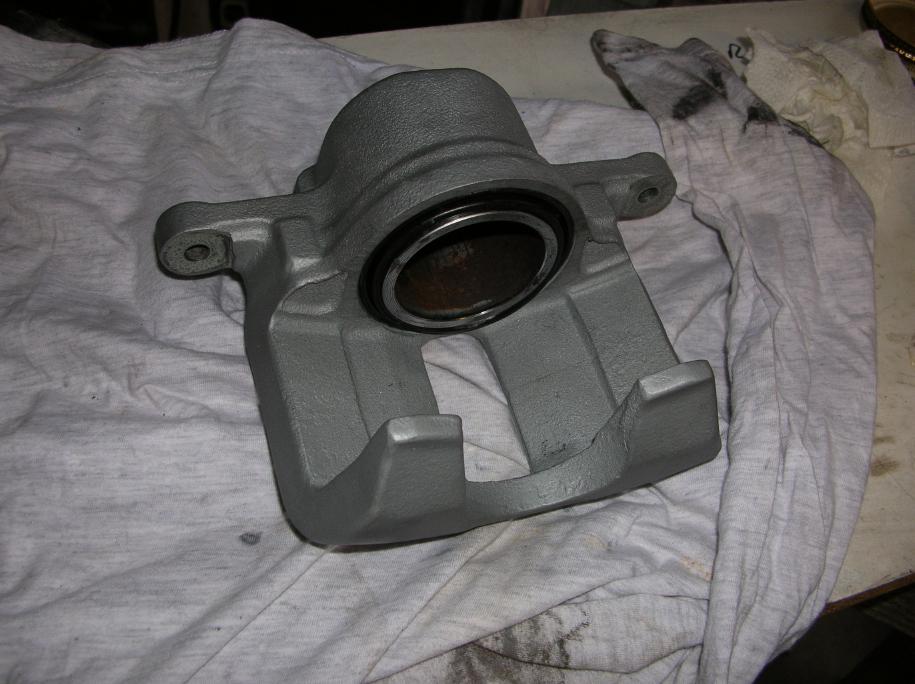
At this point, it should look like this (if it was already clean);
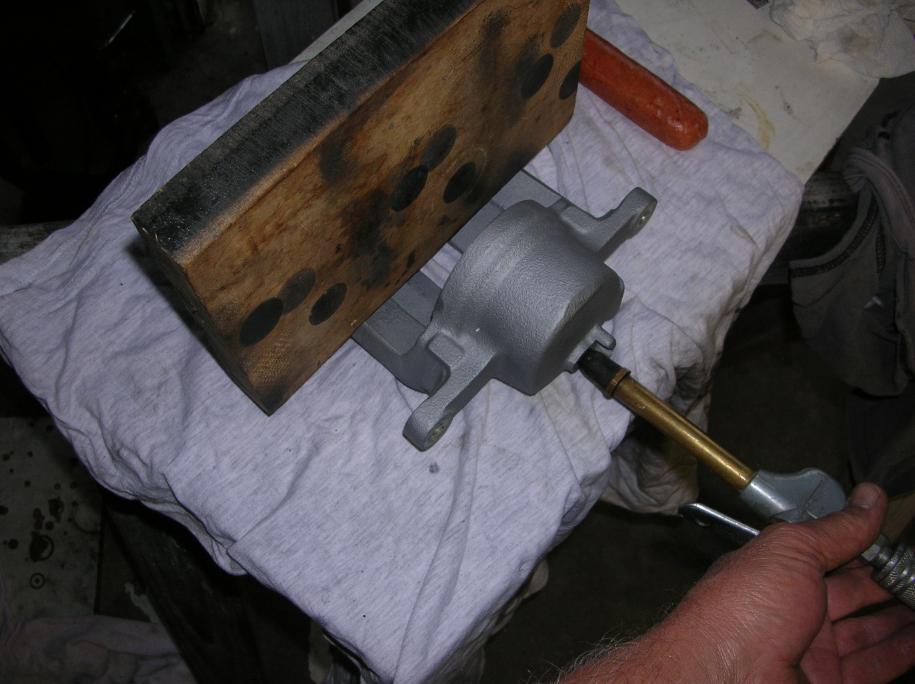
Now you are faced with the problem of getting the piston out. It's easy to do, but what I'm going to show is dangerous! That's why I'm going to have a little fun with it and do something I don't think you will ever forget!
What you want to do is use an air compressor to blow out the piston as shown in the next photo. (the bleeder valve is still in there) Notice that I've got a piece of wood to prevent the piston from jumping across the garage!!! Also notice that I don't have my fingers where they can get crushed when the piston suddenly jumps out. And it will jump out!!!!
Now to show what can happen, I put a Boar's Head hot dog where you should keep your fingers away from and blew out the piston. (you can click on any of the photos)
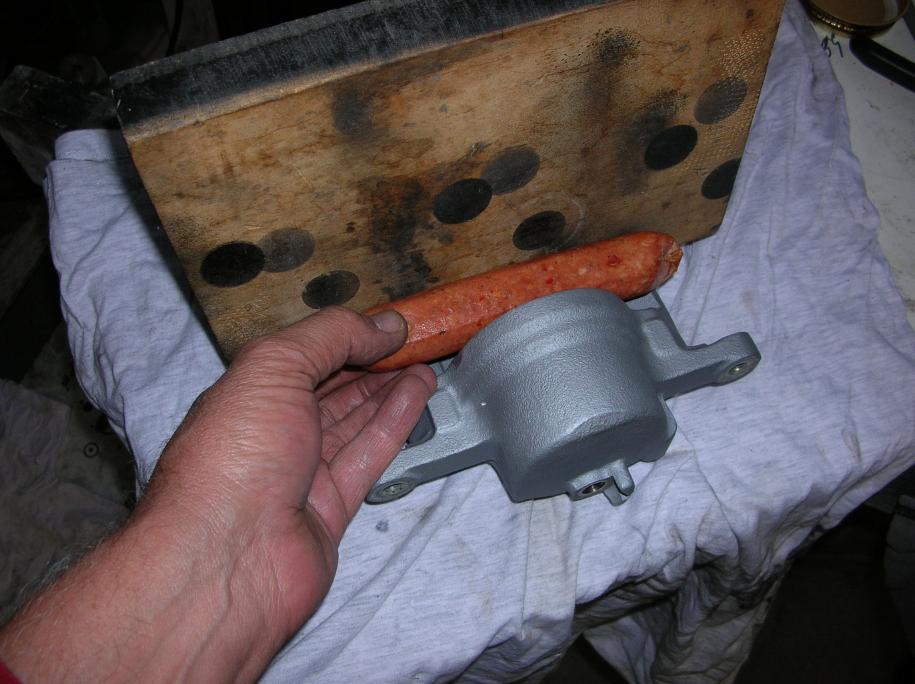
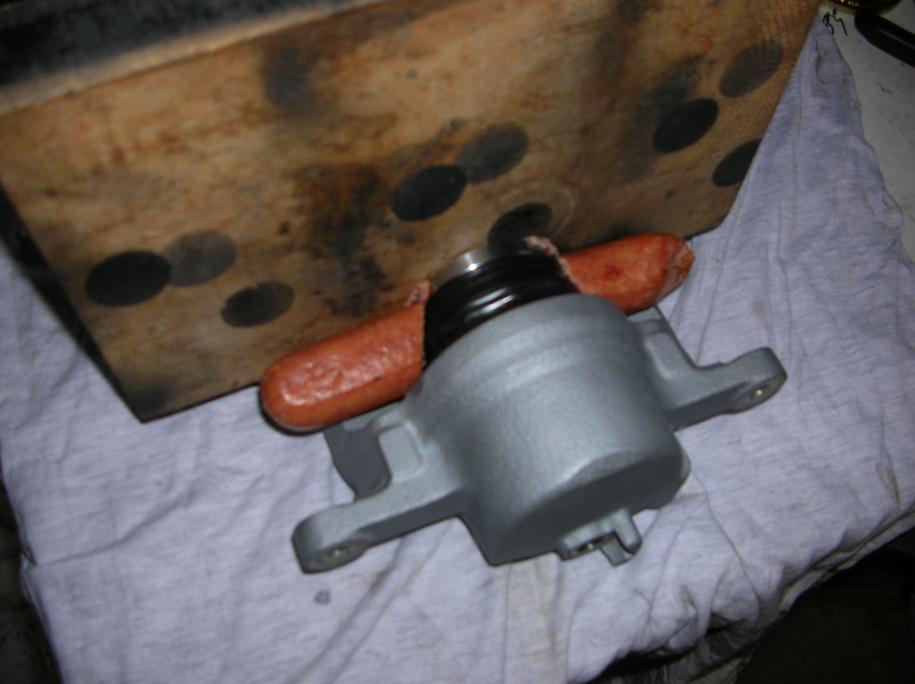
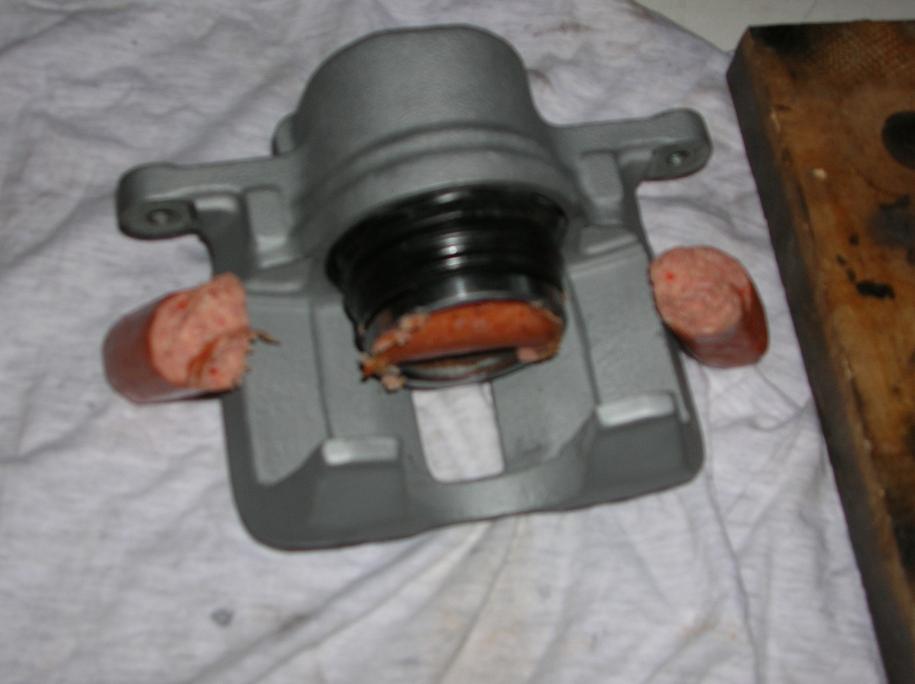
So, what have we learned? Keep your fingers out of the way! This happens real fast.
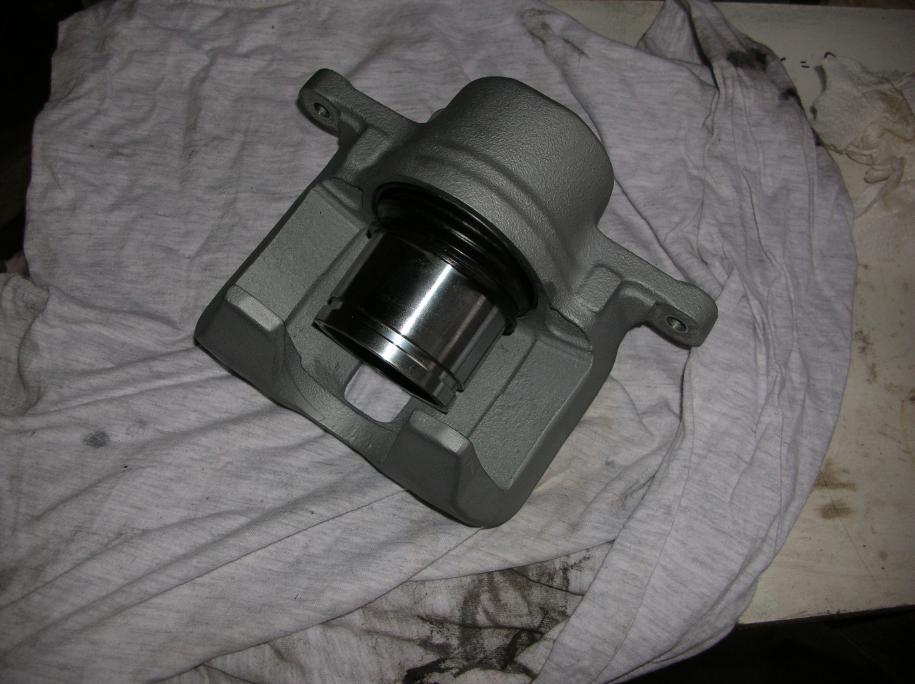
Once the piston is out, remove the two rubber seals and that bleeder valve.
Clean everything with spray brake cleaner. If you have too, use a dish washing nylon scrub brush. Use a tooth brush to clean out the grooves in the bore where the seals go. The piston should be spotless! Actually, everything should be spotless.
Now is a good time to mask off everything and paint it. (I used VHT header paint that is flat aluminum colored. I like the color, but brake fluid takes it off real fast)
Here it's ready to go back together. You can see the two rubber seals. The thin one is the actual seal and it goes in first.

If you click on the photo, you can see the two grooves that hold the seals in place.
Coat the grooves with brake fluid. Coat the seal with brake fluid and put it in place. You have to make sure it's all the way in the groove!
Now do the same to the same thing with the dust shield. Once again, you have to make sure it's all the way in the groove!
Use a flashlight to see if both seals are totally in their grooves!!! If they are not, then you will not be able to get the piston in.
At this point, take a break! The next step can be a major aggravation!!
What you need to do next is put the piston roughly in place and pull up the dust seal up and around it. It's not easy and it may help to use a small screwdriver to lever the seal up and around the piston. Be careful to not poke a hole in it.
Line up the piston and push it into the bore. Before it's all the way in, get the dust seal to seat in the groove that's in the piston. Once again, make sure it's all the way in the groove, all the way around the piston.
If all is good, the piston should slide all the way into the bore and it's top edge should be flush with the body of the caliper body.
Now just put the rest of the assembly together and install it on the car.
Rebuilding the rear calipers;
The reality is that you really don't want or need to totally take apart the rear calipers! Trust me on this and you will save yourself a lot of pain!
The reason it's not that important to totally take it apart is that the bottom area of the caliper bore does not see brake fluid! It's function is for the self-adjustment feature and parking brake linkage.
I didn't know all this and just had to take it totally apart. I'm just that kind of person.
If you only do the partial disassembly, you need to buy two seals just like what you did for the front calipers. If you go all the way, there are three other seals and also a factory Honda tool (around 50 bucks).
You may need to buy a new cotter pin for each caliper.
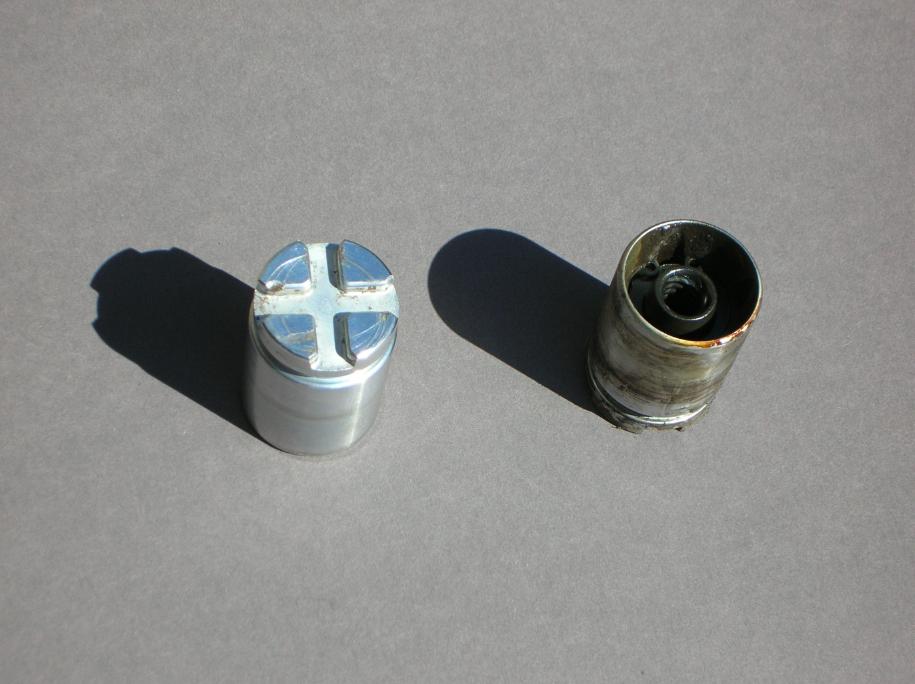
Start by removing the caliper just like you did on the front. Take it apart so that it looks like the following photo.
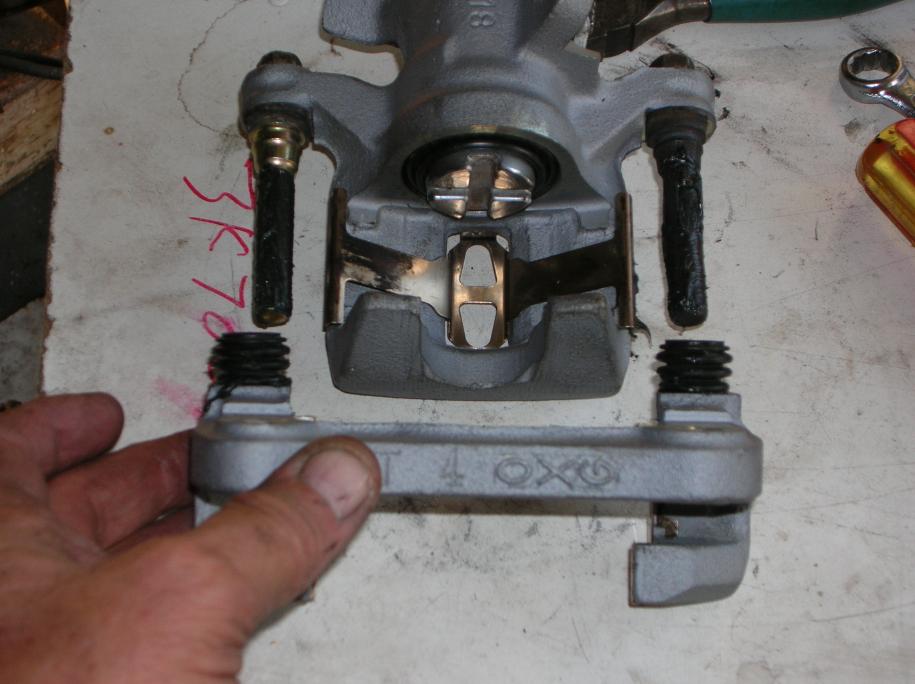
There are two things you should notice in the above photo (click if for a larger version).
One is that there are grooves on the piston face and that one of them is going straight up and down. When you are done with everything, there has to be a groove in this direction so that an index pin on the brake pad can fit in it.
The other thing is that the slider pins are different colors! One is black and the other gold. The black one has to go in the upper position once the caliper is mounted.
In order to remove the piston, use a large screwdriver or piece of metal to unscrew it. Just rotate it counter clockwise.
The following photos show the piston and also what is inside it.
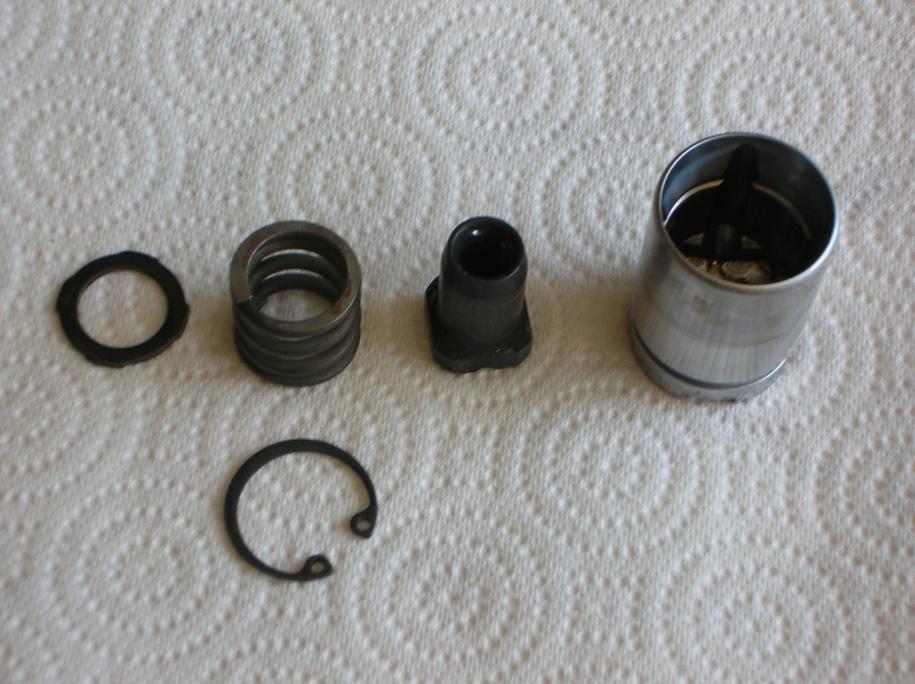
You take the insides of the piston out by using snap ring pliers.
Once it's all clean (spray carb cleaner), use the snap ring pliers to put the snap ring as deep as you can. You will be fighting the spring!
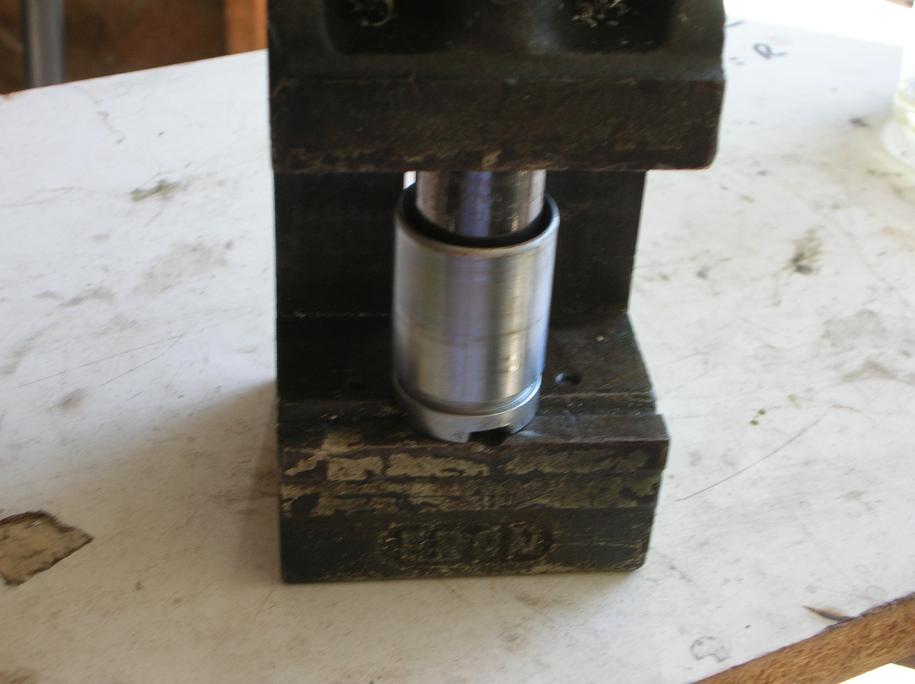
What I did was use a socket and small drill press vise to push down on the snap ring until it went into it's groove. You will feel it not want to go any deeper. (and if you listen, actually hear it snap into place)
Now if you are going to call it quits, put in the new seals and re-assemble it. Also, if you don't have the factory manual, walk away. If you are feeling ballsy, follow along;
This is the tool you will have to buy from the dealer. It's a "deep reach" snap ring pliers and you need it. I've got other snap ring pliers and even checked out what some friends have. You need this one and it's a special order item.

You use it to remove the snap ring that is down deep within the bore. Once it's remove, you can pull out all the stuff (except for the shiny piece) shown in the next photo.
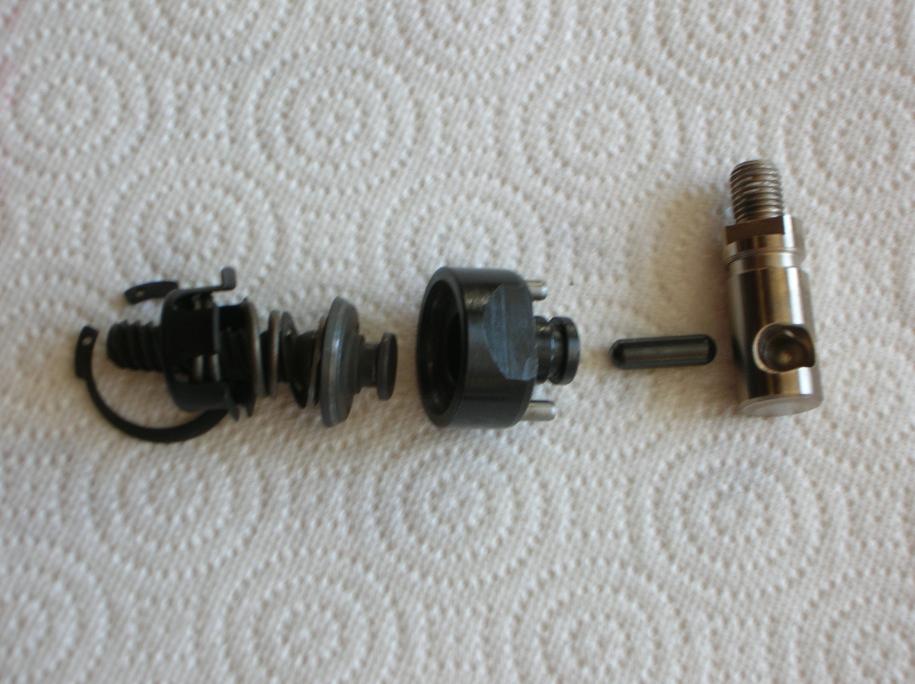
The shiny piece is what the parking brake lever attaches to and can be pulled out once all the other parts are removed.
Now as I've said before, none of this stuff sees brake fluid and as a result doesn't get gummed up.
What you can't see real well is that there is a small o-ring and a seal that should be replaced. There is also a seal on the body of the caliper that seals against the shiny part (you see it from outside the caliper).
The shiny part is the "parking brake lever shaft".
Clean it, replace the rubber parts, lube it, and put it back together.
This photo is included to show the roller bearing that the parking brake lever shaft rides on.
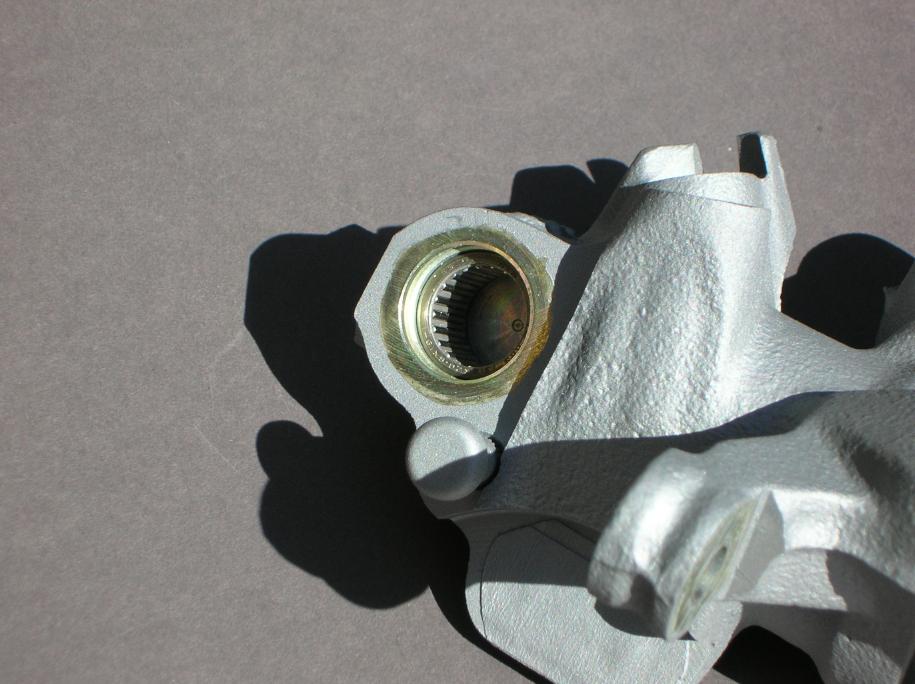
What's funny is that there are not enough rollers to complete the circle! At first I thought it was a bad bearing, but there is a reason!
When you go to put everything back together, a push pin has to pass through the roller bearing and seat in the parking brake lever shaft. It sits in the pocket within the shaft.
Lube the bearing real well before putting it back together.
Putting the piston seals back in is pretty much the same as for the front calipers, but it's a major pain to get the dust shield one around the piston!
The piston screws in and you should screw it in until it bottoms out. Then un-screw it until the grooves are straight up and down, as shown in a prior photo. If you are not using new pads, you should unscrew the piston until you can just barely get the caliper installed.
When you install the pads, make sure that the index pin on the pad that is adjacent to the piston is within the piston groove!!
That's pretty much all I have to throw in there.
Closing comments;
Use jack stands!!!
return to my site's entry page
Wes Vann