Re-installing the AC
(89 hatchback with B18C)
Updated August 10, 2006
To start off;
I'm posting this information as "food for thought"!
Your installation may be easier or harder. I think mine was just about the hardest it could be!!
This write-up originally included my remote oil cooler installation but it was just too long for easy reading.
I'm writing this in a format where I show what "issues" came up and what the solution was.
At the bottom of the page, there is a "links" section where I provide information on companies that sell stuff that you may need for this project.
Most of the photos can be clicked to see a full screen version. Use your "back" button to return here.
What's the configuration of my car and what am I dealing with;
First off, I've got a 89 SI hatchback with a GSR (B18c) engine. The motor mounts place the engine in the same location as the old Place Racing units. As a result the engine and related stuff are closer to the radiator than some of the other mount kits.
The car originally had AC, so all the wiring and under-dash stuff was already there. The original compressor is a Sanden TD70 and I'm converting the system to R134.
I'm running DC Sport headers.
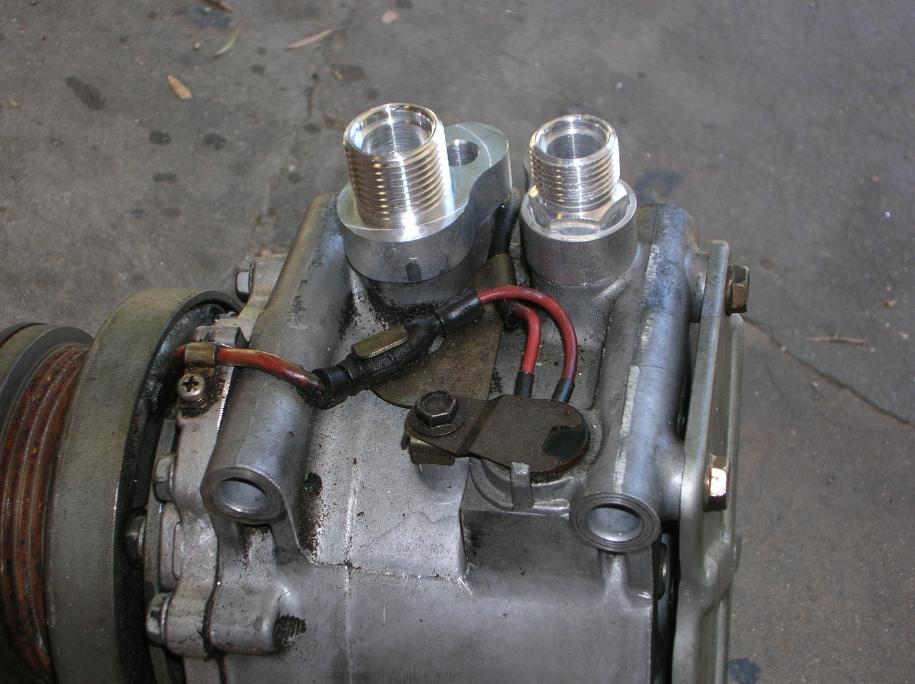
Issue #1, the compressor will not bolt to the engine;
This problem is pretty much a no-brainer once you get done looking for a "factory" solution!! Just buy the kit that Hasport sells that is now called "EFBAC" (it was originally just called EFAC). This will allow you to bolt up your original compressor to the "B" series block. It fits both the Sanden compressor and also the Matsushita that Honda used during the years 1988 through 1991.
It is rumored that you can use the Del Sol P54 bracket, but it doesn't really work. It does allow you to use compressor found in the Del Sol, but not the original one! I checked this by finding one at a dealer and brought in my compressor to see if it would bolt up. It did not! If you run the Del Sol compressor, the hoses may not hook up.
To use the Hasport "EFBAC", you have to re-use the original idle wheel and tensioning bolt.
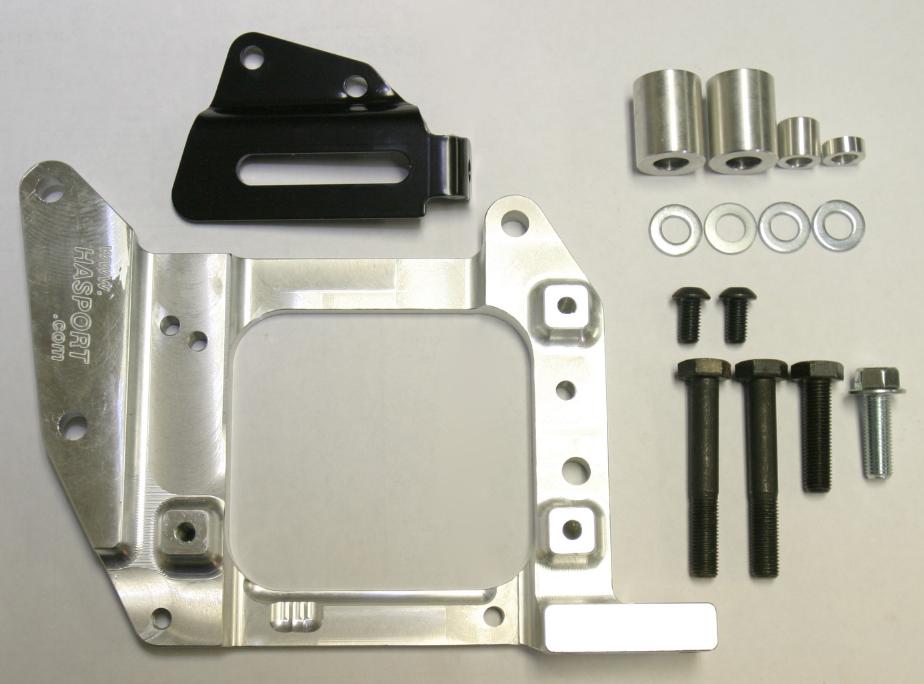
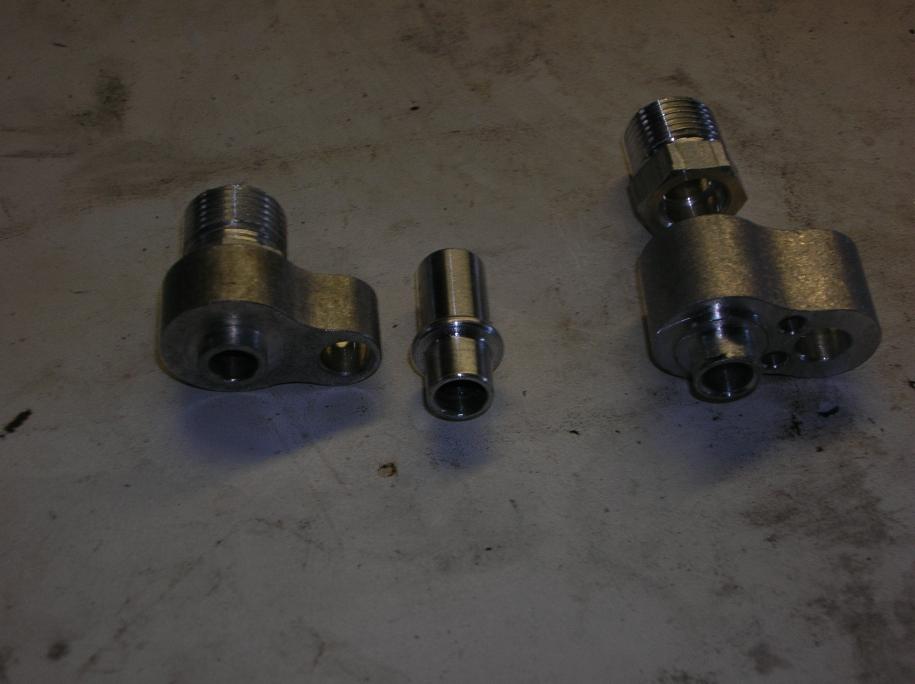
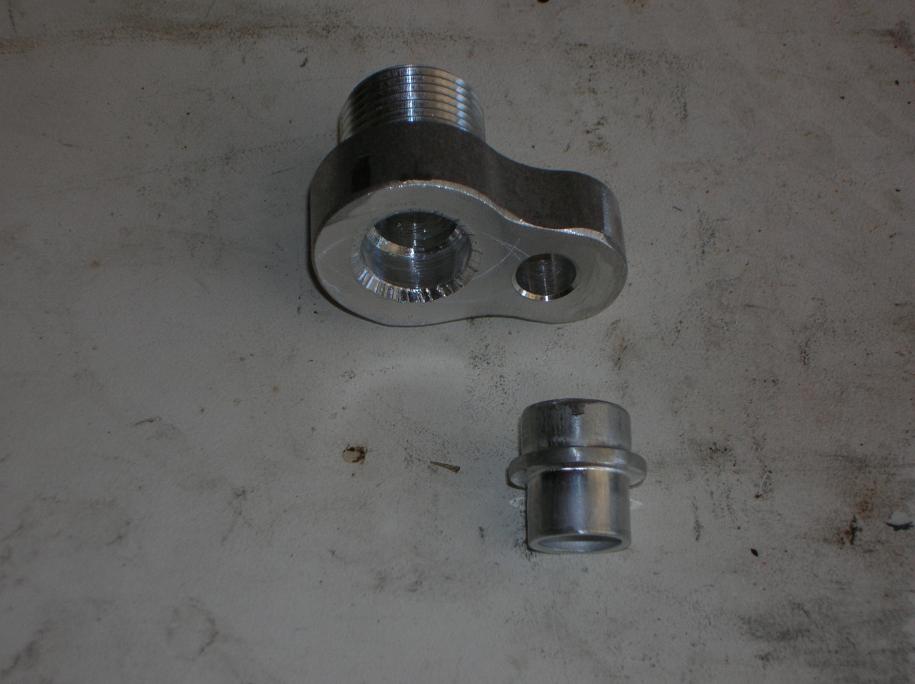
Here is a photo of the stuff that you get with the Hasport kit. (photo posted with the authorization of Hasport)
It's due to the amount of stuff that they provide that I refer to it as a kit. That black metal bracket is the tensioning bracket and is custom built for the kit (not just a stock part repainted). You only use one of the two small tube spacers depending on which compressor you have.
If you are lucky, this kit is all that you need to re-install the AC. If you are running Hasport mounts for a B motor installation, you should be good to go. However, keep in mind that things like what type headers you have, could cause problems. There are just too many different variables from installation to installation to guarantee no problems.
Go to the Hasport web site to read their installation instructions.
Issue #2, the stock fan will not fit;
Due to not being able to fit in a "puller" fan between the radiator and the headers I've got, I had to install a Spal 9" pusher fan as shown in the following photo.
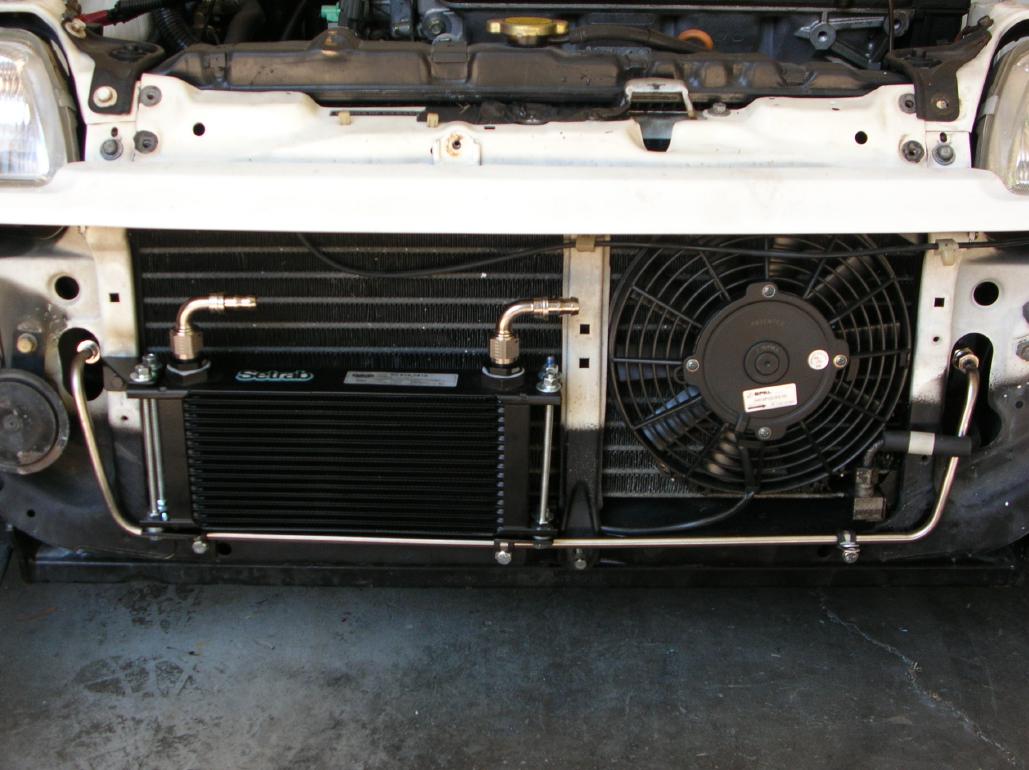
Even if you don't plan on installing an oil cooler, another problem is that there is a factory AC line that goes directly across the front, in that area. If you note the shinny stainless steel "U" shaped line, that's what's required to "relocate" the problem line. You can't use barrier hose due to the sharp bends that have to be done.
Here is how it's done;
Vintage Air makes stainless steel AC hose ends that can be welded onto the end of the tube. You need to do this due to it's being impossible to "flare" the end of the tube in an AC type ending.
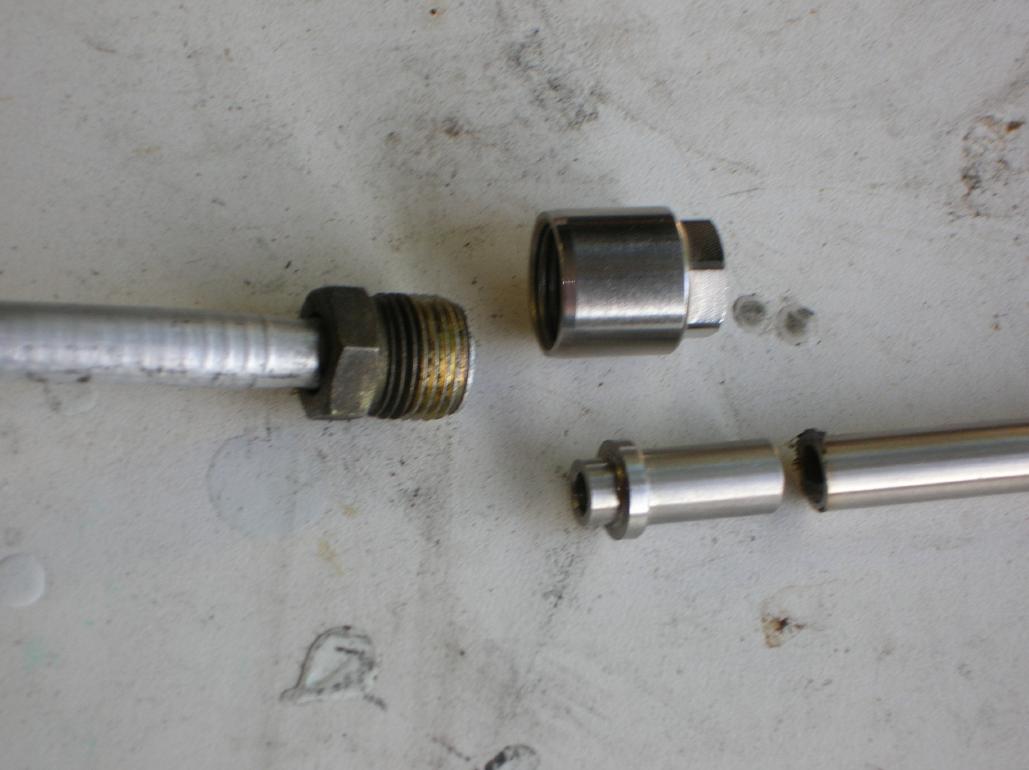
The upper piece, with the nut head on it, remains free to rotate. The smaller piece is what gets welded onto the stainless tube.
After bending the tube to the shape I wanted, I brought it to a race car fabricator and had them TIG weld it onto tube. (I'm pretty good at fab'ing stuff, but this is beyond my welding ability)
On the other end of the tube, I was able to silver solder the "male" end that I also got from Vintage Air. (I didn't take any photos)
The new hardline is attached to the lower edge of the radiator core support using Adel clamps and Nutserts that I installed.
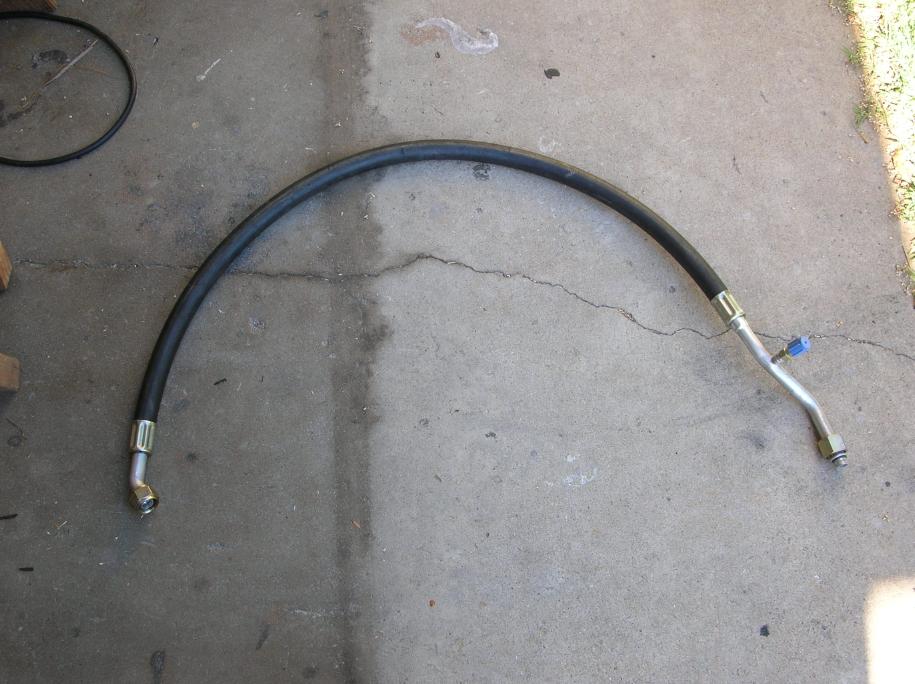
Issue #3, the AC hose that attaches to the compressor doesn't clear stuff;
In the next photo, I've got a red arrow pointing where the hose that attaches to the compressor hits one of the lines that go through the radiator core support. (crappy photo!) I think some of this is due to the engine placement governed by the mount kit. You may not have a problem with other engine swap kits.
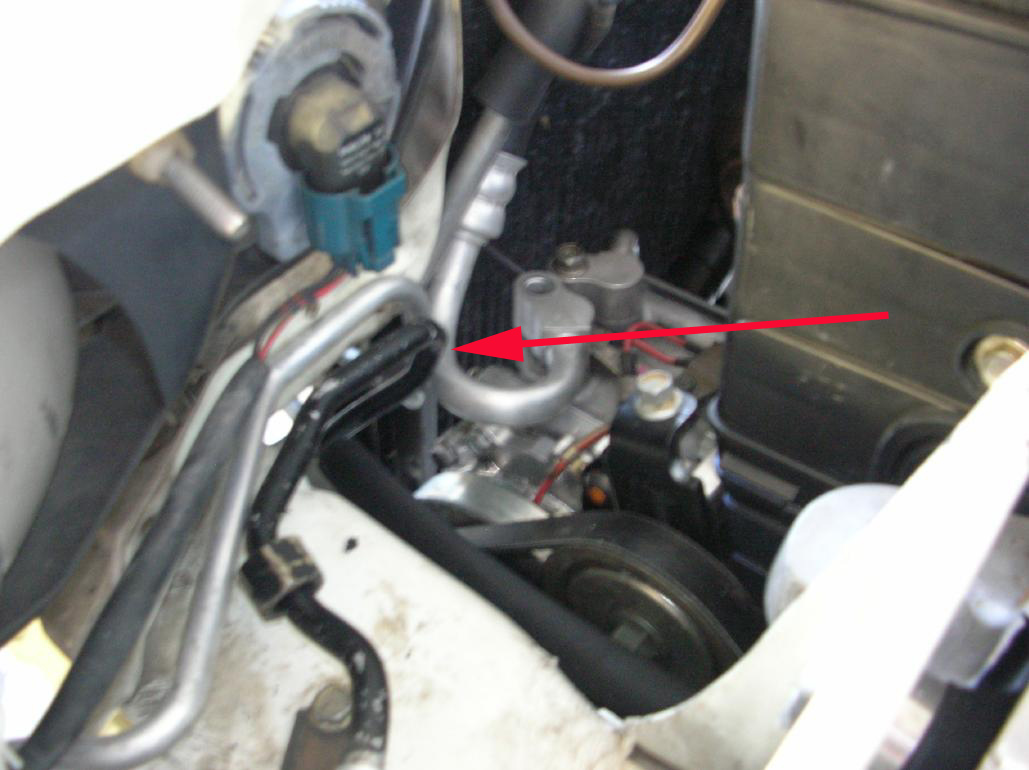
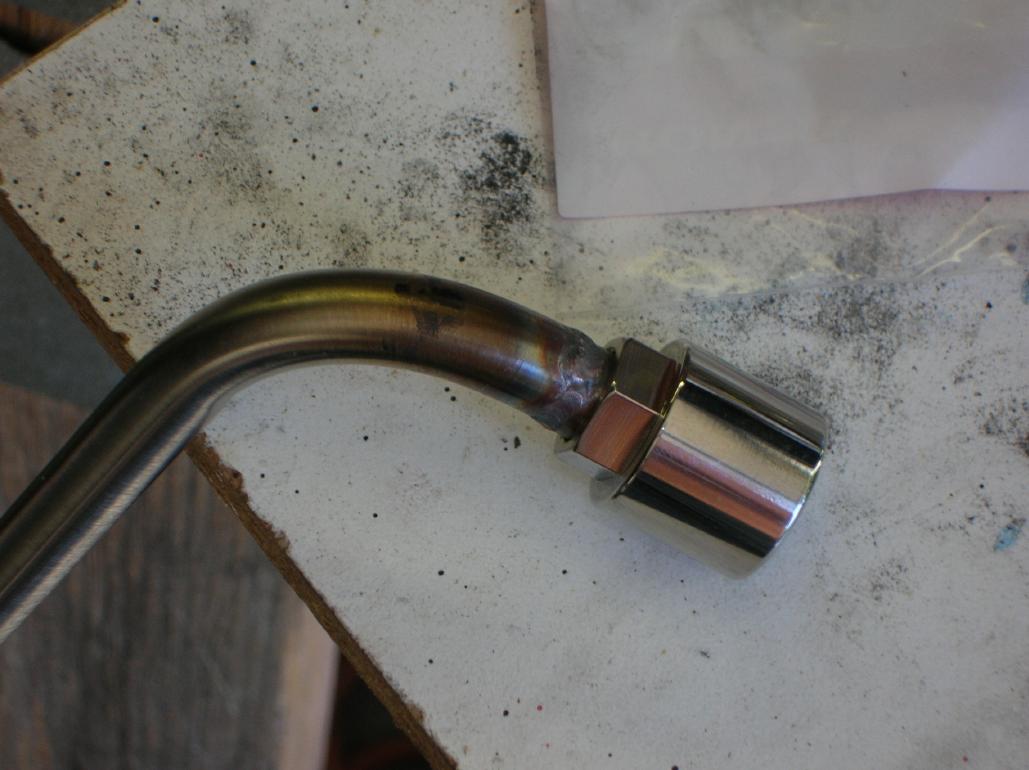
The solution would be to have the hose go upward at a 45 degree angle (toward the passenger side)
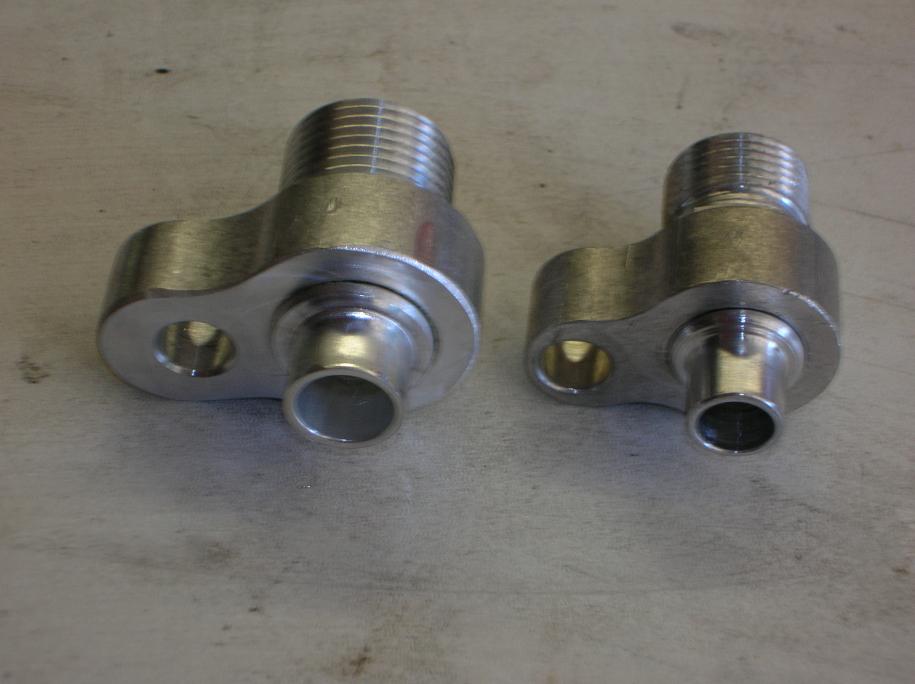
Here is a photo showing the finished installation and also another showing the "standard" 45 degree AC hose end.
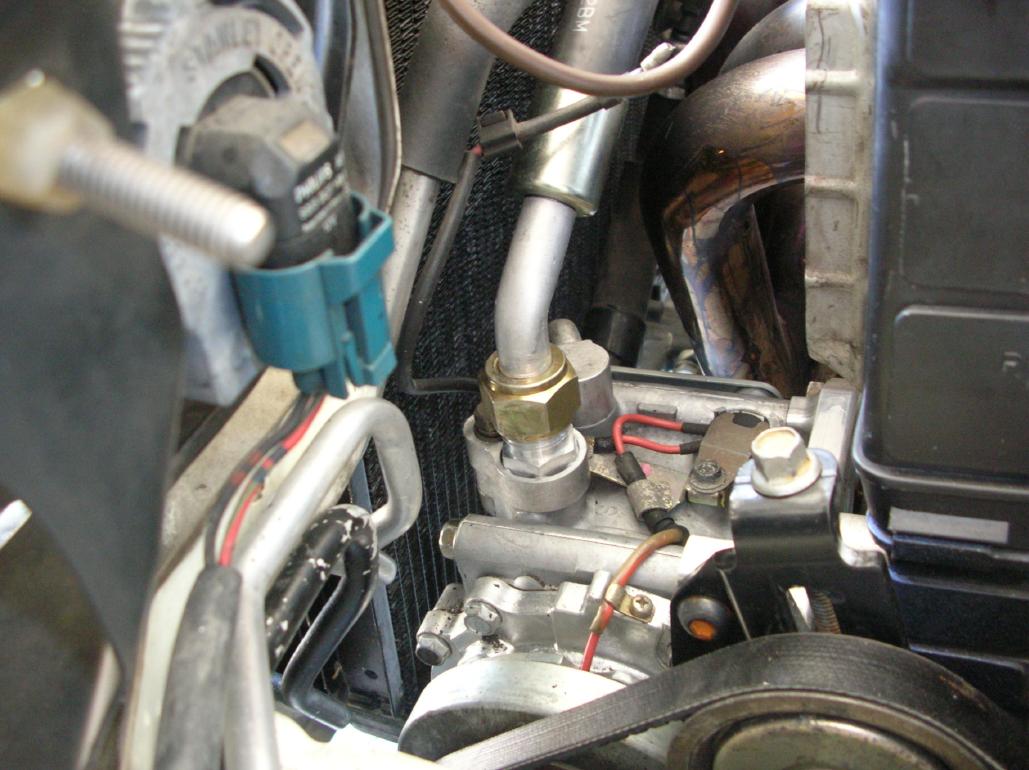
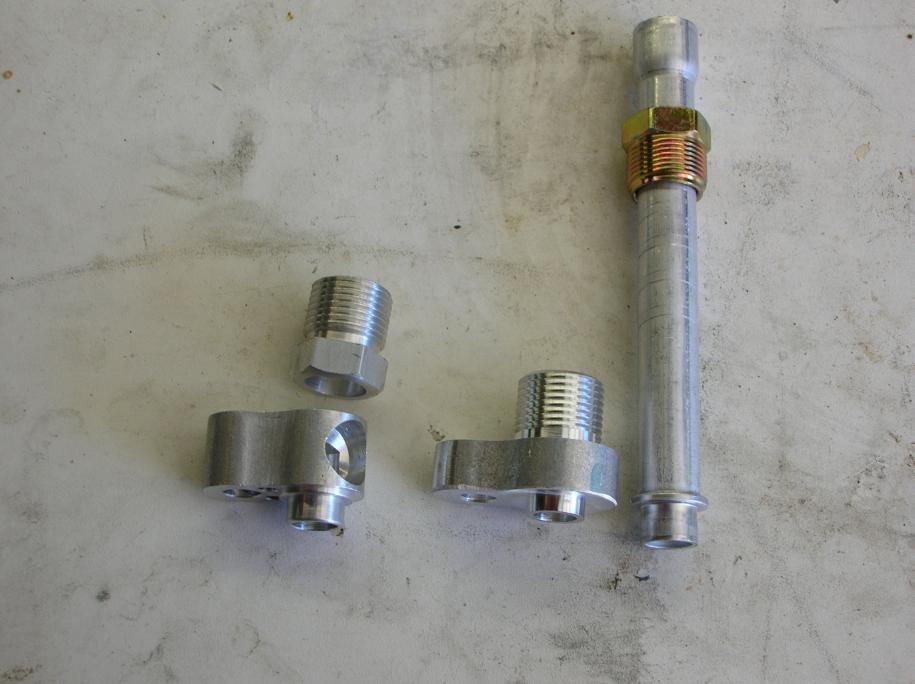
The compressor has two different hose sizes attached to it. The smaller is a #8 size. The larger (the one I custom built) is a #10 size.
To do this, I had to build up custom adapters using parts that I got from Doc's Blocks. Don't let that scare you!!! All that is needed is a drill press!!!
Although I only needed to do the #10 side, I made up adapters for both sides just to show how. The next two photos show the resulting adapters placed on my "mock-up" compressor. The adapters allow you to hook up standard AC fittings and you can get them at various angles.
The problem is that Doc's Blocks doesn't sell the exact adapter needed. They however do sell the parts to make up what you need. Keep in mind that not all Sanden compressors use the same type fitting!!!
Here is how to make up the #8 side (keep in mind that you can click on the photo for a larger view!!);
The part on the far left is Doc's Blocks part number "AC0944". The next part is number "AC0739". These are the parts you want to order and you don't have to worry about the part numbers for the other parts shown. They are shown just for reference.
If you look real close at the part on the right, you will notice that there is a shoulder on the section that goes into the compressor, where the o-ring would go. This is the correct shape for the Sanden TR70 compressor. You have to make the adapter on the left have that shape!!
It's done by taking the short "tube" section and first off, cutting it off short. Then drilling out the adapter so that it can be pressed into it.
The only thing keeping this from being a "no-brainer" is that you have to recess the shoulder slightly so that the height of the finished shoulder matches the original part.
I coated the mating surfaces with permatex and pressed them together.
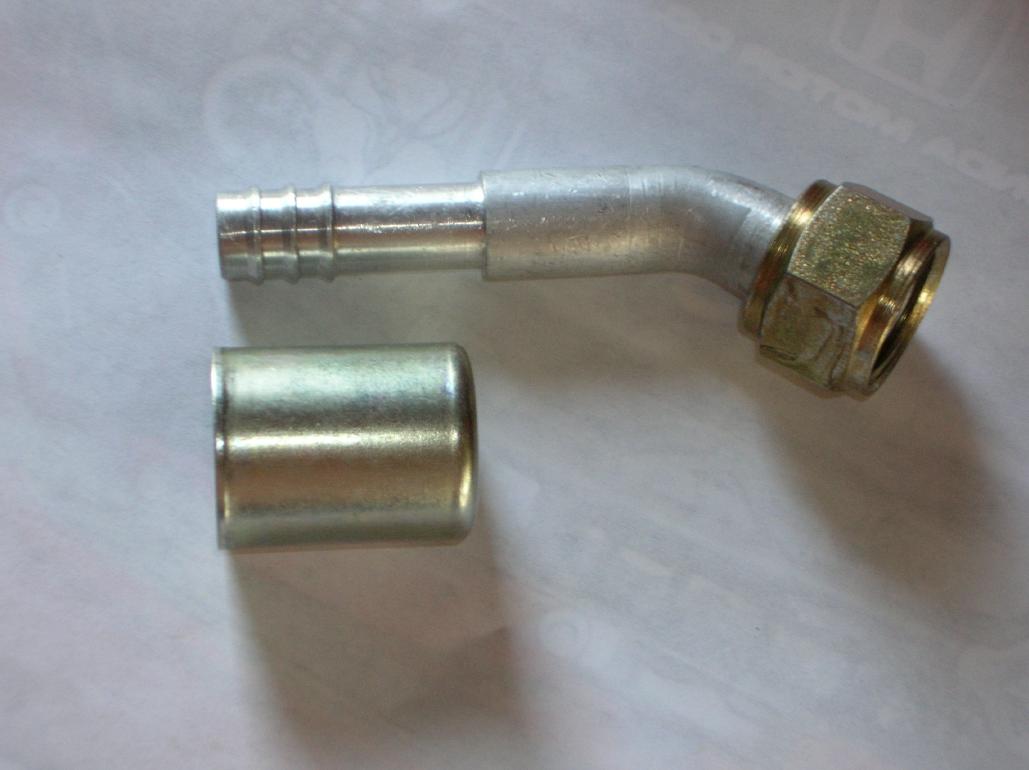
Here is how to make up the #10 side;
I did the #10 side using parts that are a little different than the #8 side due to a certain part not being available from doc's at the time.
The tube length at the far right is Doc's Blocks part number "AA0290" and the adapter next to it is part number "AC0945". I had to use the tube section due to their not having part number "AC0578" being made. That part number AC0578 is similar to the little tube section I used in the #8 adapter, but sized for a #10.
The adapter shown on the left has the correct "shape" to directly hook up on the Sanden TR70, but has a big hole on the side where they would normally weld on a tube.
The above photo shows the two parts ready to be pressed together (after drilling and such). Once again, the only issue is making sure that the height of the shoulder is correct.
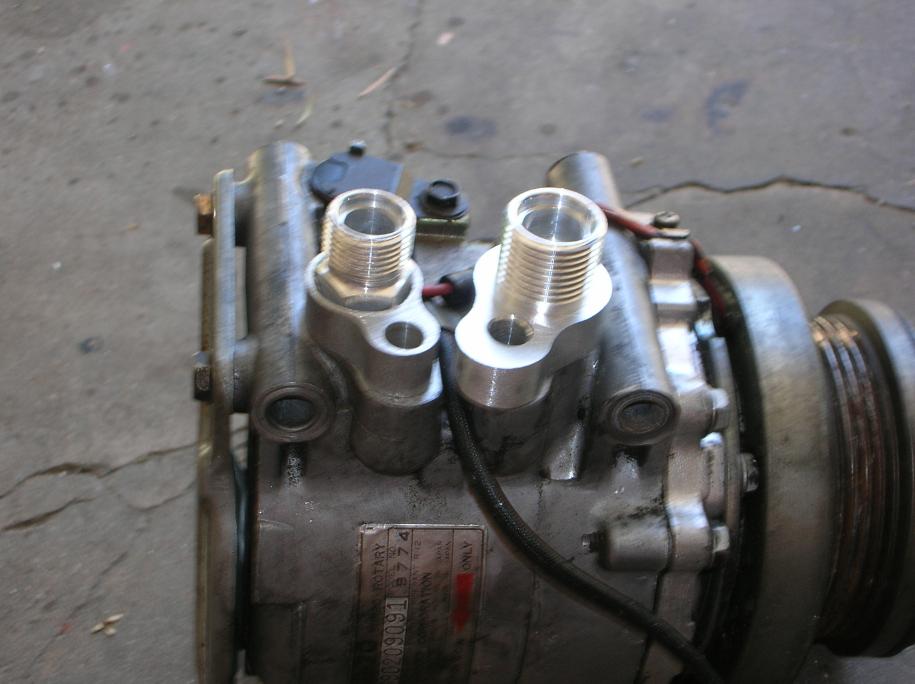
Finally, here is a photo of the two finished adapters;
That pretty much opens up all sorts of options!!
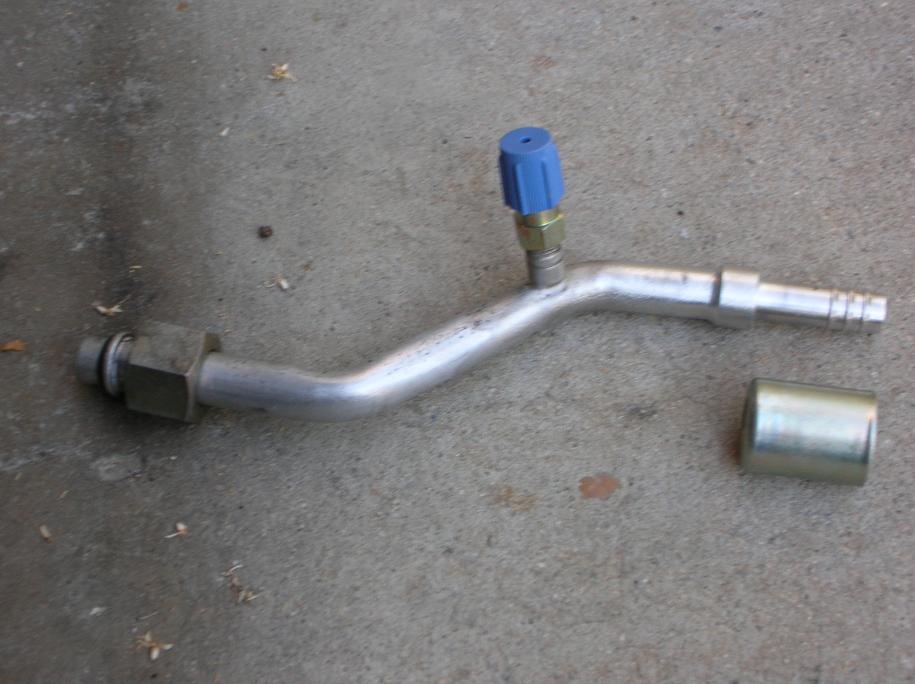
Issue #4, how to hook up the new hose line up at the firewall;
Due to having to clear the brake proportioning valve, you can't just put a straight hose end on the new hose that goes to the compressor!
It's easiest to just show a "finished" photo in order to explain what I did.
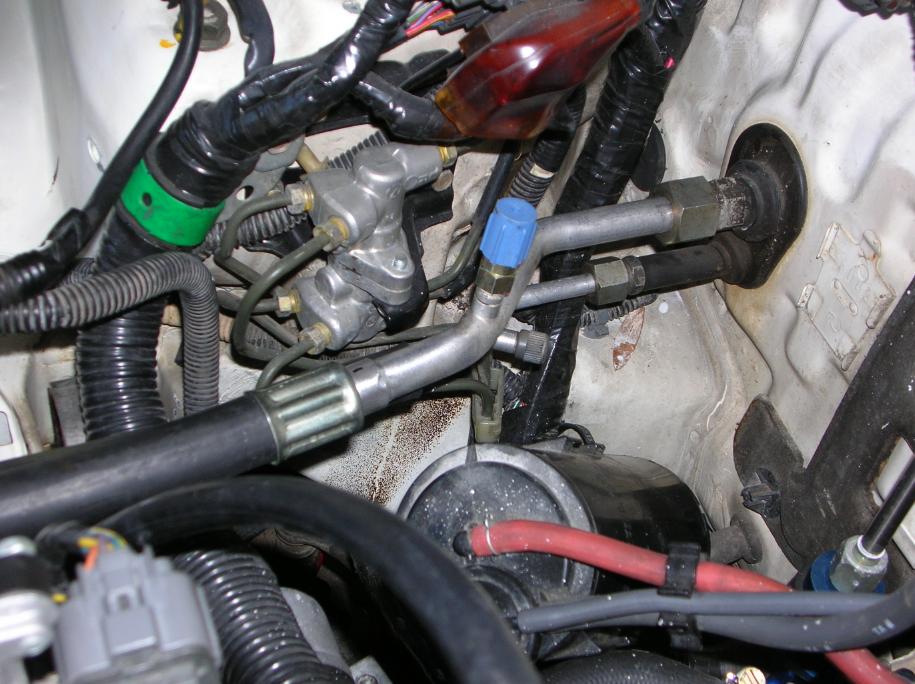
The upper AC hose is the new one I built up. The lower one is the original one and didn't need modifying.
What I did was cut off the end piece of the original hose and have an AC shop weld on a straight crimp fitting. I then had all the fittings crimped on. Keep in mind that you have to make sure that the fittings are pointing in the correct direction! Barrier hose can not be twisted!!
I'm not going to post photos of the routing of the line just due to the fact that this page is already getting just too long. Suffice it to say it's pretty much up to you.
Issue #5, converting to R134;
There are a couple issues that need to be addressed if you are converting to R134. Some of the items should be addressed even if you want to stay R12, but had the system apart for any length of time.
You should replace the dryer. The stuff in the dryer goes bad if exposed to air for any length of time (I don't know how long is reasonable). The chemical inside is different if you are planning on R134 and not R12. Just make sure that you get one that is correct. (you can't tell the difference by how it's built)
You need to change the oil in the system. The oil for R134 is different than that for R12. Your new dryer already doesn't have any oil in it, but you should plan on draining the compressor real good. Add oil to both the compressor and also to the dryer. (I don't remember the amount that goes into each)
You need different "charger" hose hook-ups. These are just adapters that are screwed on the original R12 hook-ups after removing the original valve (it's like a car tire valve stem).
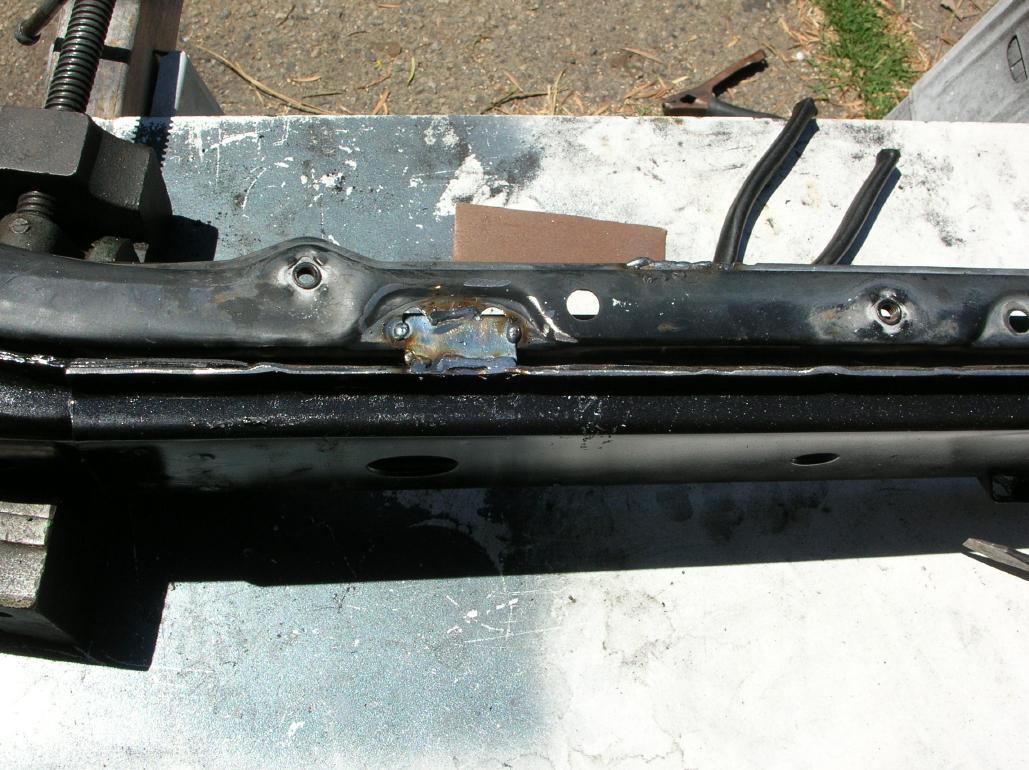
Issue #6, the bumper cross-beam doesn't clear the new pusher fan;
You may find it interesting to know that I decreased the weight of the cross-beam from 18 pounds to 11 pounds.
Before you jump in and say that the car isn't safe after cutting out major sections of the cross-beam, here is a photo of what's behind a JDM bumper skin. There isn't any cross-bar, just a support for the upper edge of the urethane skin. (thanks to Erik for the photo)
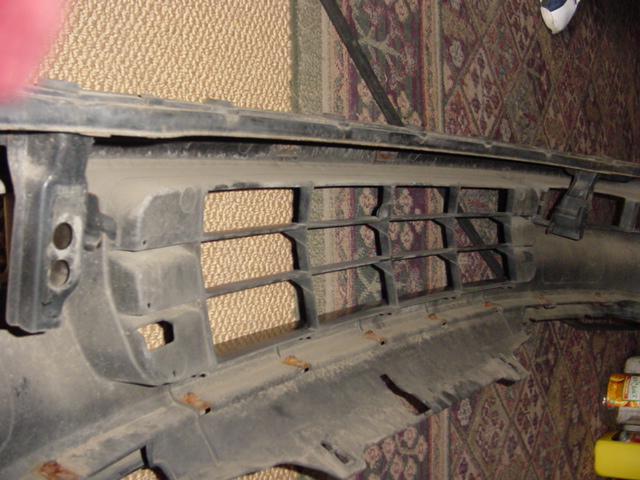
As shown in the next photo, there are a bunch of brackets on the cross-bar that don't do anything at all. All I can think is that they were for some "option". I cut them off and ground it flush.
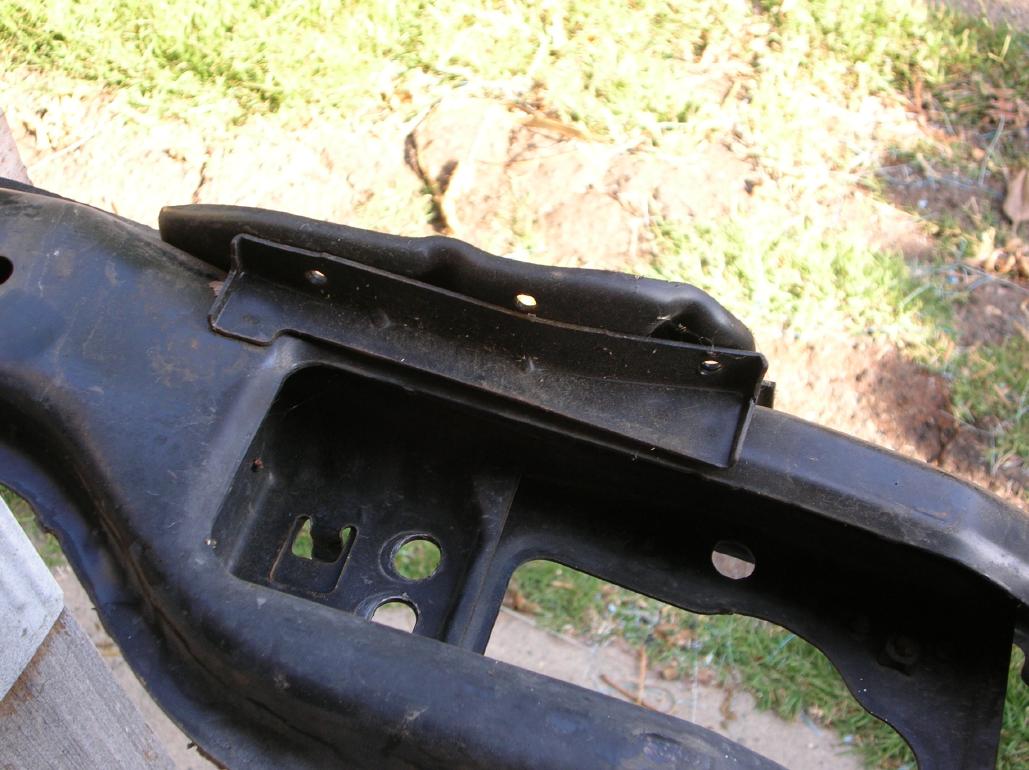
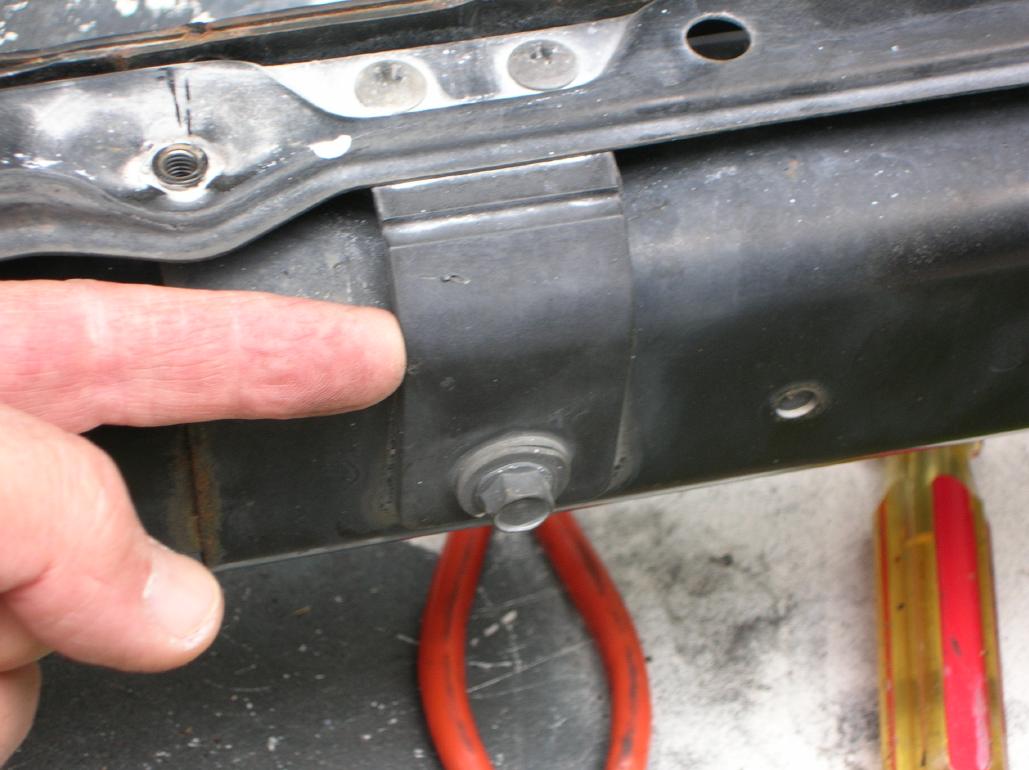
In the next photo you can see the angle bracket that holds the bumper skin support (the upper metal piece). I removed them due to having to cut out the metal where the single bolt is.
Here is a photo of the modified cross-beam and also a un-modified cross-beam.

In order to re-attach that upper metal piece that the urethane skin bolts to, I had to weld on a couple metal flanges.
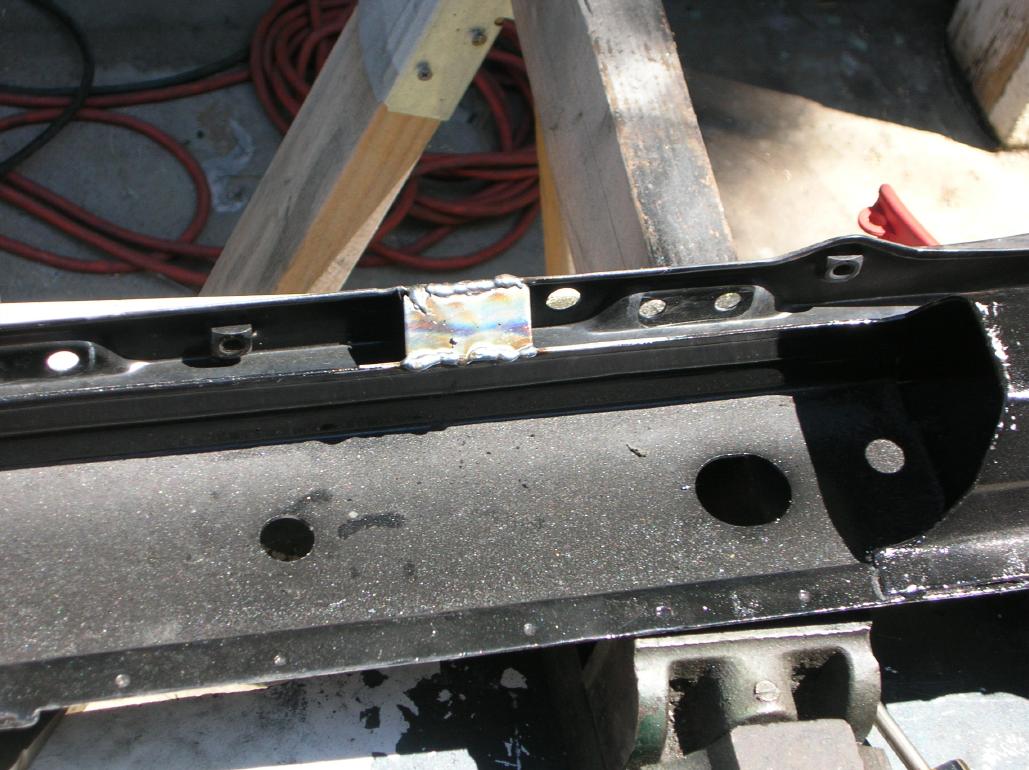
And here is a photo of the cross-beam on the car. (at the time the photo was taken, the oil cooler wasn't installed)

Issue #7, Gee, AC plumbing is ugly and I want "bling";
If you really want to do something that the car magazines would like, plumb the whole thing with Aeroquip Stainless Steel braided AC hose. It wouldn't be hard, just pricy! You can get all the parts you need from Doc's Blocks or Vintage Air. If you do the Aeroquip hose, you don't need a crimp tool like you do with normal barrier hose. Basically, it would look just like you did it with stainless AN hose and fittings.
Vintage Air; This is a company that sells retrofit AC kits to the street rod and muscle car people. I've done business with them for years and they are great to deal with. Very knowledgable! I used one of their kits to add air to the 64 Chevelle 2 door wagon I owned. They are a good source for various items needed to customize an AC system. They sell "stock" barrier hose and fittings. They sell Aeroquip stainless steel braided barrier hose and matching fittings. They can also custom build up hoses for you. Get a catalog!
Doc's Blocks; Like Vintage Air, they are a supplier of custom AC parts and they also manufacture "stock" AC hoses. As a result of their manufacturing "stock" hoses, they have a vast array of end fittings that can be used!! They were very helpfull in my search for the items I needed. They also sell Aeroquip AC hose and fittings. Get a catalog!
AirMec; These guys are located near me and are a good source for "stock" end fittings and general generic AC parts.
Hasport; Dang, you really should know these guys if you are into Hondas with swapped engines! They are not the cheapest out there, but their products work correctly and their customer support is the best!
Closing comments;
It's possible to re-install AC in just about any hybrid car. It's just a matter of being willing to address all the issues that come up.
return to my site's entry page
Wes Vann