Removing the "bitch pin"
Without using a hammer
Originally written; March 10, 2007
To start off;
You shouldn't be bashing on something attached to your transmission with a hammer!! The transmission case is aluminum for gods sake!
I'm tired of people thinking that removing the transmission linkage roll-pin warrants calling it a "bitch pin". However, it's the commonly used name, so that's what I'm going to call it.
I took the photos with the linkage out of the car due to not being able to shoot good photos under the car (I don't have a lift). The process I'm going to outline is exactly what I do under the car while it's on jack-stands.
All the photos are "clickable" to a larger view.
You may have to buy a couple tools, but nothing custom or big-buck!
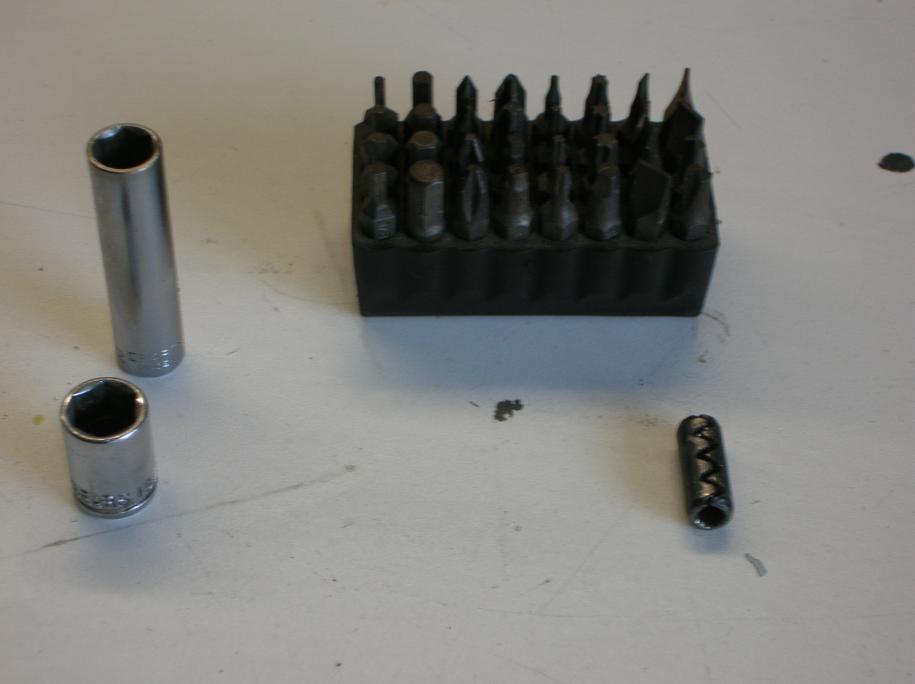
Here is a photo of all the tools you need other than a good size C clamp. You can buy everything at Sears!!
There is nothing special about the two sockets except for the fact that they should be large enough for the bitch pin to fit inside. Both are 1/4" drive sockets.
The assortment of 1/4" "bits" are nothing special and I got them at Sears. You are going to use two of the allen head bits and as such may be able to find a smaller assortment for less money.
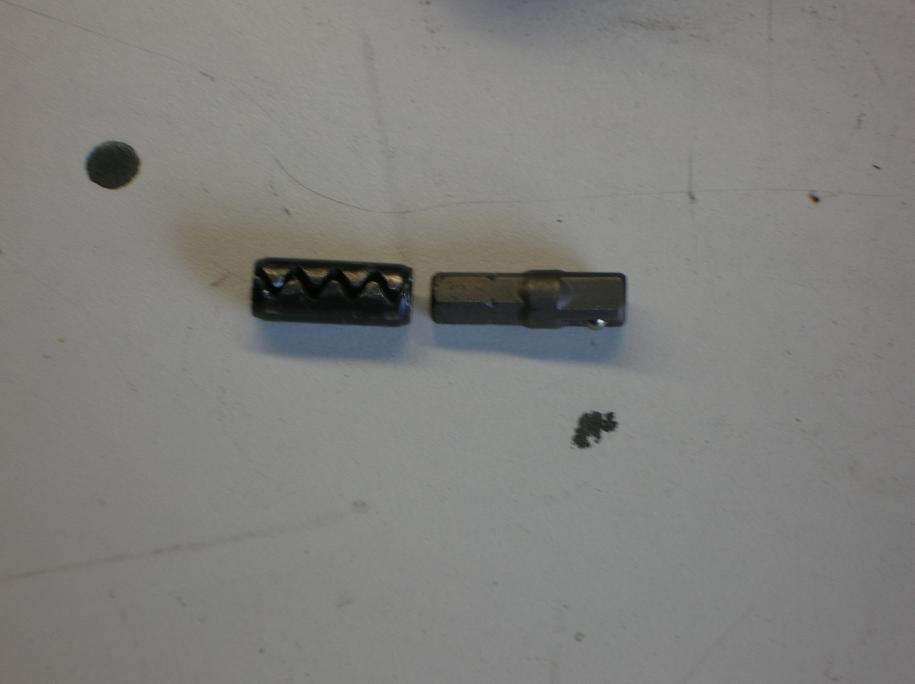
That's the bitch pin on the lower right.
Now in the next two photos you can see the key to how this all works;
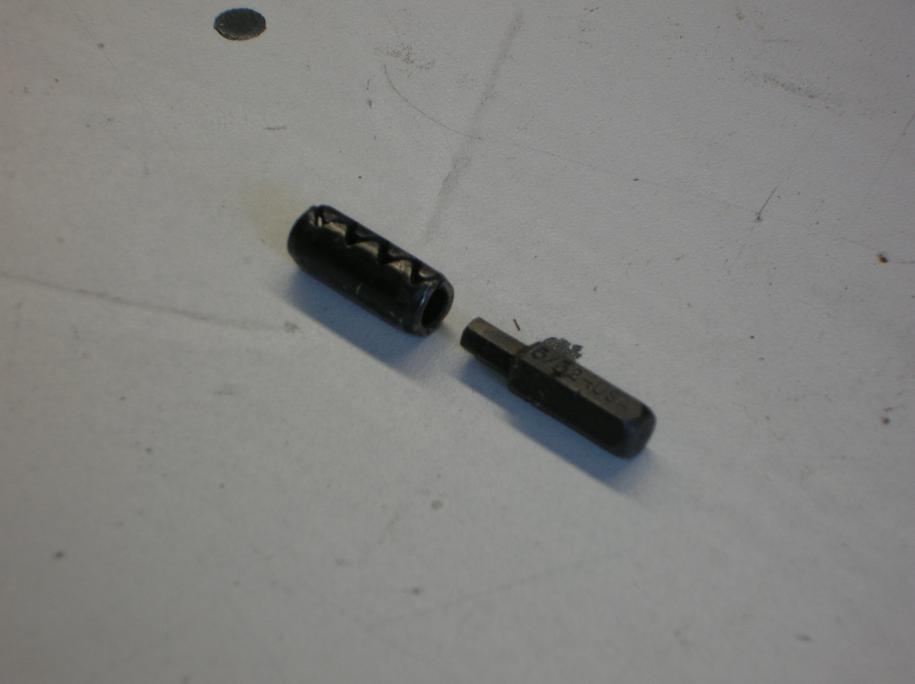
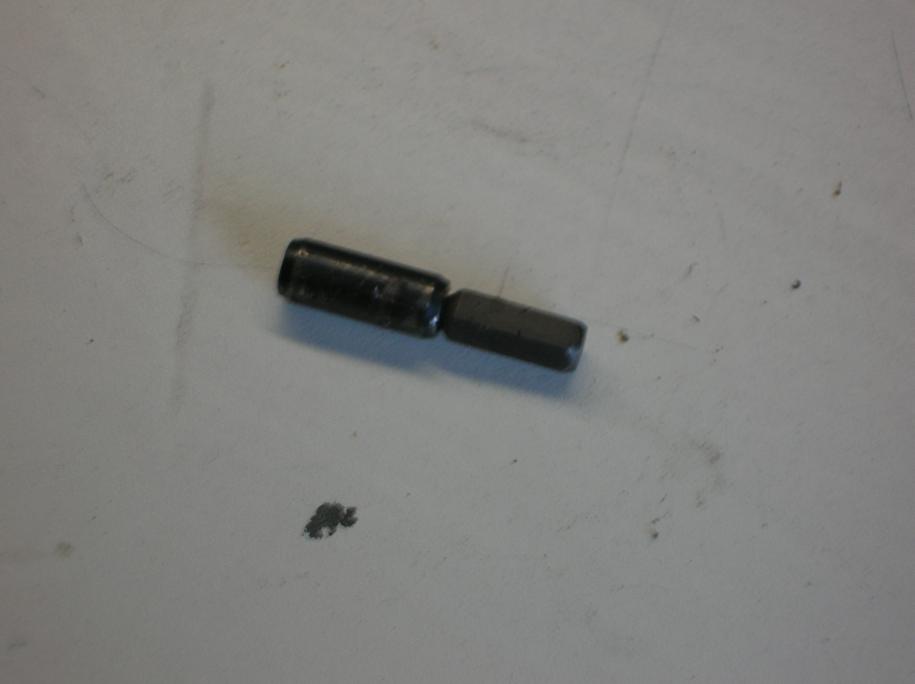
You want to first off find one of the bits that slides inside the bitch pin. In the right hand photo, I've slid the bit inside the bitch pin.
The whole reason for doing this is that the bit is supported while you put the force of the C clamp on it.
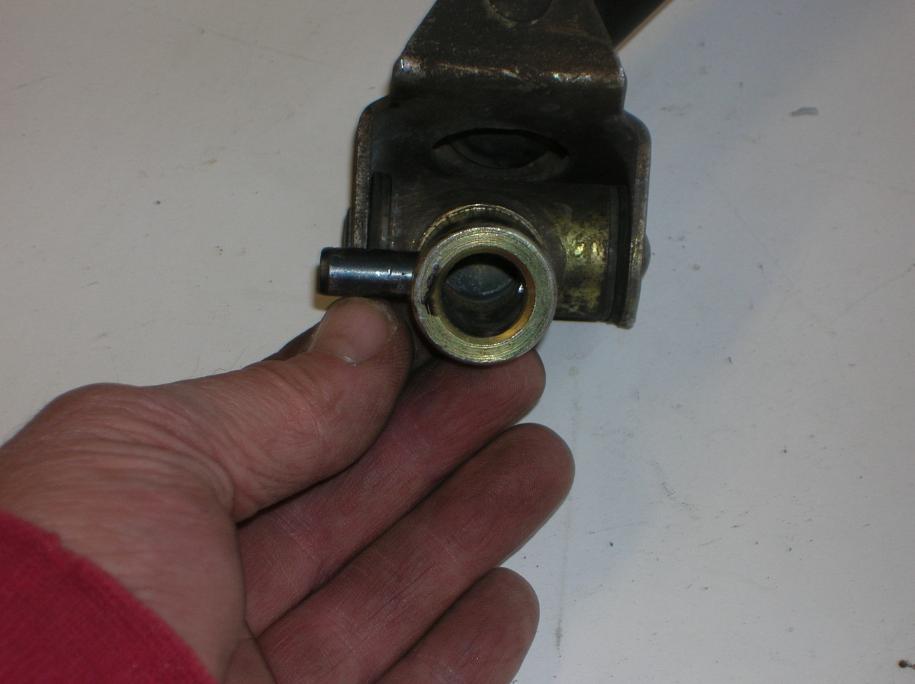
Now get under the car, push the rubber boot out of the way, and remove the circular clip that prevents the bitch pin from falling out (like it's really going to just fall out).
Put the car in third gear. By doing this the shift rod coming out of the transmission moves toward the rear of the car and gives you more room for the C clamp.
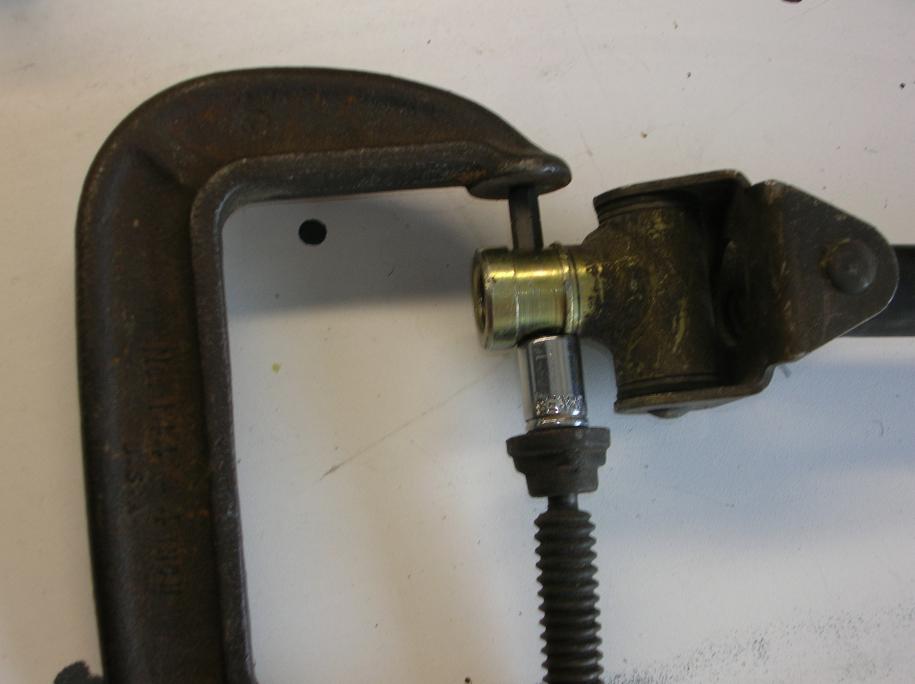
From the top side, put that allen bit into the bitch pin (it stays there due to fitting within the bitch pin) and grab your short socket.
Use the C-clamp as shown in the right hand photo to press the bitch pin downward, into the short socket.
Once again, this all works under the car if you put the transmission in third (or first)!!!!!
Now you run into a little problem in that the allen head bit will bottom out before the bitch pin is all the way out and there doesn't appear to be anyway to remove the allen bit.
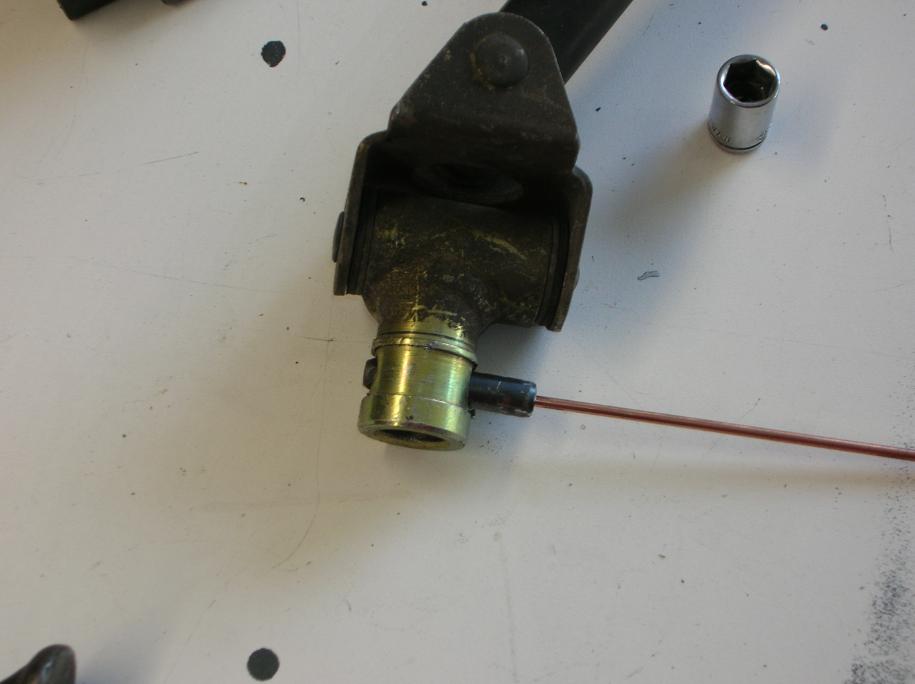
All you have to do in order to get out the allen head bit is to take a short piece of welding rod (or piece of coat hanger) and insert it from the underside, pushing the bit upward and out. Remove that bit and put it aside.
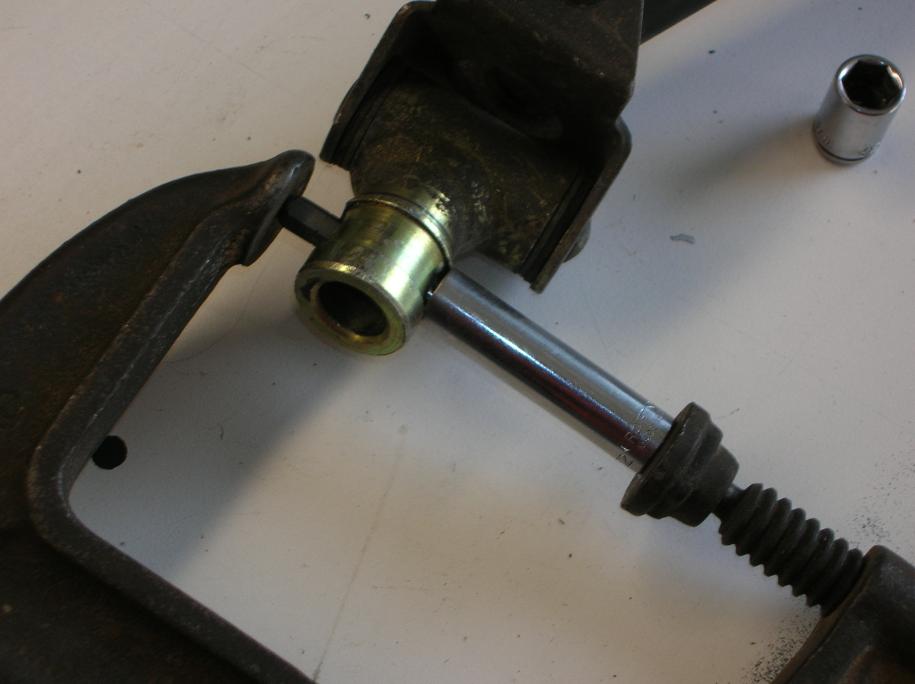
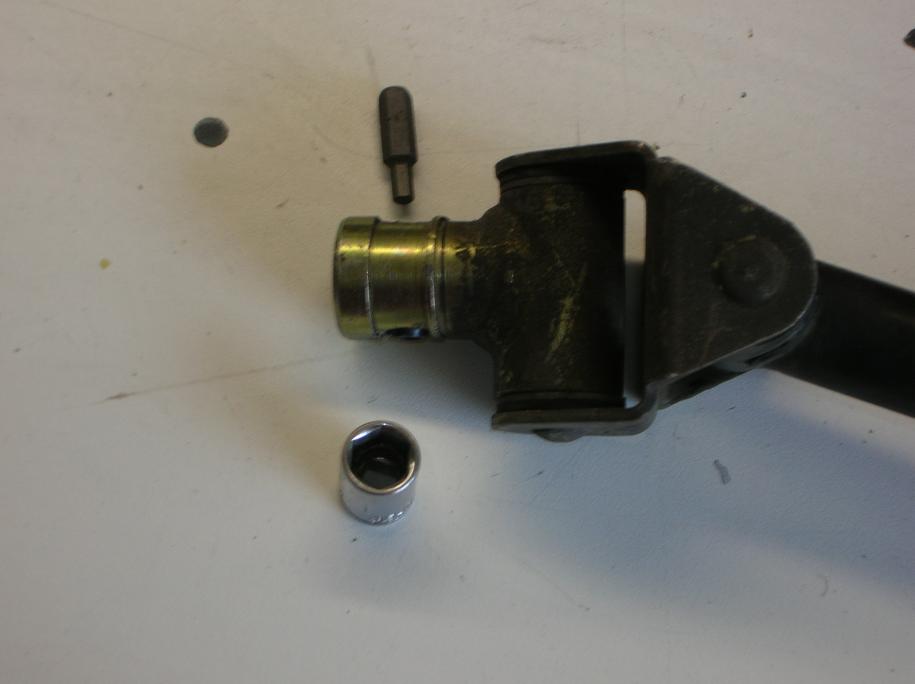
Now you want to use the largest size allen head bit that is slightly smaller in diameter than the outside diameter of the bitch pin. Insert it in the hole at the top and use the deep socket as shown in the photo on the right.
Finish with the C clamp and the bitch pin will fall free.
At this point, I'd recommend you just remove the main shift rod (the one with the bitch pin) for a little prep that makes it easier when putting everything back together. It's just one bolt at the base of the shifter and it will make it easier in the long run!
With the shift rod out of the car, use a hammer (dang, I really didn't want to say that) to tap the bitch pin partially in place. It should be so that when you install the linkage, it's going in from the bottom. (just easier to get the C clamp in there when done in this direction)
You want it so that it's in place, but not so deep that it pokes into where the transmission rod has to go.
If it's too deep, use the large allen head bit to move it outward.
When re-installing the linkage, just make sure the holes line up and use your C clamp to push the bitch pin into place.
Closing comments;
At no time was a hammer near my transmission!!
return to my site's entry page
Wes Vann