Power Windows and Door Locks
Originally written; January 8, 2005
Updated January 30, 2005
The why and what of this page;
The intent of this page is to provide ideas on how you can install power windows and door locks.
I have to first off state that what I've done is a lot more complex than what others may want to do. I totally understand this, but for me it's a project car and I wanted to do it as I feel it should be. You will never get an alarm shop to do an installation like this. It's just too time consuming!
Now this may sound pissy, but I really don't want to hear from others on how I should have done my installation! I would however like to hear about any other sites that show other installations and I'd post them here so people can see them.
All photos are "click-able" to a larger version.
Options and why I did it the way I did;
I wanted to set the car up so that the alarm could roll up the windows and lock the doors. It had to look reasonably stock, or "original".
The car is an 89 Civic Si hatchback and Honda never sold them in the US with power windows. I did luck out in that the original buyer of the car did get the "optional" center dash piece (which is no longer available).
JDM doors are available with power windows, however they have the "main" control switches on the right hand side. It's possible to swap the main switch panel from one side to the other, but you end up with the switches upside down. There are also issues with the location of the mounting screws for the switch panels. Plus, the hole in the door panel for the main switch is longer than the hole for the passenger side (at least on the hatchback), this means you would have a gap that would have to be hidden.
EDM doors are available with power windows but get real pricy when you factor in shipping and all. Normally you would have to get them from an individual and they are not shipped "in-bulk" like what a lot of the JDM importers do.
4 door EX's were available with power windows in the US and this would be the best low cost source for the regulators and motors. It doesn't solve the problems in regards to the switches or door panels. I'm not sure about how easy they are to bolt up or if the arms on the regulator are workable.
There are companies like Spal that make kits to drive the stock window regulator, however I don't like the "cap" that has to cover where the crank lever would go.
So, where did the parts that I used come from?
I bought a set of complete JDM doors from PasswordJDM and tore them apart. I used the regulators with motors and the door panels (well, the lower part of them). Some of the wiring was used. The rest I threw away.
I went to a local junk yard and got the wiring from an 4 door EX. This included the rubber boot section that goes between the door and body frame.
For the switches, I ordered them from Spal. They are factory looking and are even illuminated.
The power window control module is from DEI, as are the door lock actuators.
Relays and mounts for them are from Bosch.
Making the dash assembly to hold the switches;
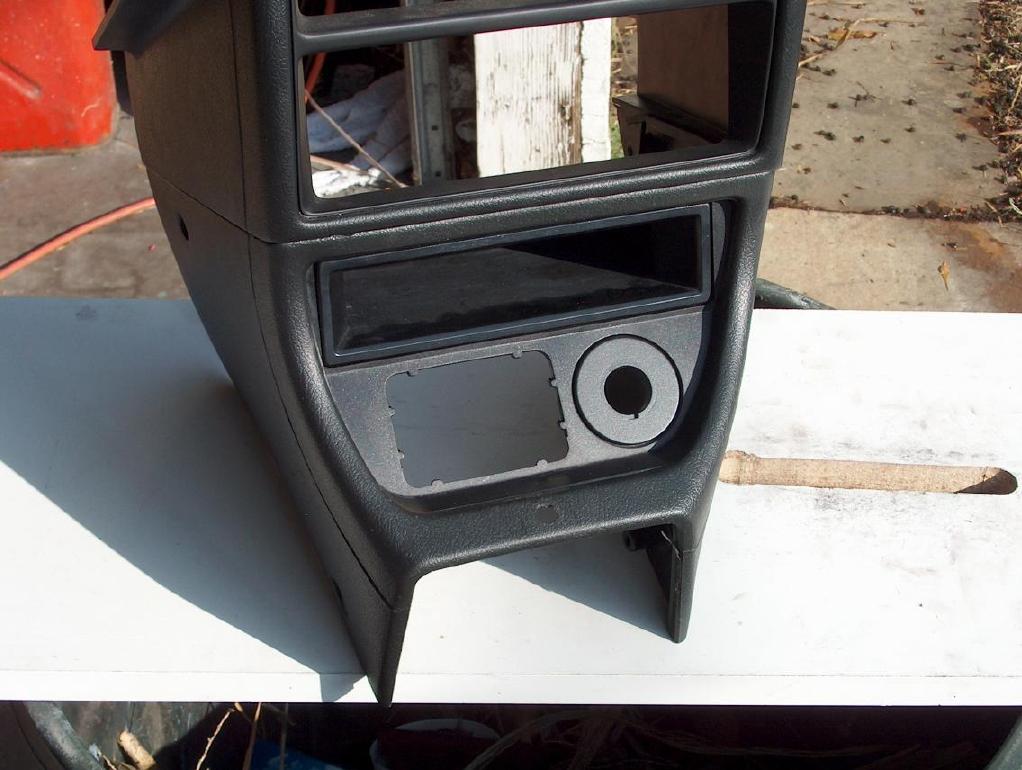
I lucked out in that the original buyer of my car got the optional "factory" center console. These are no longer available and hard to find. What I didn't like was that one of the prior owners had an alarm LED mounted at the base of the unit and I had to re-install another one to fill the hole. I managed to find a small plastic cover plate that at least made it look better.
The following photo shows the center console. That large square hole is where the ash tray would go and the round hole is for the cigarette lighter. I didn't want to drill any holes due to it's being a hard to get item.
So, I made up the metal cover plate that is shown in the two following photos. Notice the stud welded on in the photo on the left.
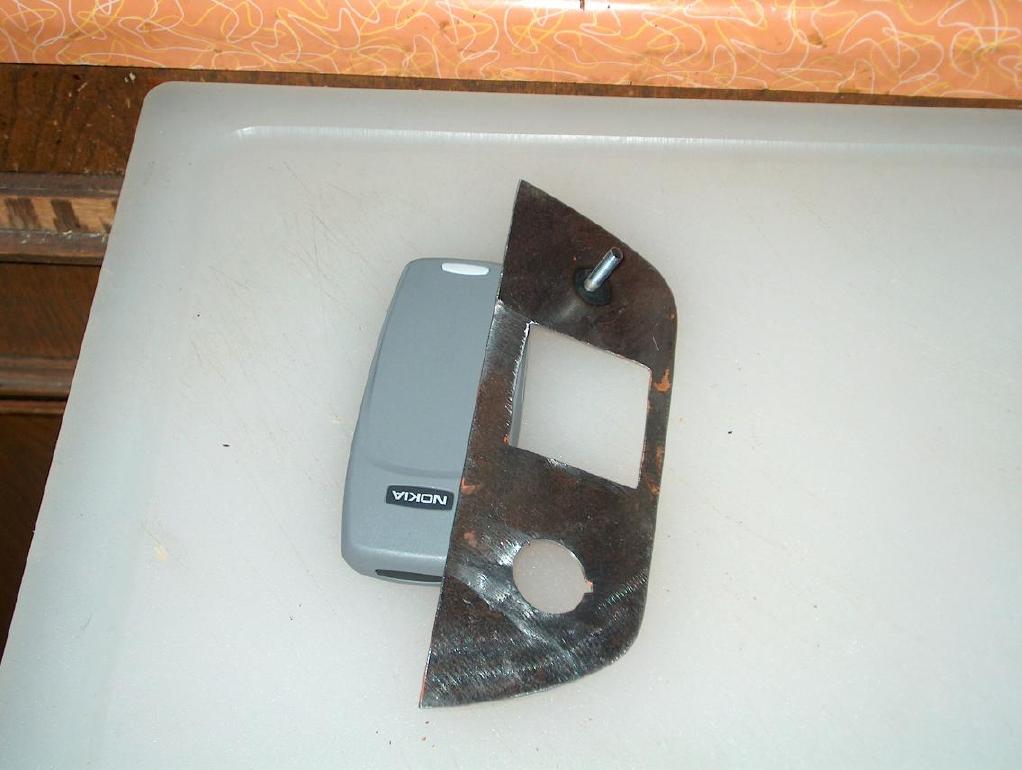
The following photo shows the cover panel and switches mounted. On one side, the cigarette lighter holds in in place. On the other side the stud and fender washer clamp it down. What looks like a flat edge of the washer is actually bent over to make up for the thickness of the plastic piece (click and look at the larger version of the photo).
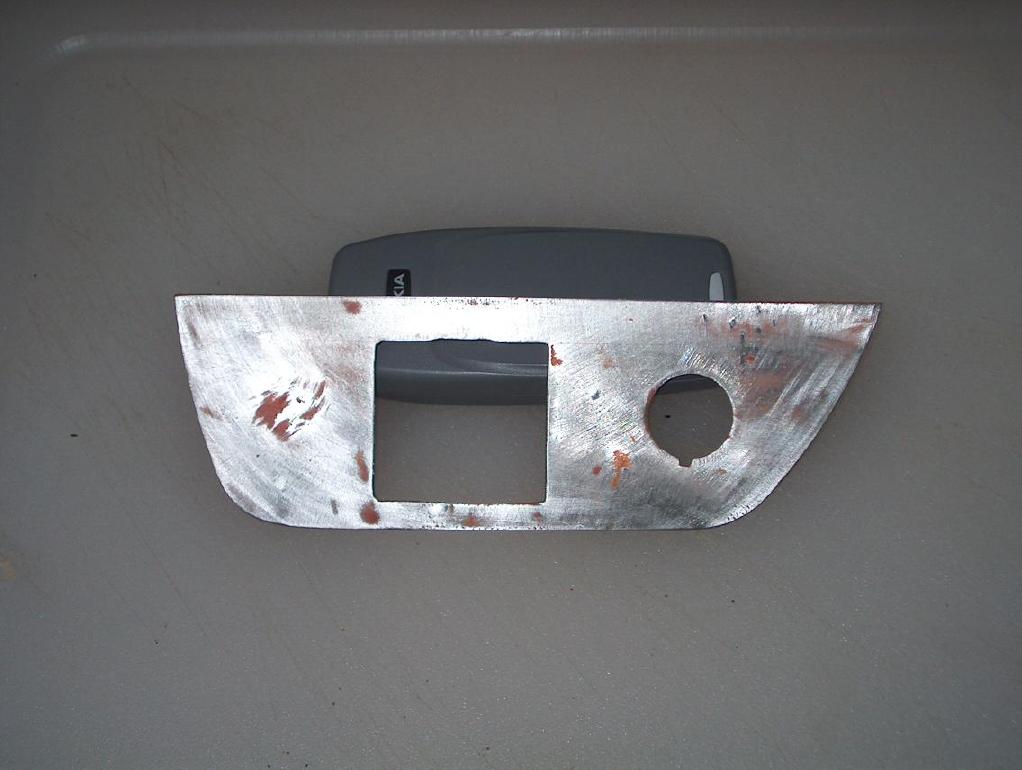
Here is the front of the finished panel.
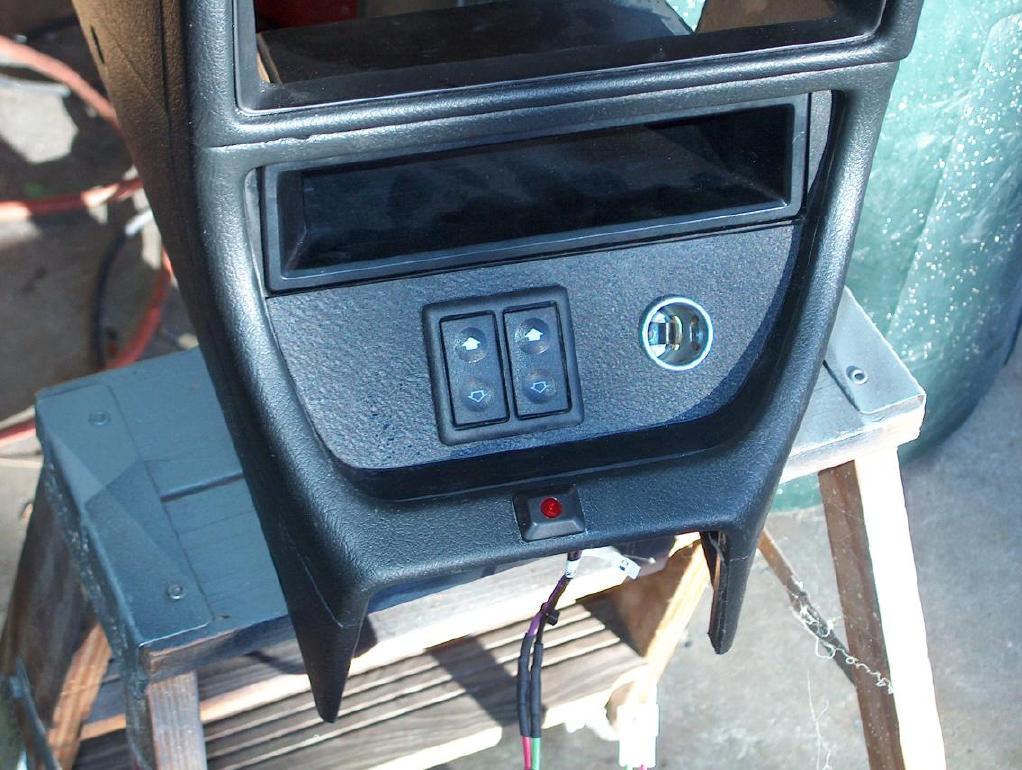
I like how it looks!! As stated prior, the switches are from Spal.
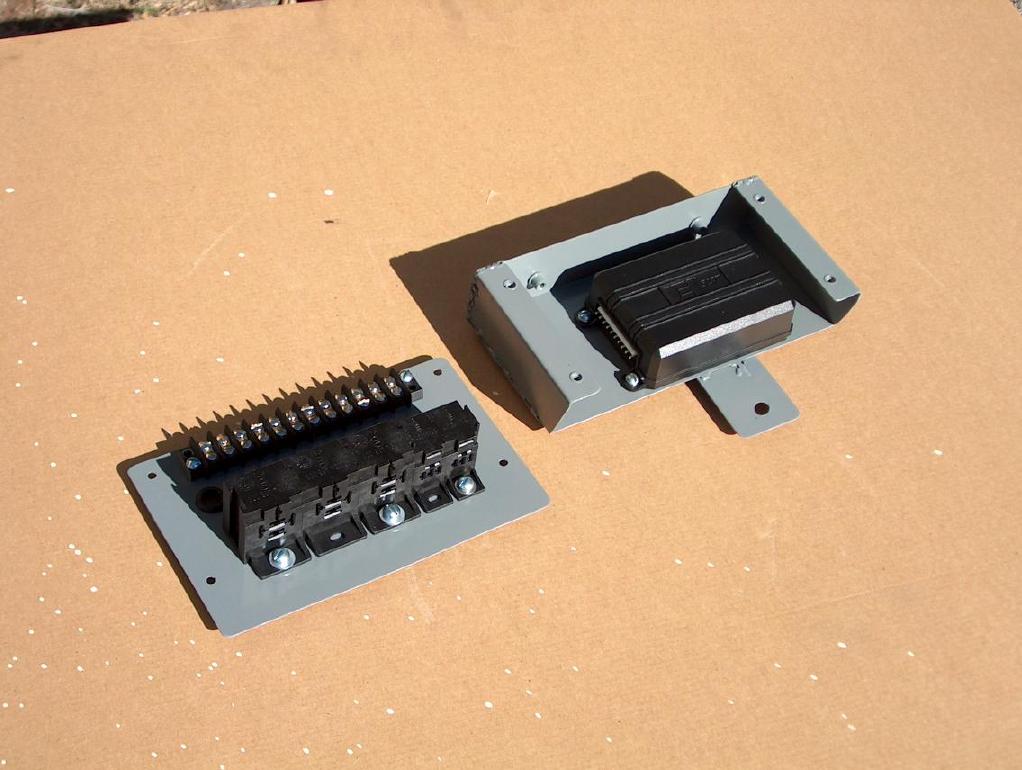
Building the "control" box;
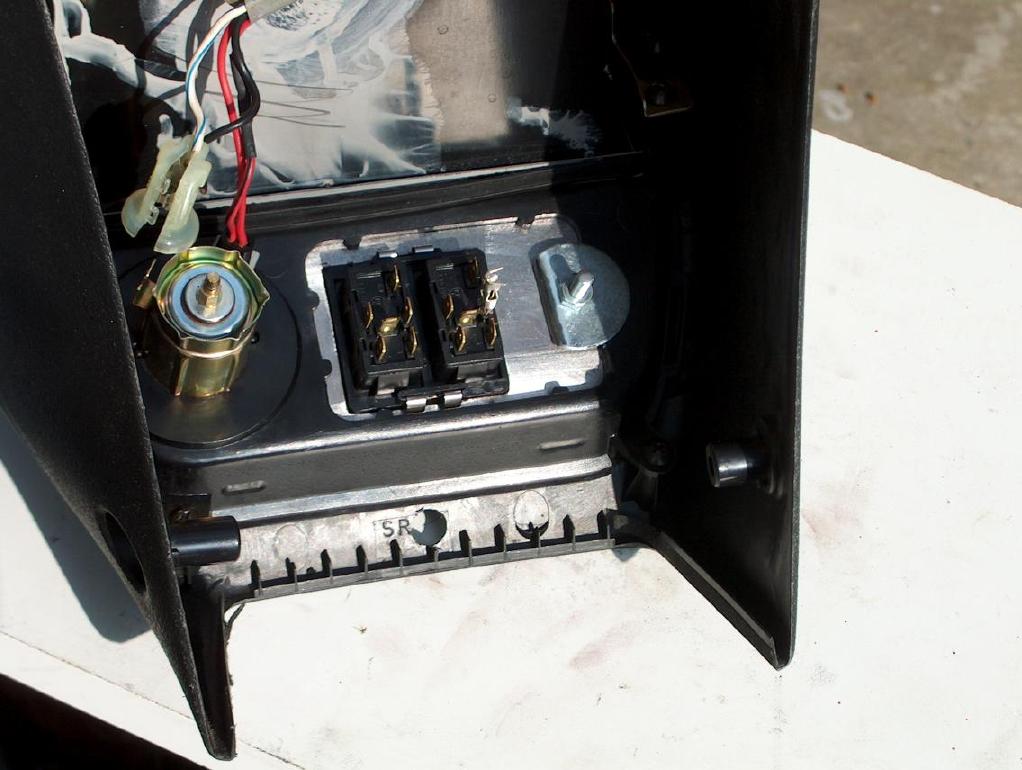
I needed to mount a bunch of the control circuit stuff under the dash and decided that the best thing was to build a metal box that everything would be mounted to. The whole assembly is then mounted behind the center dash as shown in the photo below. It's totally hidden once the center dash cover is installed. It's solidly bolted in place and can't be "ripped" out. (as a side note, the stereo is also bolted in from the rear and can't be quickly removed by a thief)

This photo shows the box and cover plate. Within the box is a DEI 529 power window module. This module takes a grounding pulse from the alarm (mounted elsewhere in the car) and rolls up the windows. The cover plate holds 5 relays and the buss strip. Three of the relays are used to "disconnect" a circuit (I'm not going to say what) to disable the car when the alarm is activated. The two other relays are used to lock and unlock the doors.
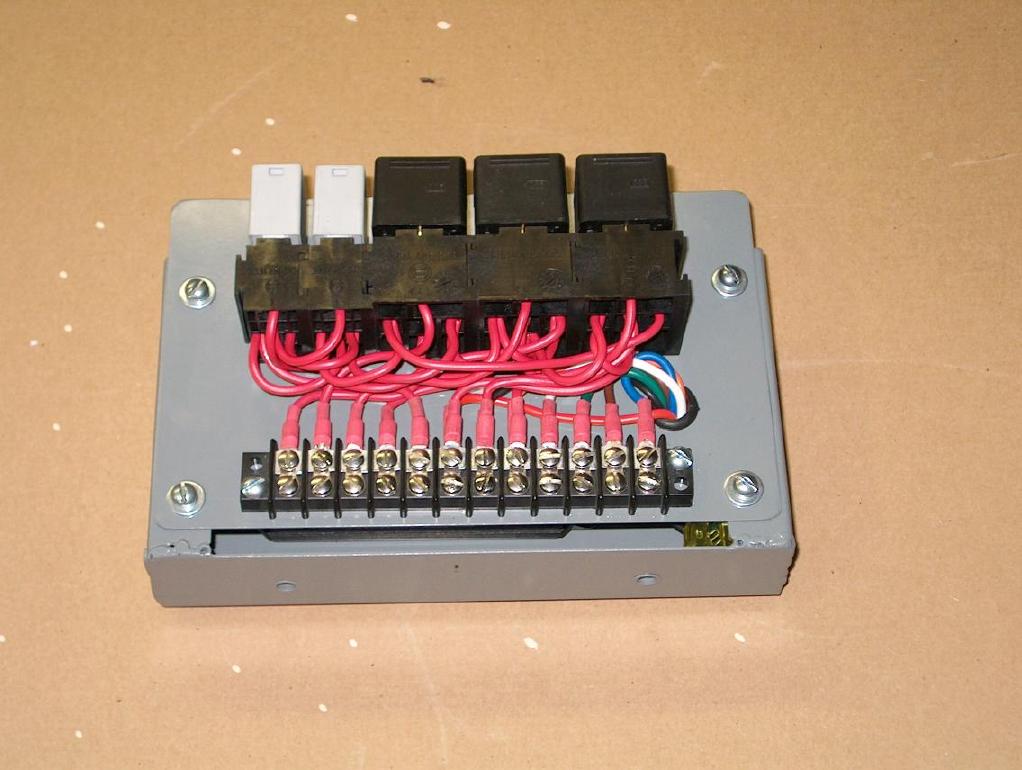
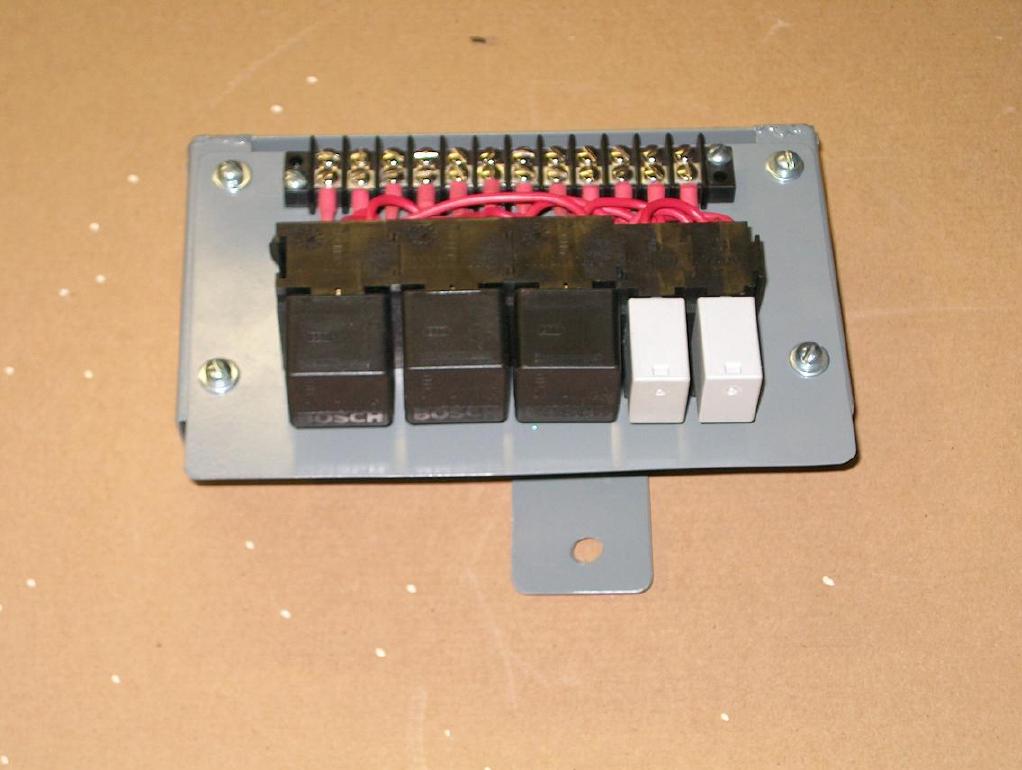
These two photos show the completed assembly with wiring;
Once again, the photo at the top of this section shows the completed assembly installed.
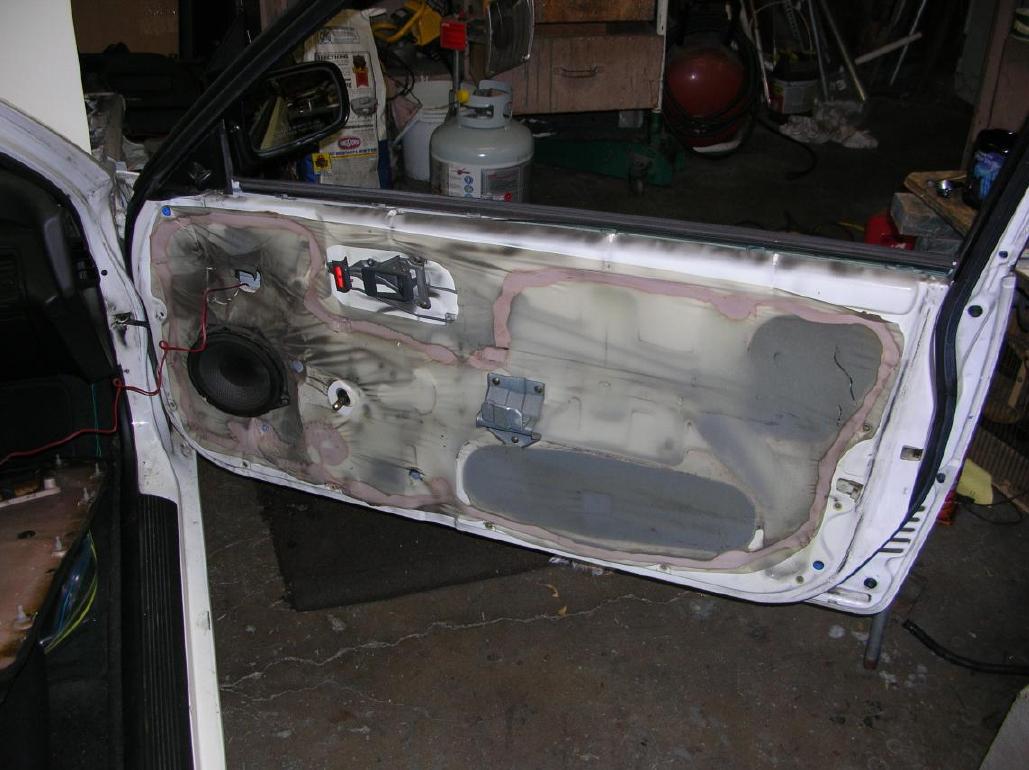
Pulling the door apart and bolting in the new regulators;
Pulling the door apart is pretty easy and the first thing you want to do is remove the door panel. Here is a list of the steps to get it off. It should be pretty much the same if you have a CRX.
1. Remove the two screws on the leading edge of the speaker grill. Pull the grill forward (toward the front of the car) and then snap off the top and bottom edges. The rear edge has a flange that is cleared when you pull it forward.
2. Remove the screw that is at the bottom of the "pull" pocket at the center of the door. Then pull up on the pocket and it will come free.
3. Remove the screw at the trailing edge of the door panel and also the one at the upper leading edge.
4. Remove the two screws that are at the ends of the storage pocket (at the bottom of the door).
5. Pull on the door release lever and you will see a screw there. Remove it and jiggle the plastic backing cover and it will come free.
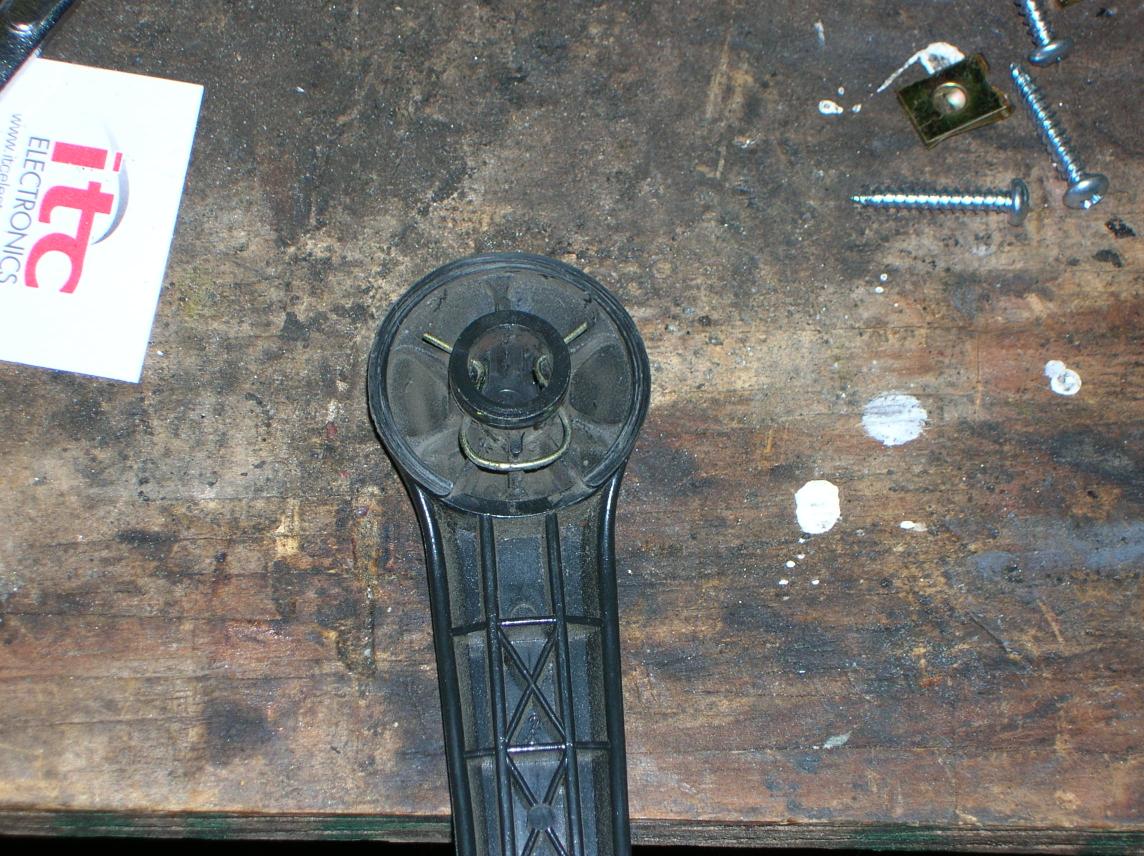
6. Remove the window crank. There is a metal clip that has to be removed and if you take a short piece of welding rod (or coat hanger) and put a small hook on it, you can grab the clip and pull it free. You get to it by pressing on the door panel and looking between the crank and the plastic "washer" (that protects the panel material). If it was installed correctly, you can see it when sighting down the arm of the handle. This photo shows the backside of the crank with the clip placed back where it belongs.
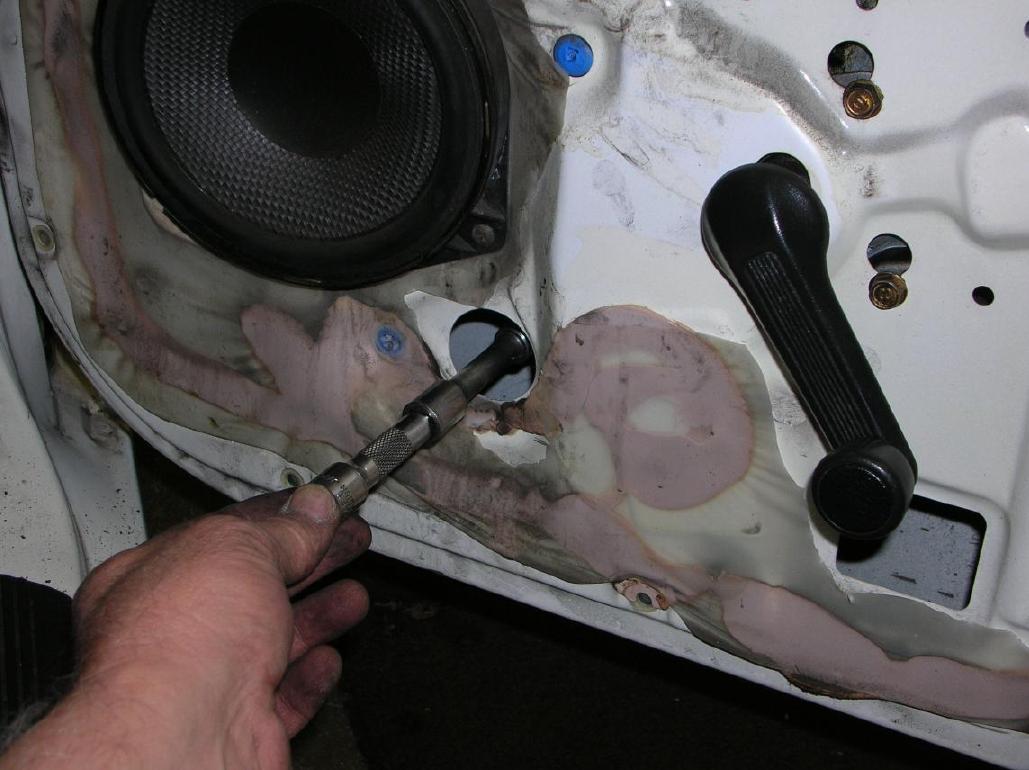
7. There are two screws that were hidden by the speaker grill. They are at the trailing edge of the speaker opening. These are NOT the four screws that hold the speaker assembly to the door. Remove them.
8. Now all that remains are the "push pins" along the bottom edge and slightly up along the leading and trailing edge. Just get your fingers under the panel and pull it away from the door. If you can't pull it free by hand, then go and make sure that I didn't forget about a screw. Do not try to pull the top of the panel away from the door!!
9. Once the panel is loose, slide it slightly to the rear and you should be able to move it upward and off the lip at the top.
Time for a photo;
Now you have to cut off the plastic sheet to get to the internals. When you go to put everything back together you will have to come up with some other kind of sheet. All it does is keep out water and cold air, so it's debatable if it's real required.
Roll the window down so that about two inches are still showing.
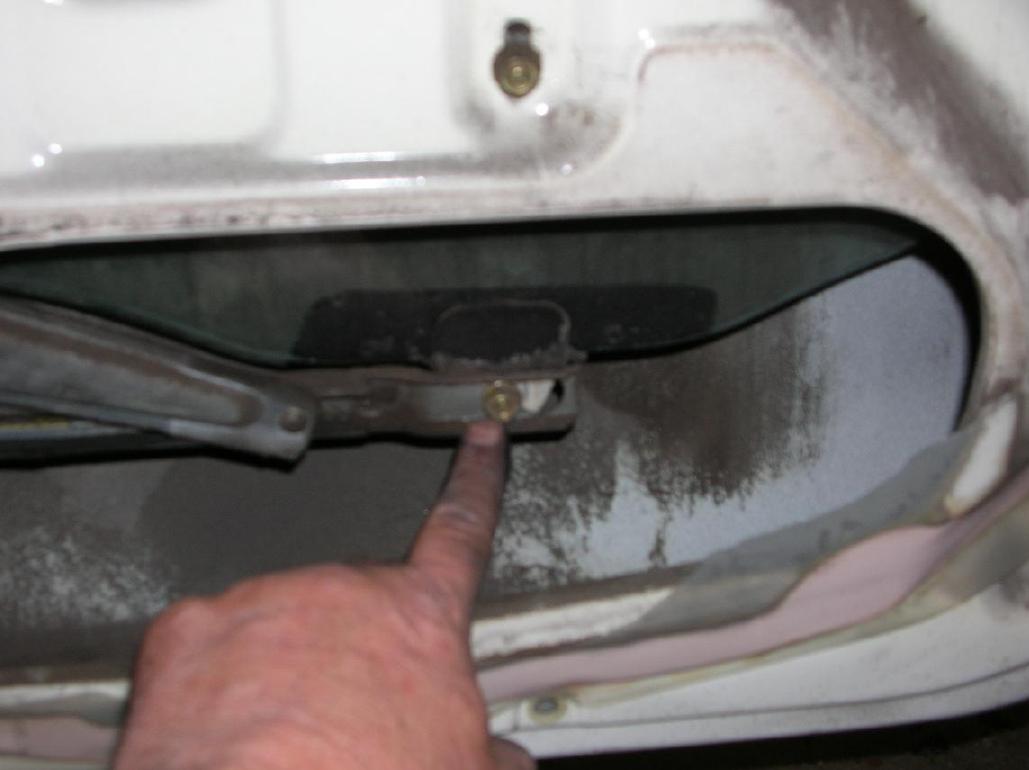
What you have to do is remove the two screws that are the attachment of the glass. (there are two "tabs" glued to the bottom edge of the glass) The bolt at the rear edge is easy to see and I'm pointing to it in the photo on the right. The bolt at the front has to be accessed through the hole as shown in the photo on the left. You may have to roll the window up or down in order to get to the bolt at the front. If you are doing this at a junk yard and are trying to salvage a power window regulator, plan on bringing a small 12 volt battery to power the motor.
Once you remove those two bolts the glass is free to fall! The glass doesn't weigh hardly anything and plan on having one hand on it at all time. Lift the glass upward and jocky it around. You can pull it out and away from the door. Put it somewhere safe. (I did this by my self, but if you are worried about it, have a friend close by)
Now remove the regulator assembly.
There are two bolts that hold the horizontal track to the door skin. Remove them.
There are four bolts that hold the regulator assembly to the door skin. Remove them while keeping one hand inside the door to support the weight of the regulator. Then just feed the whole thing through the square hole in the bottom of the door. Now there is something that needs to be noted, the two bolts that are toward the rear of the car are shorter than the other two. This may be important for clearance. I don't really know, but don't risk it!
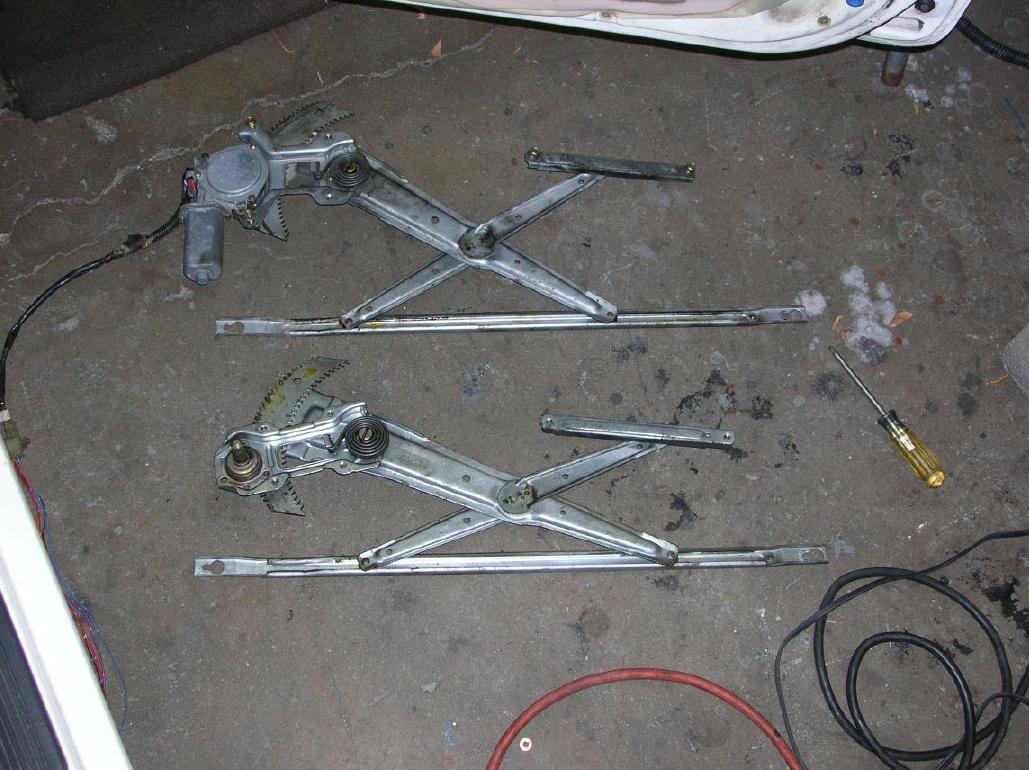
Here is a photo of the removed manual regulator and the new (at least to me) power window regulator. The power window regulators are from a JDM hatchback.
Use a battery to get the arm on the power window assembly to be the same position as the manual one you just removed. This will just make things easier. It also will tell you if the motor is good or not. Try both up and down. If you don't know, the motors only require two wires and depending on which way they are hooked up (12 volts and ground) governs if the motor is going up or down.
Clean up and lube the tracks.
Before installing the new regulators, put in the bolts that are on the leading edge. Just screw them in a couple threads.
The power window regulator uses different holes than the manual regulator does, but the holes are all there!
Then shove the whole assembly into the door opening. Those two bolts will fit within two of the slotted holes and makes it a lot easier to figure the placement of the assembly. Add the two other (shorter, as noted above) bolts and tighten them all down.
Bolt in place the horizontal track using the two bolts.
Install and bolt up the glass.
You now have power windows (that are not wired up).
Quick notes about this section;
1. The motors only require two wires hooked up to function! At rest, both are at ground. To get the motor to go up or down, one wire is hooked to 12 volts.
2. The motor that was (originally) on the drivers side will have 4 wires coming from it. As stated above, you only have to hook up to two of the wires. The others are a "pulsing" line that lets the factory control unit know that the window is moving. That way it can turn off after the window has hit it's limits.
Doing the wiring;
This has to be the ugliest part of the project and I doubt that very many others will want to do this!
Now the concept on what has to be done is easy (you are just adding 4 wires), but in order to get to this section of the loom to rework it, you have to remove the fender!! In order to remove the fender, you have to remove the front bumper!! What a pain in the ass.
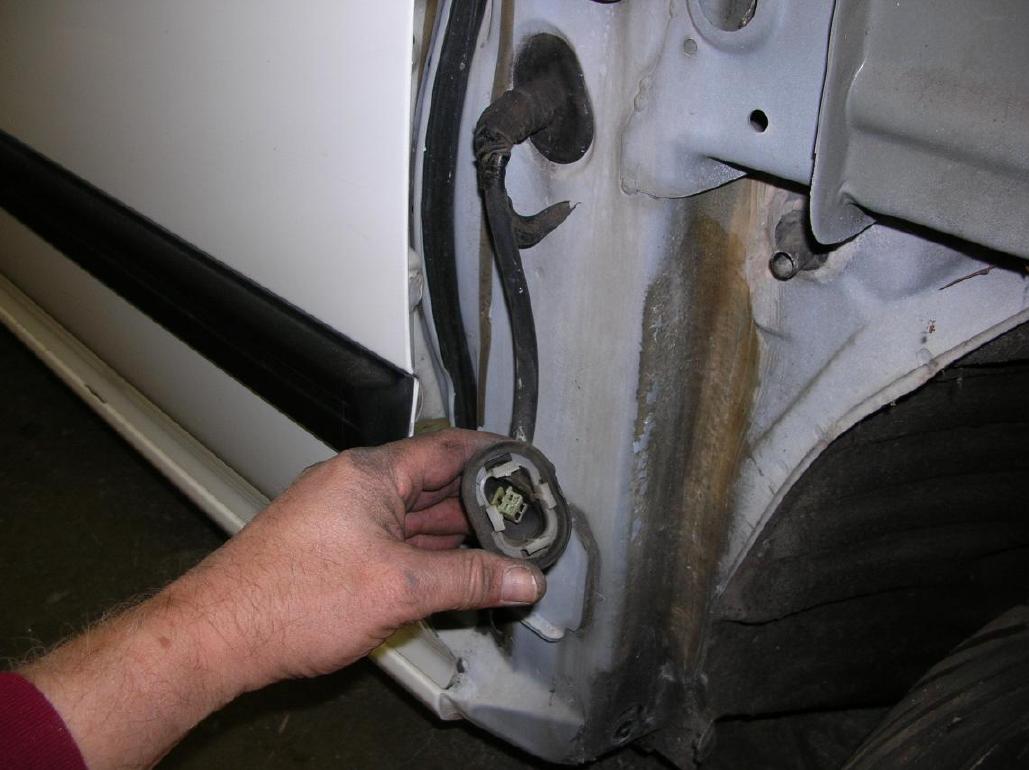
When Honda built the car, there were only two wires that go from the body to the door. They are the wires that are for the speakers. The "loom" unplugs at the leading edge of the door. The following photos shows the disconnected loom.
Now I was after a "factory" installation and that meant that the connectors in this location would have to be changed in order to add the 4 required wires. Add to that the fact that it would be difficult to fit 4 additional wires through the plastic loom that was original.
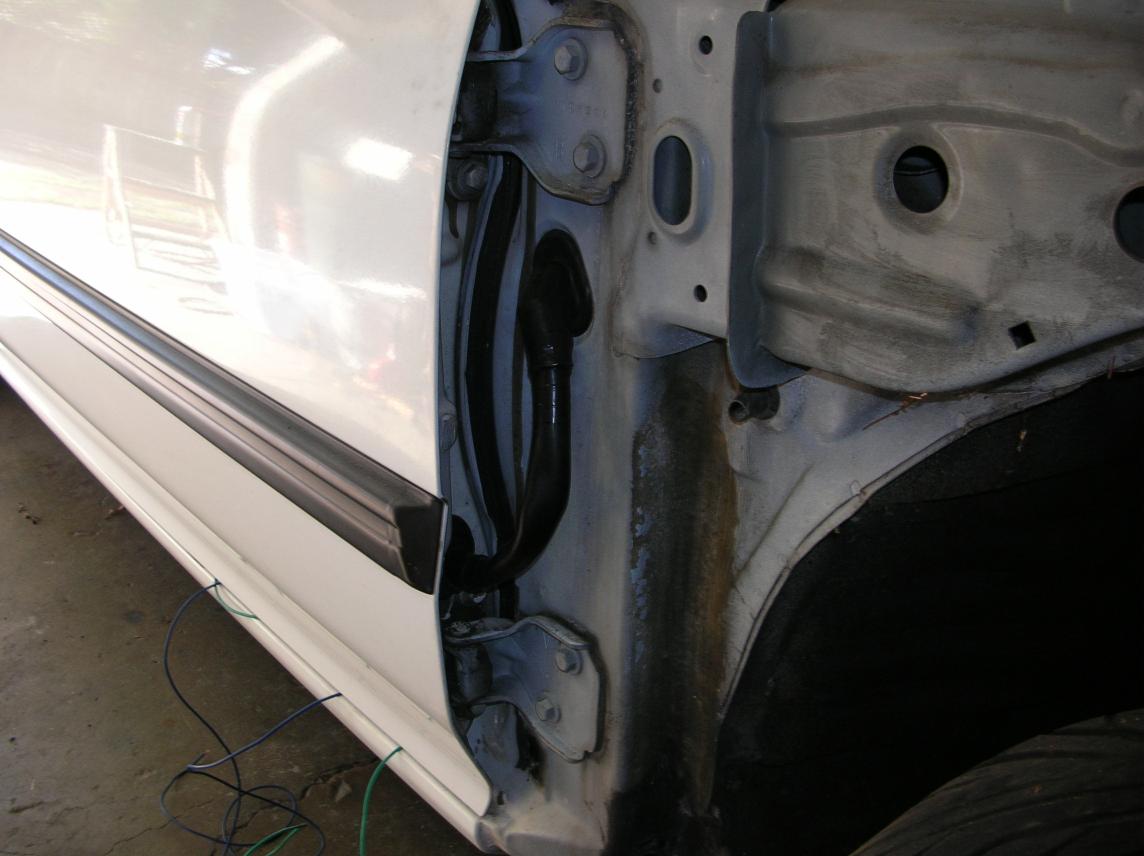
So, I went to a junk yard and picked up the wiring, connectors, and loom sheath from a 4 door EX. I reworked the wiring in the door for the larger connector and also the wiring through the loom. The new loom and sheath shown in the following photo is from EX, after taking it apart and re-working it.

What is cool is that the holes in the leading edge of the door and also in the body are the same and you don't have to cut larger holes. It now looks totally stock and un-plugs if I have to remove the door.
Here is a photo of the finished "factory look" loom and you can judge if it was worth it or not;
Installing the power door actuators;
This photo shows the general location of where the actuator will go.
Of course, it has to go within the door.

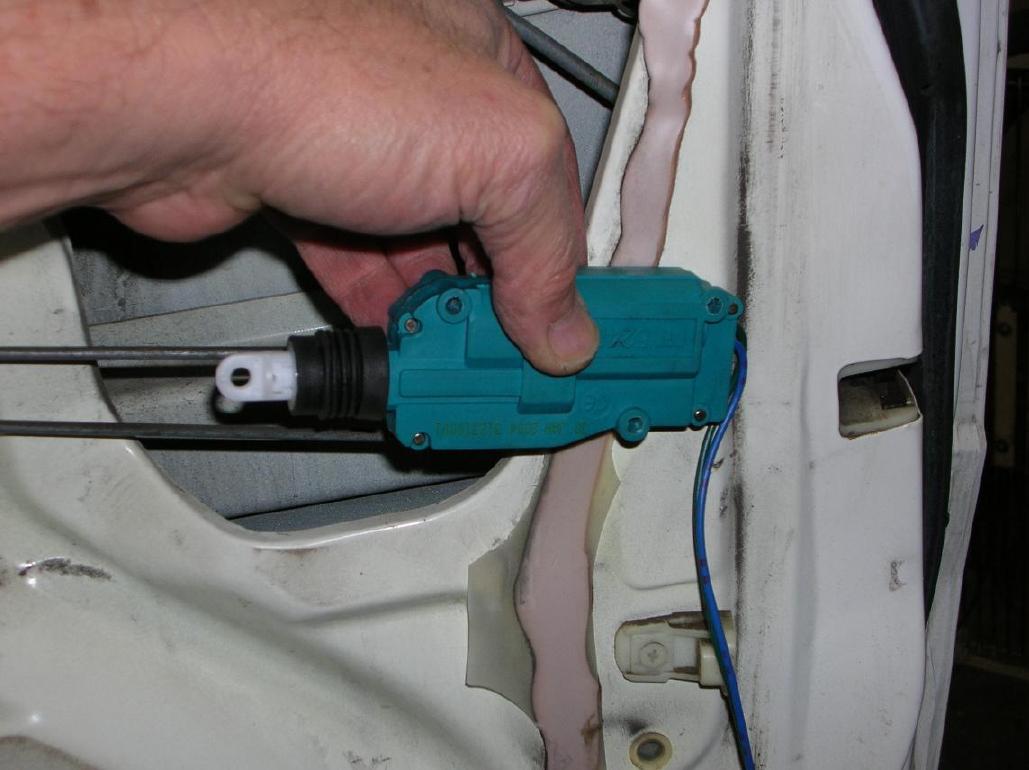
Here it's installed and connected to the lock rod.
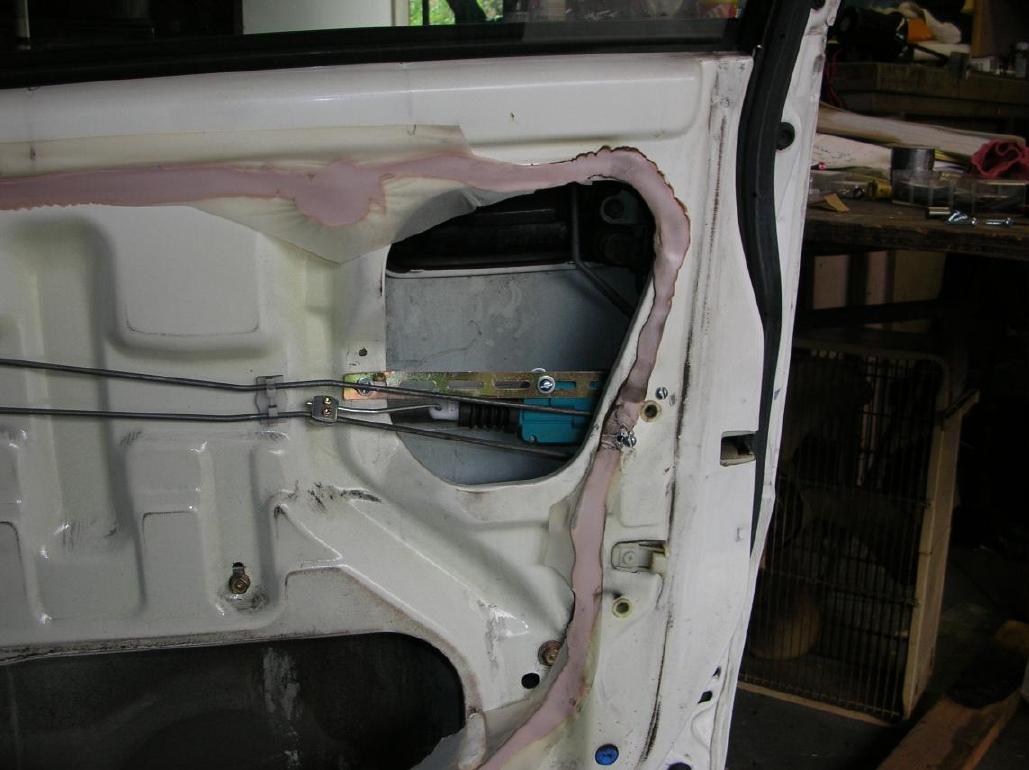
Now what you can't see is that the two bolts that go through the door panel (near the edge) are two inches long and have a spacer tube that is 0.8" long so that the actuator is held away from the upper rod. When you do this, test to make sure that it all clears the window when it goes up and down.
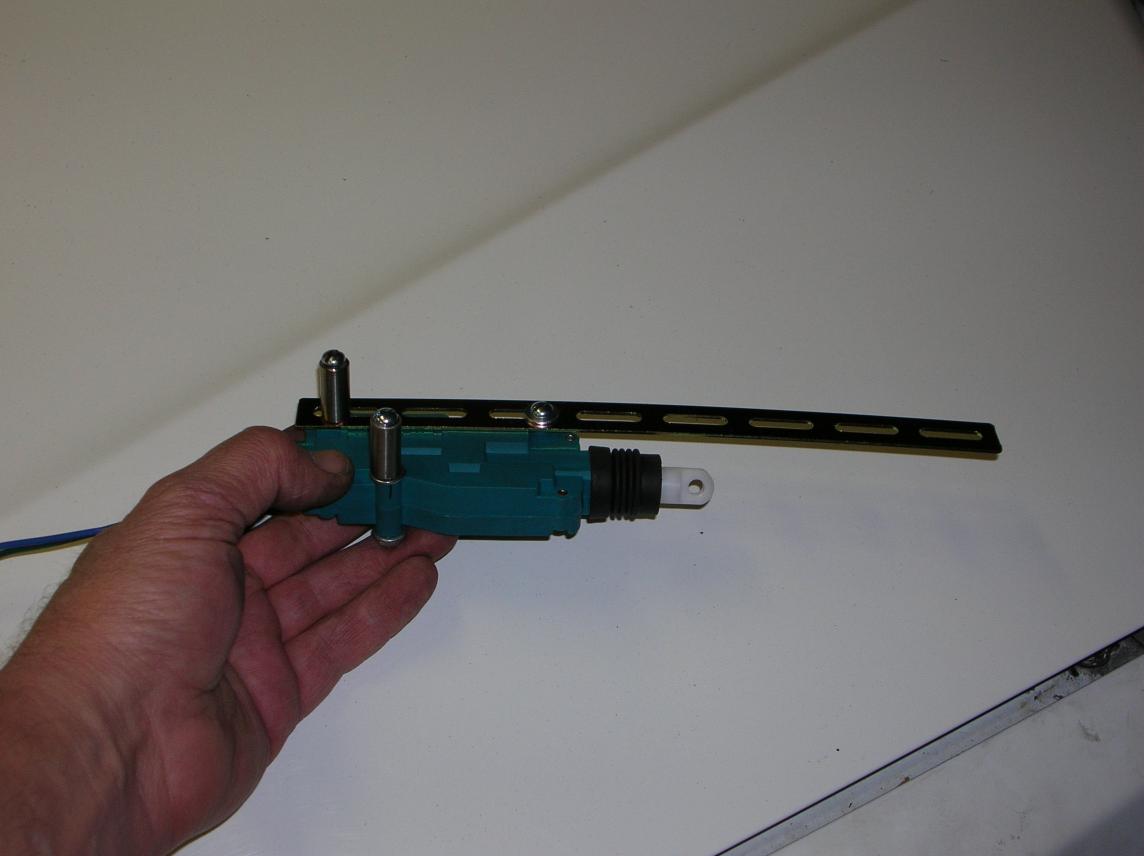
Here is a photo of the assembly with spacers and all;
Quick notes about this section;
I was sent an e-mail (dang, I forgot to ask who he was - long story! if he reads this, please contact me again!!!) and it was stated that this type of actuator is powerful enough to actually damage the lock release over time. I'm going to have to find out I guess. At least if I have to replace the interior lock lever, it's a commonly available item.
He also commented that he had used door latches off of another Honda that had the power lock mechanism in it. This may in reality be the best way to go and I'd recommend that you look at the locks used in 4 door EX's. The one thing I don't know is if the factory unit takes a longer duration pulse to activate. This could be a problem if the alarm system has too short of a grounding pulse.
This type of actuator has only two wires. At rest, both wires should be at ground. When you want it to lock or un-lock, one of the wires is connected to ground for a short period of time. Plan on having relays to set this up. Go to "the12volt.com" to see how this is done.
There is a "function" designed into the door latches that helps prevent an owner from locking his car keys in the car. This makes it so the door locks act weird if the door is open. You have to have the doors closed to test the actuators!
Modifying the door panels;
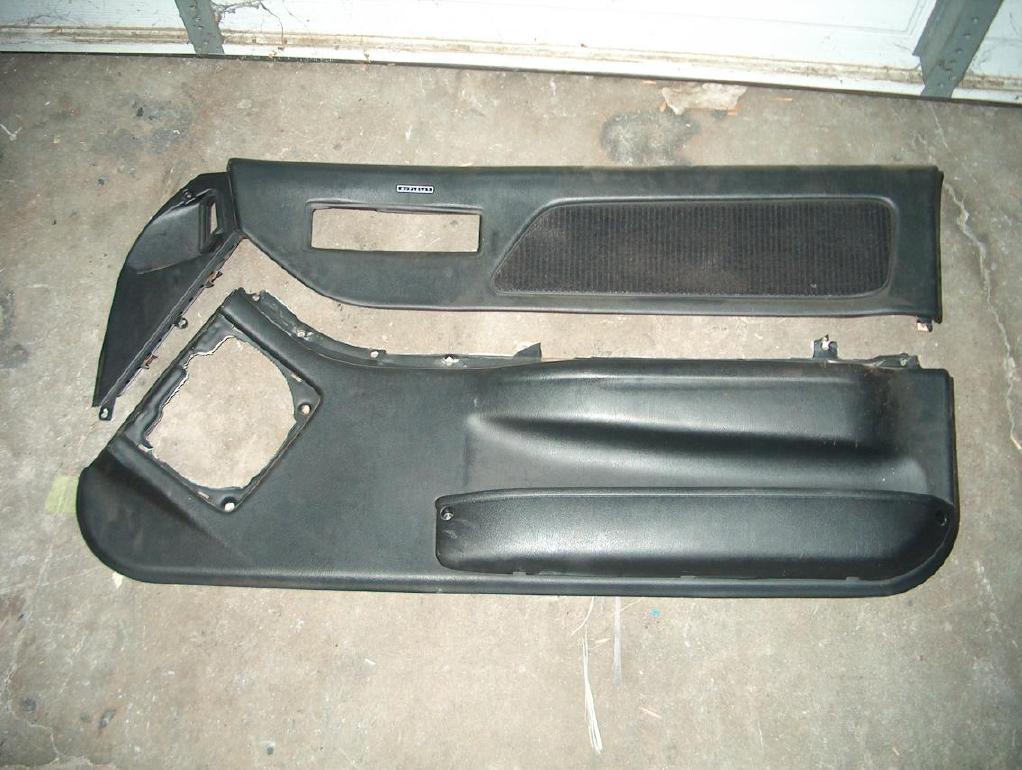
I had the door panels from the JDM doors and also my original door panels were in good condition.
What I wanted to do was use the upper section of my original panels so that they would still match the coloring of my interior and not have the large hole where the JDM switch assembly was.
I wanted to use the lower section from the JDM panels due to their not having the hole for the window crank. It was the same color as my original panels (maybe they are always black).
These two photos show the back side of the JDM panels.
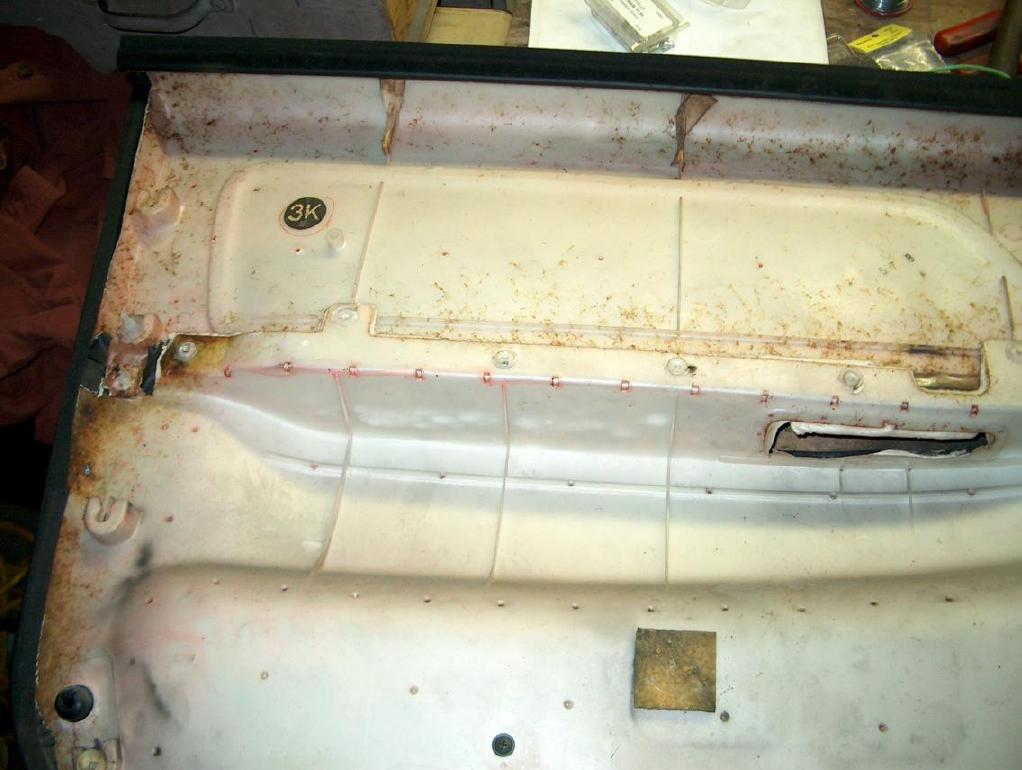
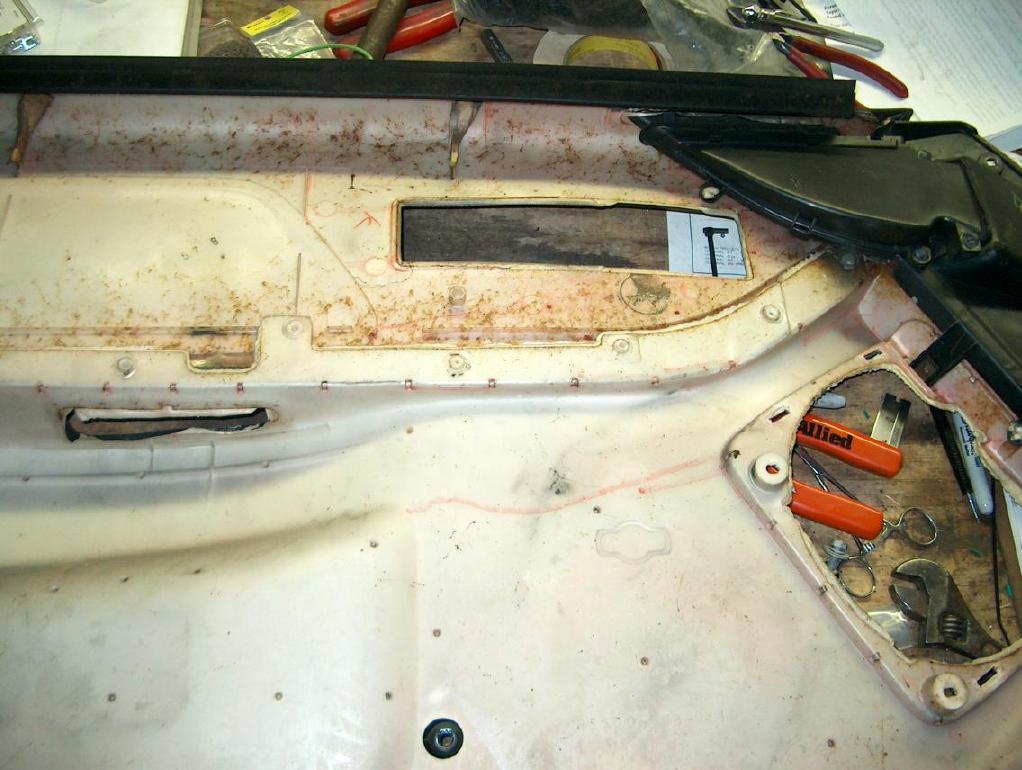
If you look close (click on the photos for a larger version), you will notice that the top is attached to the bottom by melting plastic "pins" that go from the upper section, through holes in the lower section.
If you sand off the melted over section (I used a dremel with a sanding drum), the two pieces can be taken apart. Save as much of the pin as you can!
At this point, you have to do the same thing to your original panels so that you can re-use the upper section.
The big poop about doing this is that the plastic that is used is resistant to just about every epoxy that is available out there!! And you can't really just melt over the pins as Honda did due to the amount that you have to remove to get the pieces apart.
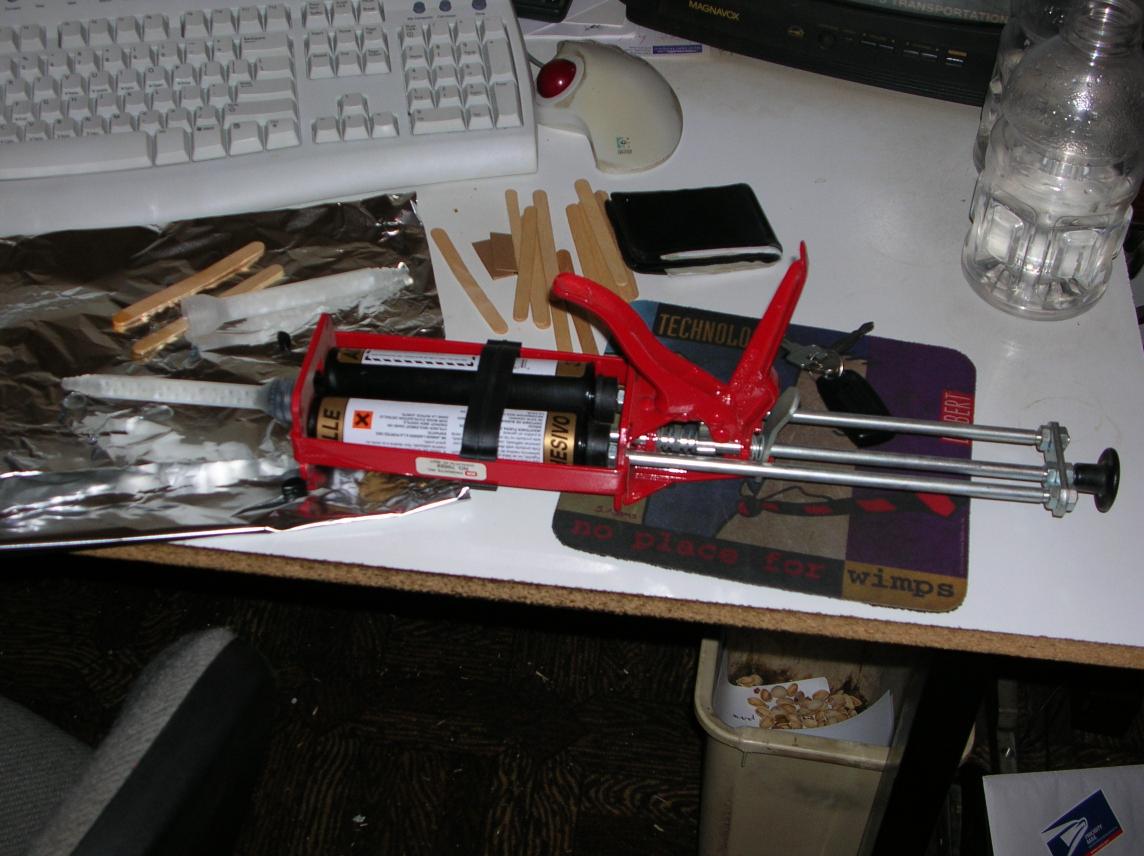
What I did was get "SEM 39987 Clear Fast Set Sem Bond" from an automotive paint supply shop. The epoxy costs about 30 bucks and comes with two "mixing" tubes. I also got a package of extra mixing tubes and that was about another 10 bucks. This isn't cheap, but it's the only epoxy that I found that would do the job, and I did check a bunch of other products. The epoxy sets in about 4 minutes.
The big stink comes when you realize that you need the SEM manufactured plunger tool to dispense the epoxy. (get ready to bend over!!) It costs around 60 bucks. I was lucky and managed to get a friend to let me borrow one (he owns the paint supply shop). So, first off ask if you can borrow one, if not, try renting it.
Here is a photo of the epoxy gun;
I glued the panels back together using the long-reach vise-grips to hold it together as I went. (you can get vise-grips like this at a welding supply shop) The vise-grips are not tight, just holding the panels snug.
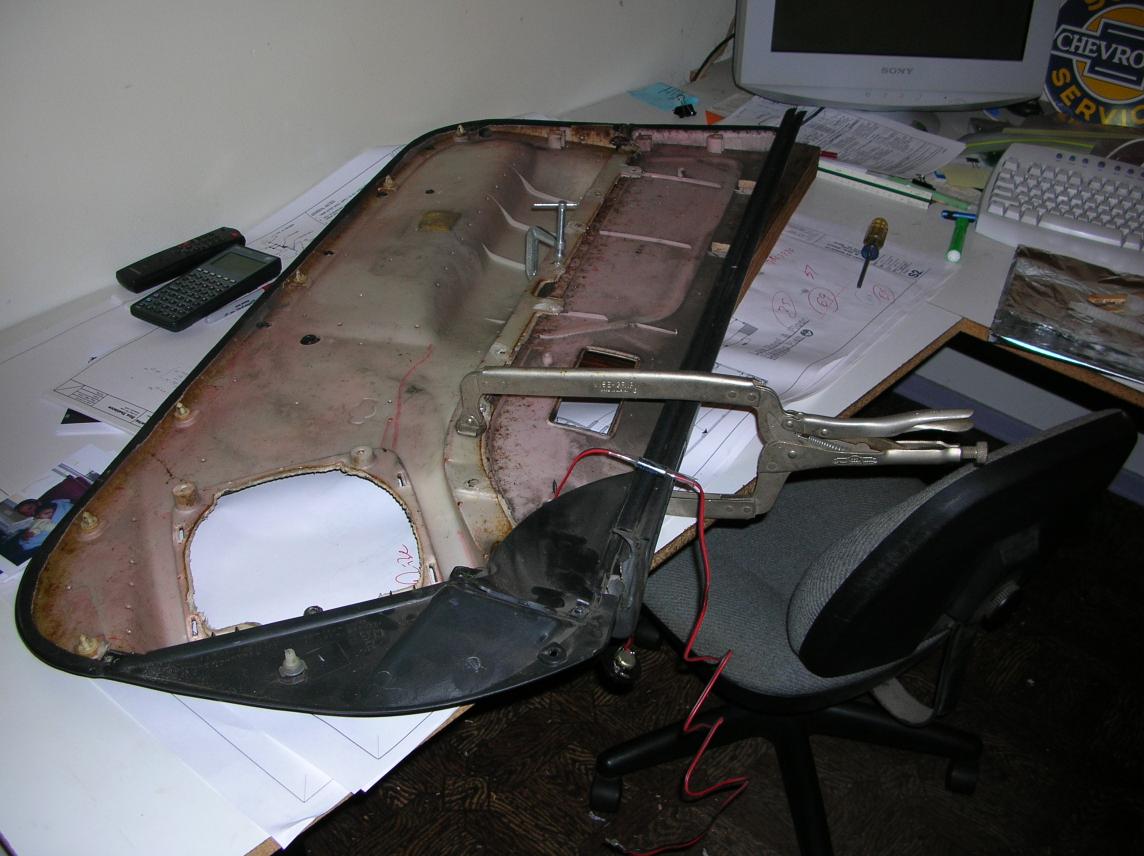
Due to only having one of the long-reach vise-grips, I couldn't glue all the pins at once. As a result, I had to use several of the epoxy mixing tubes. After a couple minutes, the epoxy within the mixing tube starts to set up, sealing the tube. I did manage to do both panels in one evening and didn't have any problem with the epoxy setting within the main body of the tube. However, I'd bet that after a day, the un-used epoxy is trashed. They don't give you a cap that you can use to seal it up.
It's only the pin locations that are epoxied.
Here is a photo of the finished door panel, installed. No holes from the window cranks!! (that circular object forward of the door release is a tweeter that a prior owner installed)
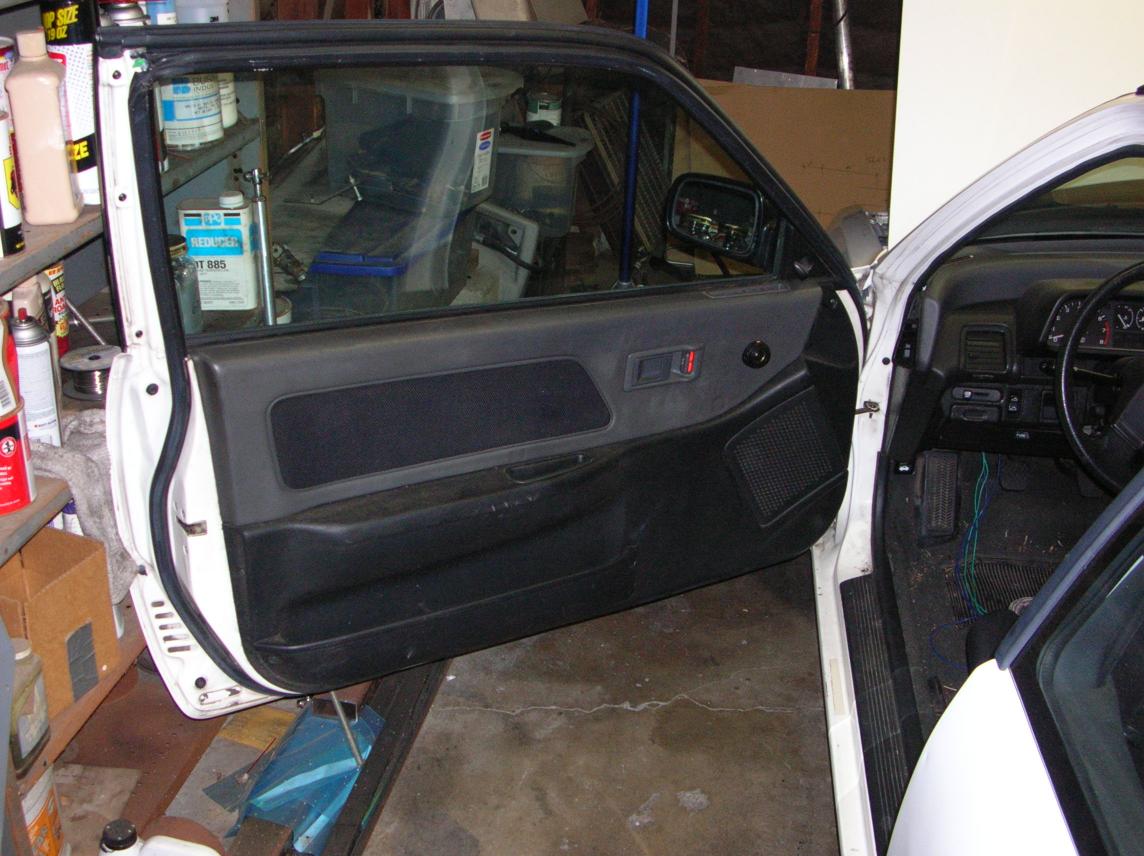
It looks totally stock and clean. (it is dirty in the photo)
Closing comments;
1. Test your wiring as you go! That way, if there is a problem you will know about where it is. (that leads to the next comment!)
2. The factory door latch has a function that helps prevent you from locking the doors if they are open. I didn't know about this and it caused me go crazy while trying to test the door lock actuators!!!!!!!!!!!! I ended up having to ask a friend (Tom at Lightning Motorsports) who had a business doing alarm installations what I was missing. Doh, when the door is closed, they worked just fine.
3. Not all of the wiring is done yet due to having to hook it up to the alarm.
4. The power window switches that I used are designed to directly power the windows. If you use something else, think about using relays to handle the current.
5. When in doubt, add a fuse!
6. The USDM power window doors (4 door EX, as an example) have a control unit mounted in the drivers door. I don't know exactly what all it does and didn't use it. The power window switches do not have an automatic "full-up" function (however the alarm will).
7. While the doors are all apart, it may be a good idea to think about doing the EX external door handle trick. This is where you use the rear door release handles (exterior) from a 4 door EX and get rid of the door lock key. This would make it harder for a thief to break into your car with a slim-jim. To keep the car stock looking, you could also just remove the linkage within the door that goes from the key tumbler assembly to the latch mechanism.
return to my site's entry page
Wes Vann