Building "Bling" Fuel Lines
Originally written; April 22, 2006
To start off;
All of this is of no performance worth! It's just a matter of Bling.
I'm writing this showing the different variations that I worked through.
Nobody makes the correct adapter!
There simply isn't a correct adapter to attach to the fuel line that comes out of the firewall. The adapter that some people want to use is a metric power steering adapter and it's just wrong!
The drawing on the left is a standard automotive double flare. The drawing on the right is a "power steering" tube end and those circles are the rubber o-ring seal. To use a fitting that is intended for a rubber o-ring on a double flare is wrong and it's safety is questionable.
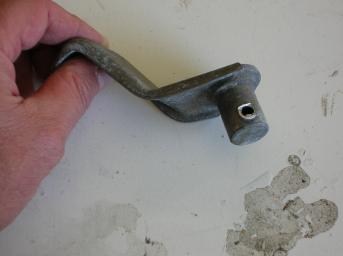
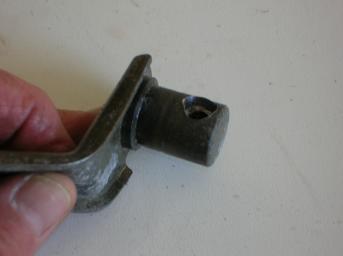
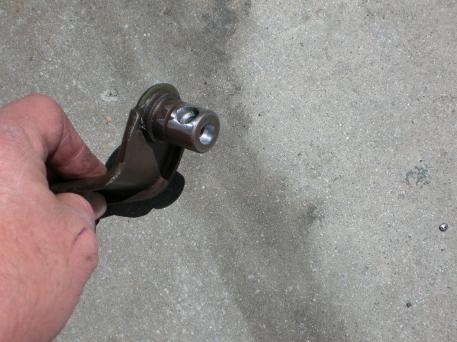
Honda also throws out another zinger and that's the fact that they use two different style nuts on the fuel line. Some of the nuts have threads all the way to the end and others don't. You will not know which one you have until you remove it. Here is a photo (taken by Chase Mcmaster, aka EF8kid) that shows the one that isn't threaded all the way.
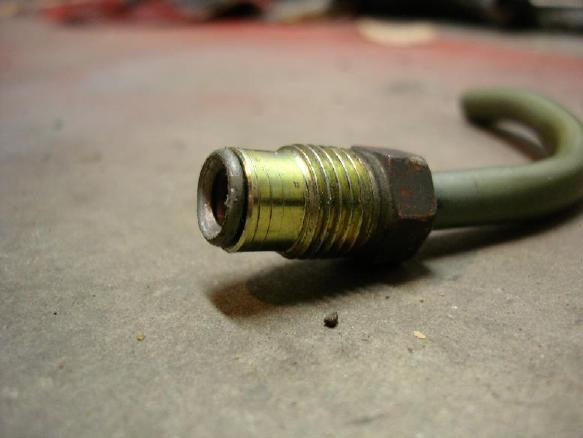
What's a booger is that if you want to make an adapter like I did, you have to make sure that the original part is the same style as the nut already on your car. That's assuming that you are getting the bracket out of a junk yard so that you can keep your car running until ready to swap over everything.
Another thing that needs to be said is that you should always make sure that the fuel line is supported from vibrations. That's why I made the adapter that retains the mounting to the firewall!
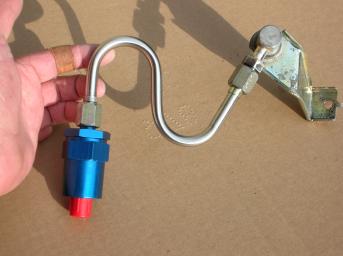
The finished installation photos;
I'm putting the finished photos at the top of this page so you can get a feel for what I was trying to do.
Notice that the fuel line is still supported by the bracket attached to the firewall. What can't be seen is that the stainless steel line is solidly attached to the original bracket / adapter.
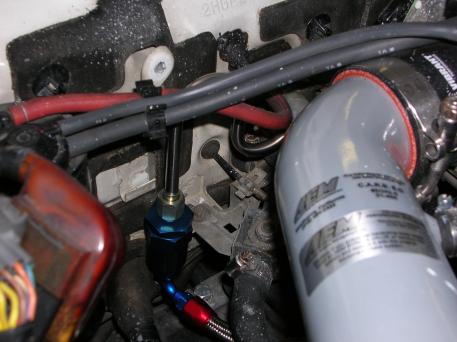
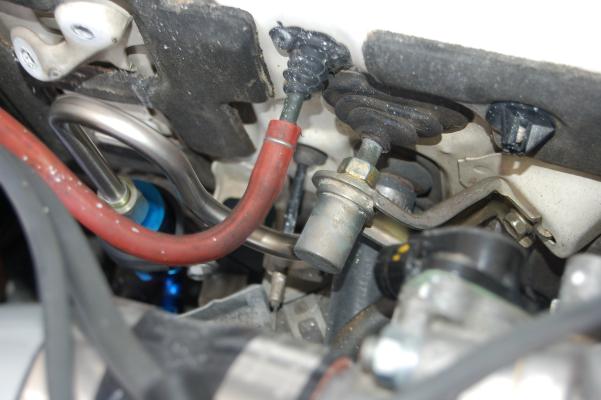
Here you can see the location of the fuel filter. There are two reasons for wanting it here. One is that I could make a bracket supporting the filter off of the heater control bracket. The other is that I wanted the braided line to run down low (due to planed changes in the future).
This photo shows the Adel clamp and small angle bracket I used to support the fuel filter.
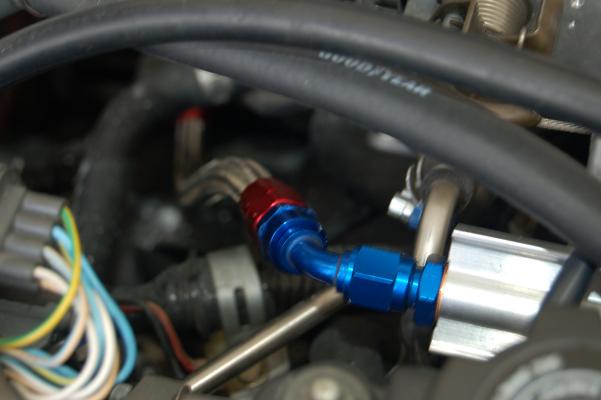
And finally, a photo showing the braided line hooked up to the fuel rail.
How did I do it;
I went to a junk yard and bought a couple hose lines with firewall attachment brackets. (some of the photos shown are actually from one of the units I made up for a friend named Ian)

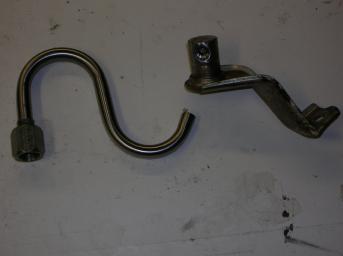
First off, cut off the rubber hose. Then cut off the existing metal tube fairly close to the body of the bracket.
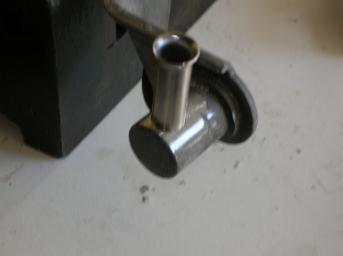
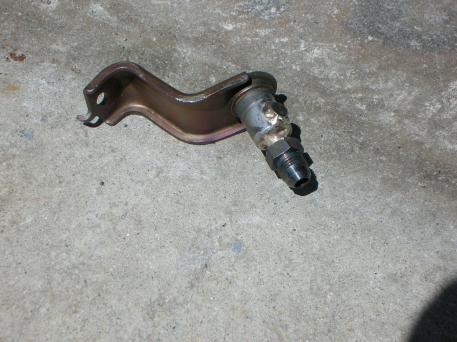
The existing tube is drilled out to 3/8" diameter, about 1/4" deep. Into this a short section of stainless steel tube is inserted and silver soldered in place. (the flare shown is just due to it being on the section of tube I grabbed, it is cut off latter)
And then finally, an #6 AN adapter is silver soldered onto the stainless steel tube (after cutting off the flare shown in the prior photo). If you can't find a place that will sell you the "weld-on" AN fitting, just make one by from a steel "bulkhead fitting" by cutting it short and then drilling a 3/8" hole.
Here is where it starts to make a little more sense as to what I'm trying to do.
When I make up hard-lines, I start with mild steel tube, it's cheap and easy to work. Once I like the shape, I make the final item out of stainless steel (bling only).
On the left you can see two different "S" curves I tried.
The dark green tube is mild steel and I just bought a length from a local auto parts store. Just tell them that you want a length of 3/8" "brake line". The name really bugs me! At one time it was called BundyFlex and that's the name I like. Have you ever seen a brake line that is 3/8"??
At the end of the hard lines is what's called a "B" nut. It's a sleeve and also the outer nut. You slide the sleeve and nut on the tube and then do the flare.
The problem that I had was that the curved section came too close to the heater control valve, so I went to the next variation.
There is a problem in fabricating tubes in that the curve of the "S" tube has to have a straight section before you can install the B nut and then flare it! In order to get around that, I decided to just solder the "S" tube directly to the adapter / bracket.
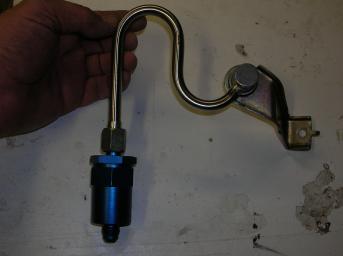
So, here is what I ended up using. It's all one solid piece (not counting the filter). In the photo on the left I'm showing the original shape and I decided that I wanted to mount the filter lower down, so I made up the tube shown on the right. If you look at the photos at the top, you can see how the location of the filter was critical to providing a support bracket for the filter.
Here is one reason I'm not building these for others; I had to test fit the assembly several times in order to correctly figure the desired location for the fuel filter. This all varies from car to car!!
On to the fuel rail and hooking it up;
My engine is a 95 GSR B18C and I've always tried to keep it "legal". One issue here in California is that ALL aftermarket fuel rails are not considered a legal modification (Ya, it drives me crazy too!!).
The original GSR fuel rail looks like a Battlestar Galactic scale model! So, I contacted one of my friends that knows a lot about "factory"' bling (Eric K) and he told me about the factory 99 SI fuel rail. It's a nice clean item and yet is still factory, so shouldn't be considered illegal.

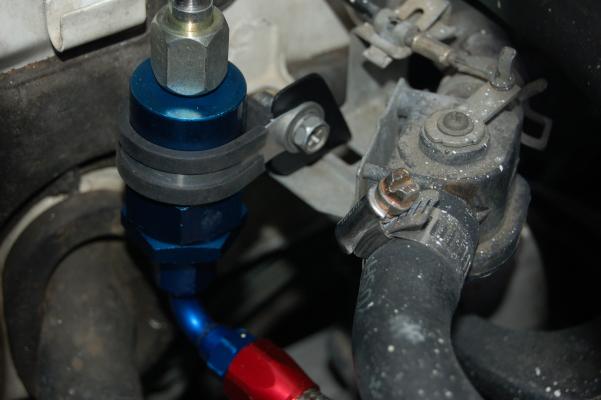
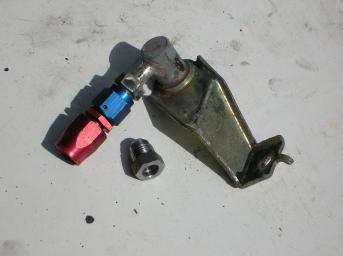
Functionally, the 99 fuel rail is a direct replacement with the original rail. (I'm not going to go into how to swap fuel rails) On the input end of the rail is a short brass threaded section that has to be un-screwed. I used a tap to clean up the threads before using the adapter shown in the next photo.
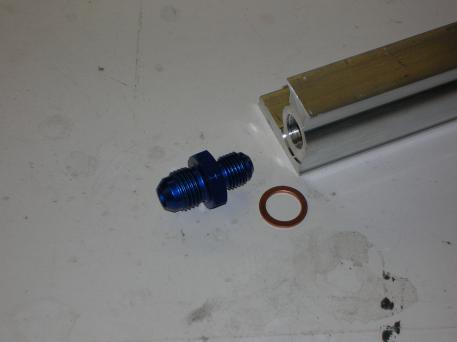
The adapter has 12mm x 1.25 threads on the part that screws into the fuel rail and #6 AN on the other side. Due to the straight threads on the fuel rail, a soft brass washer should be used to seal correctly. (the adapter shown has a tapered end that could also be used on a flare tube, but that isn't applicable for this installation)
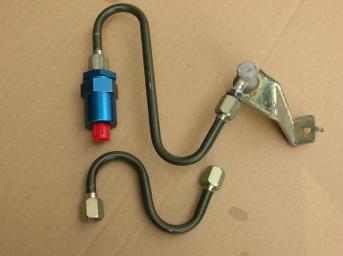
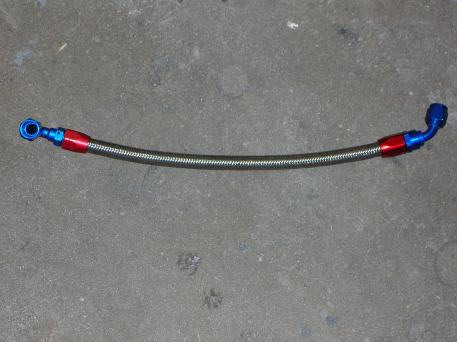
And finally, here is the braided line with AN fittings I made up;
I got to thinking about other "options" could be done and I came up with this;
Lets say that you don't want the line coming out of the side of the adapter / bracket, but want it coming out the end (in line with the tube coming through the firewall).
Here is what you can do;
Drill out the original tube just like what I did before. Then drill a hole in the end, stopping once the drill bit can be first seen through the side hole. You don't want to drill all the way through or you will mess up the seal surface needed for the original firewall tube it's going to be attached to.
Then the side hole is filled with a short piece of 3/8" round stock, silver soldering it in place.
On the end, a short section of 3/8" tube is silver solder in place along with a #6 AN adapter.
Here is another option;
Lets say that you want the hard-line coming out of the adapter in a different direction?
Buy two of the hose units from a junk yard. On one of them, cut off the firewall attachment bracket, saving the center section. On the other, cut out the center section, saving the attachment bracket.
Then press the saved center section into the saved firewall attachment bracket with the hose line pointing in any direction you want. Silver solder the two together if the press fitting isn't tight.
Closing comments;
Any time you play with fuel lines, you should always check it out under pressure before driving down the street!
return to my site's entry page
Wes Vann