Installing Koni SP3 Shocks
October 31, 2004
To start off;
This is actually the second time that I've done this. That is why some of the photos don't make sense.
The first time, I was swapping from stock shocks. This time, I was swapping out Tokico "blue" shocks.
Even if you are doing just the fronts (or rears), read the whole page! Some of the photos that may be taken while doing the rear, may also apply to the fronts.
In both installations, Neuspeed "sport" springs were used. Now a days, they paint them green. My current car had older ones on it already and they were painted black.
I'm not going to say things like; "remove the wheels", or "use jack stands while working on the car". I'm going to assume that you have the smarts to figure out that sort of stuff.
All of the photos are "clickable" to a larger version.
Why do I like Koni SP3 shocks?
These shocks are specially made up by Koni for Neuspeed. I order them up from Lightning Motorsport.
What sets them apart from normal Koni shocks that would be for my car is that they are shorter in height and also have 5 different "grooves" that allow for different height settings.
Koni shocks are adjustable for stiffness and can be rebuilt by the manufacturer.
Doing the front shocks;
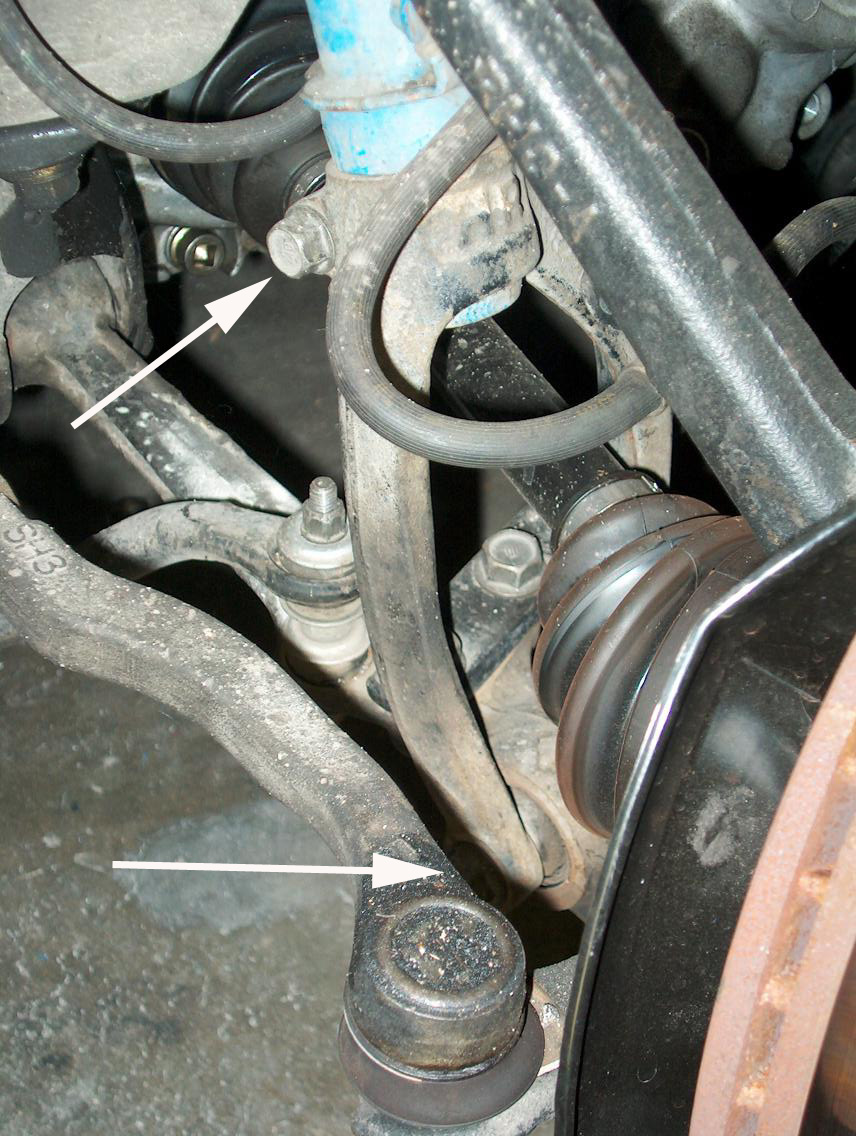
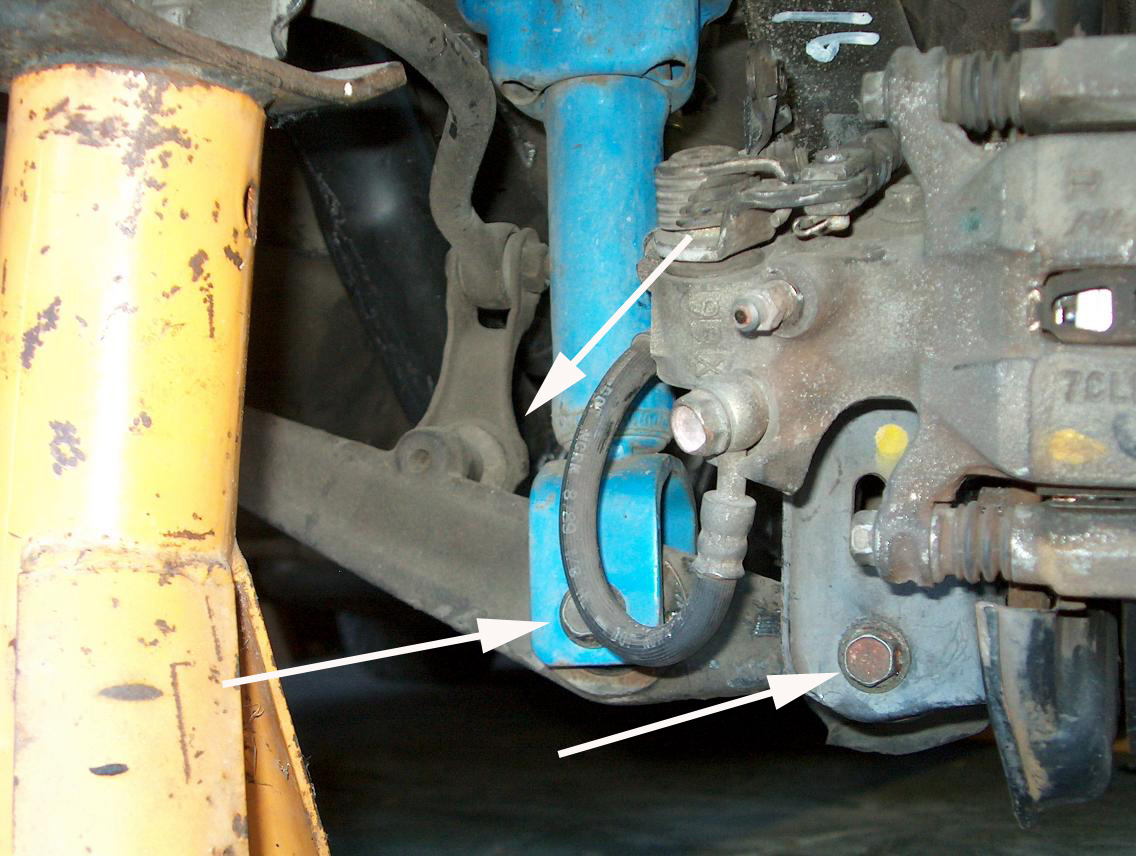
Under the car, remove the bolts that hold the brake lines to the shock body. Don't disconnect the ends of the line!
Also under the car, you want to remove the "pinch" bolt where the shock "fork" bolts to the shock and also the bolt that holds the shock fork to the lower control arm.
Pull the shock fork downward, away from the shock. It should fall free and you can remove it.
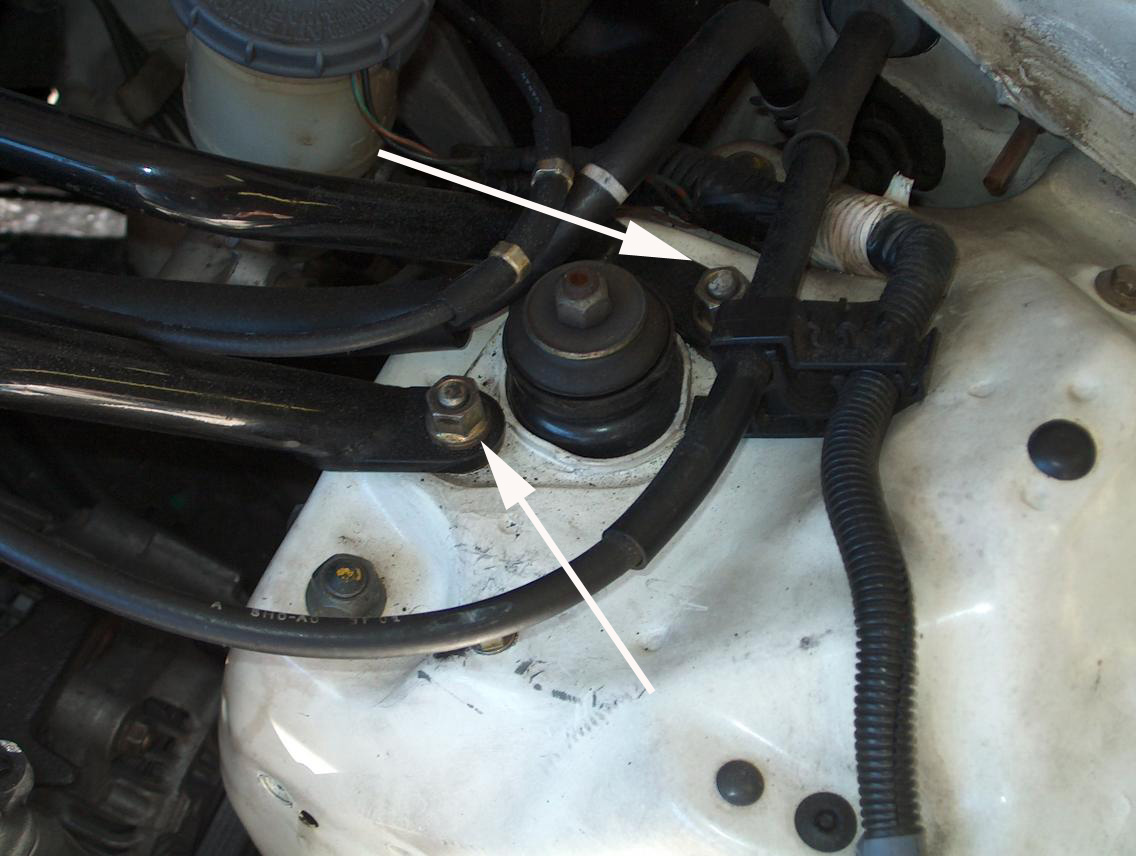
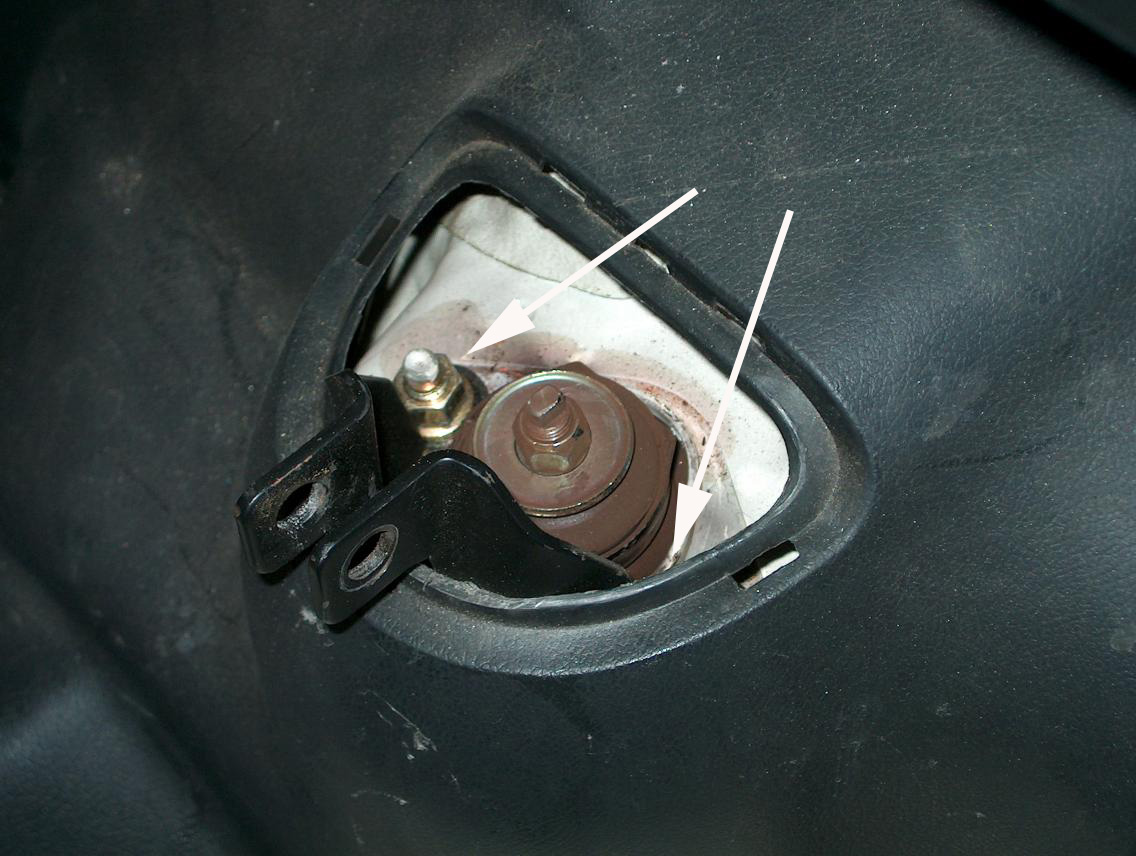
From within the engine compartment, remove the two bolts that hold the top of the shock assembly. Do not remove the nut at the top of the shock! The shock assembly should fall free and can be removed.
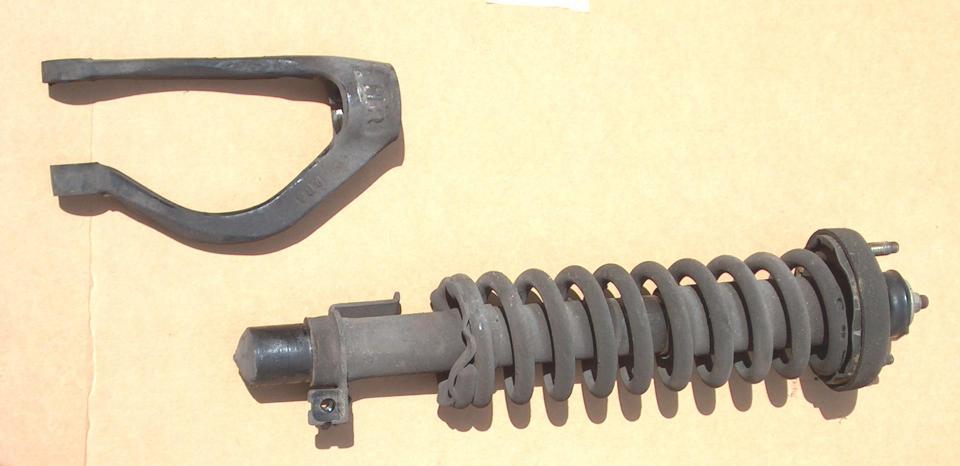
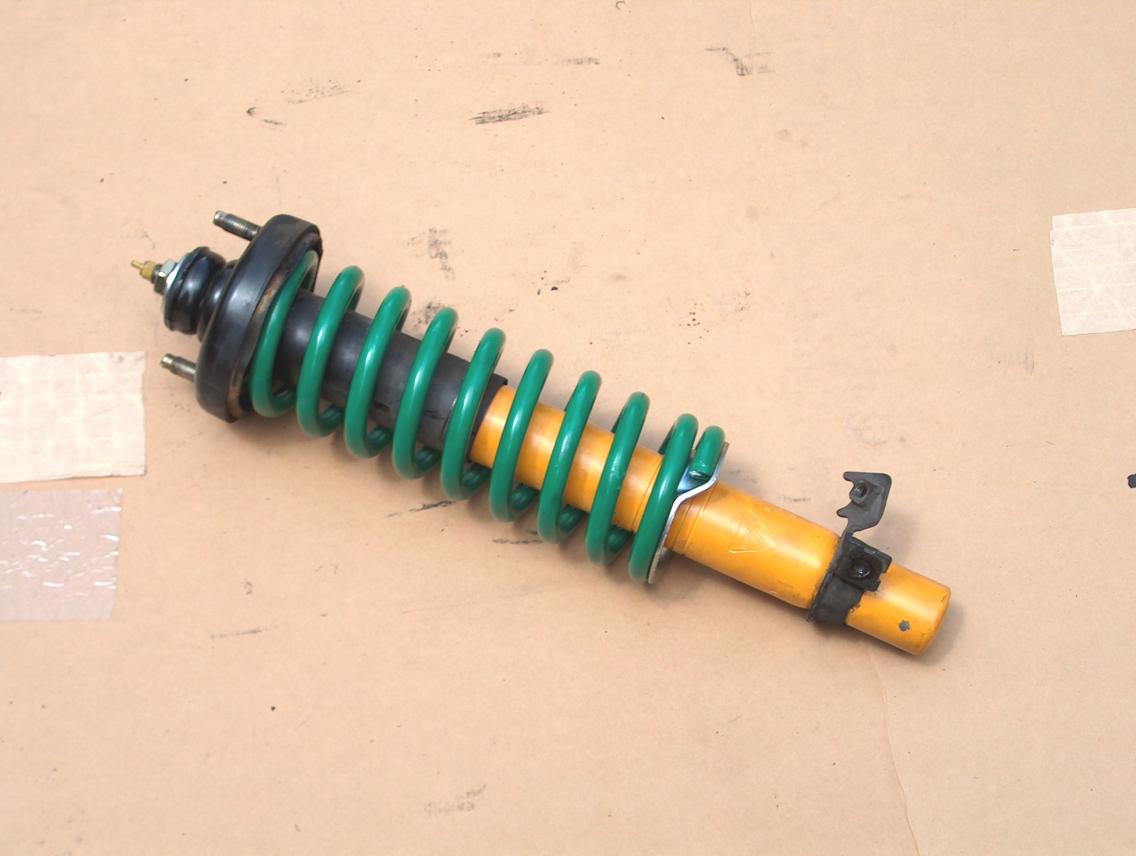
Here is a photo of the shock assembly and also the shock fork; (this is from the first time that I did this and shows a "stock" shock)
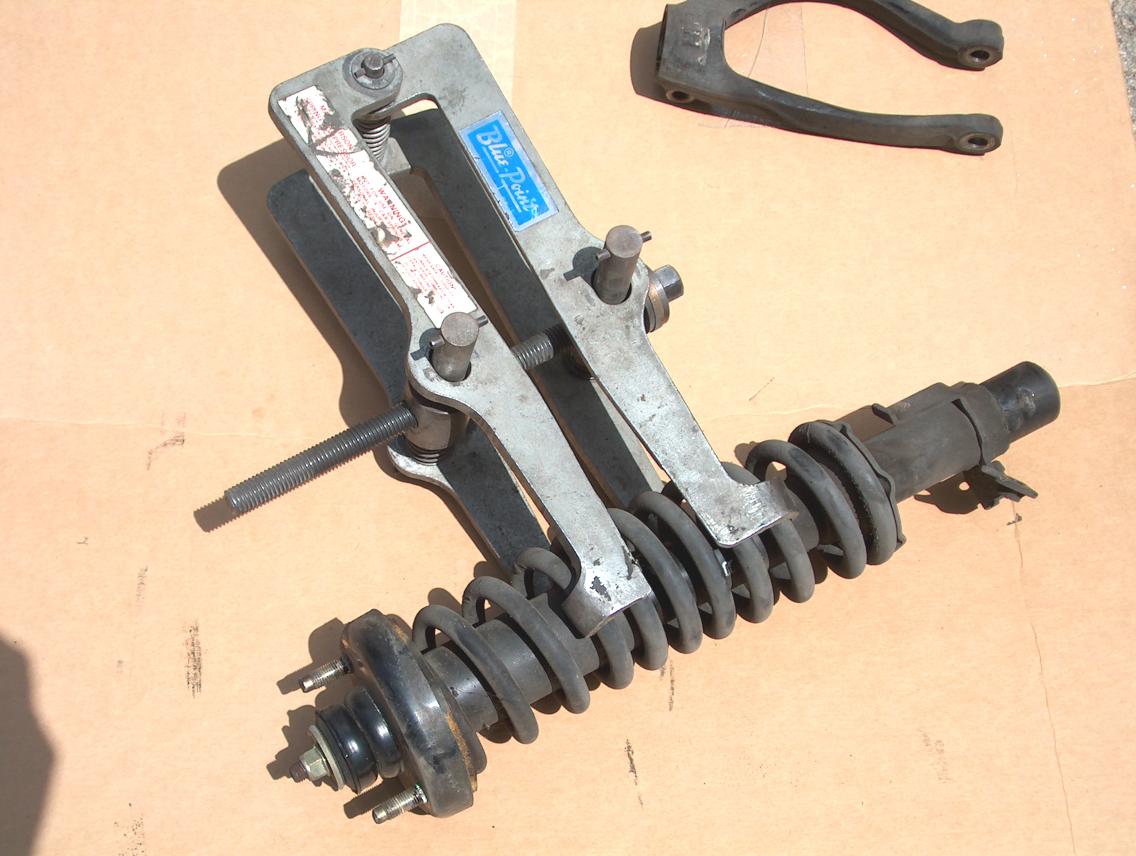
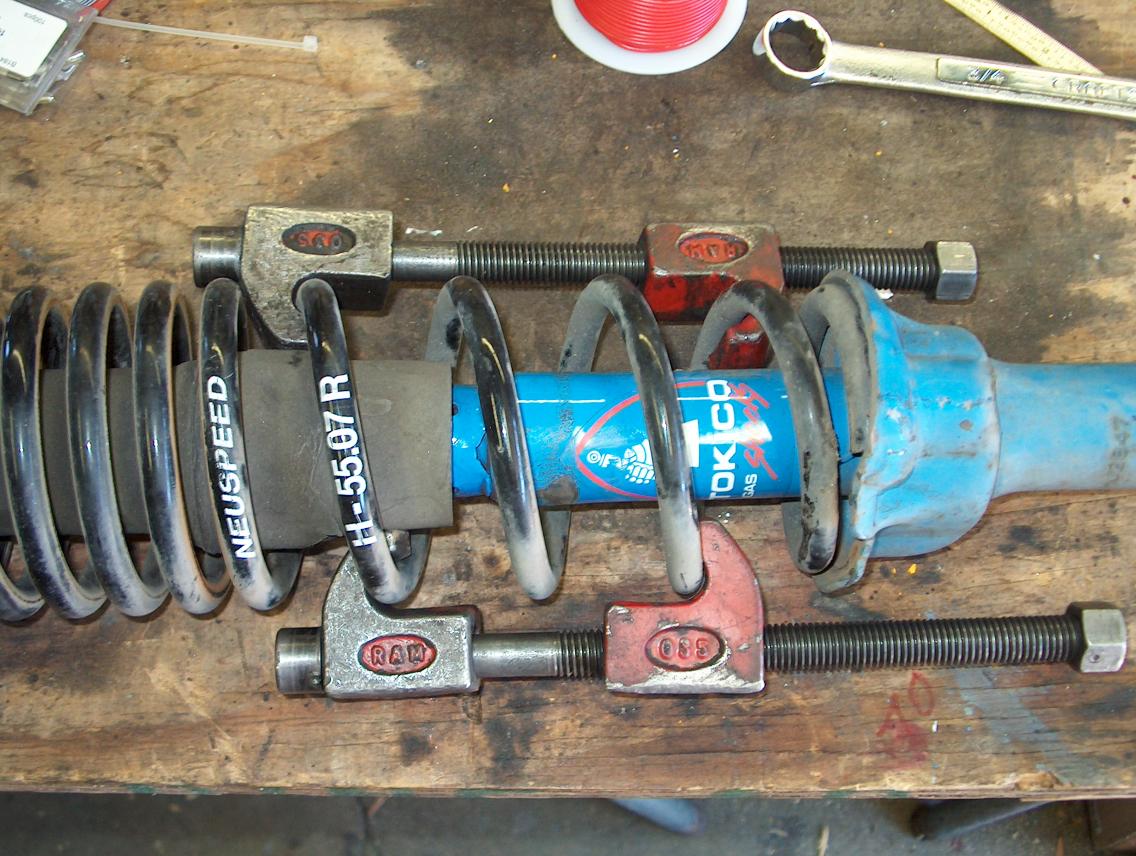
Using a spring compressor, tension is removed from the top cap and then the nut at the top of the shock rod can be removed. This photo shows one type of compressor that I have used. In a latter photo I use a different type.
Now this next photo is real important while doing the fronts!!
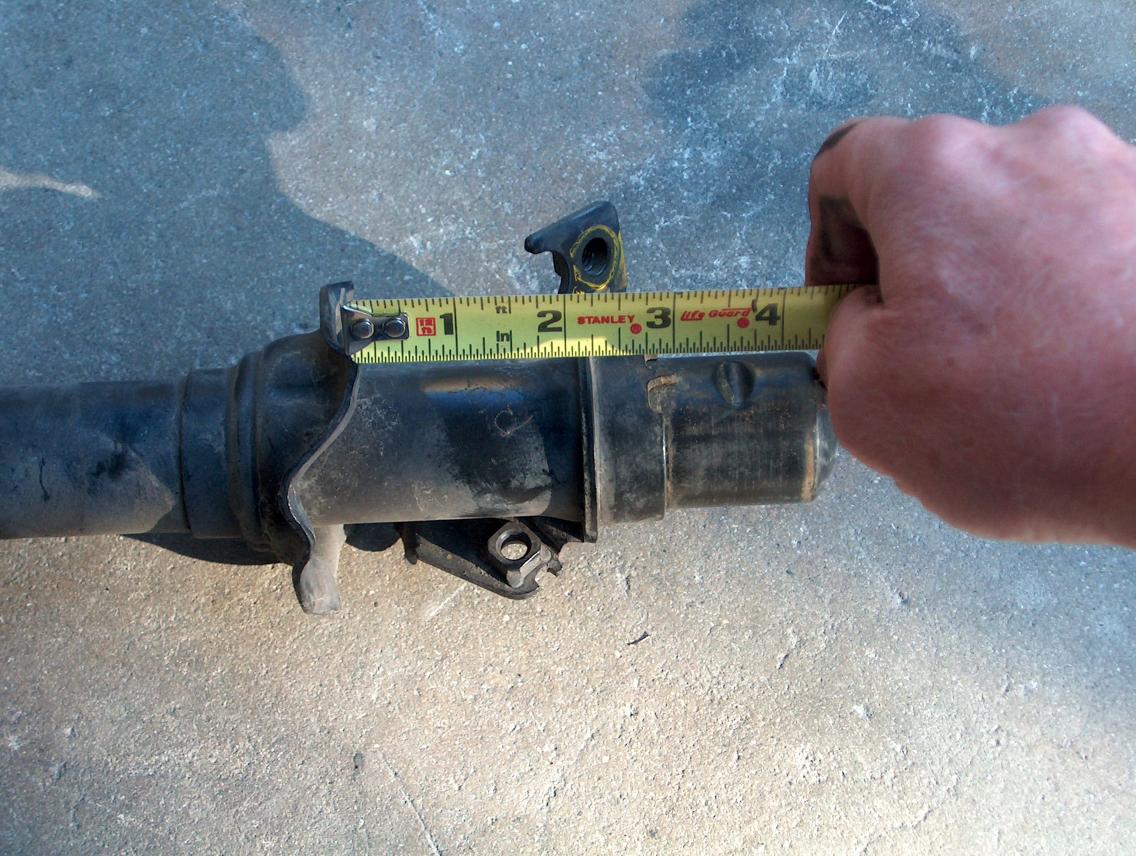
The reason for this photo is to show that you have to measure two different things. At about the 2 1/2" point is a piece that I'm going to call the "collar". This collar is removable from the stock shock and is required for the Koni shocks. Before you remove the collar, you want to measure from the bottom of it to the low point where the spring will sit in the spring cup. You also want to measure from the bottom of the collar to that "divot" in the shock body (at about 3 3/4"). The reason for the divot is to clear the bolt that goes through the shock fork.
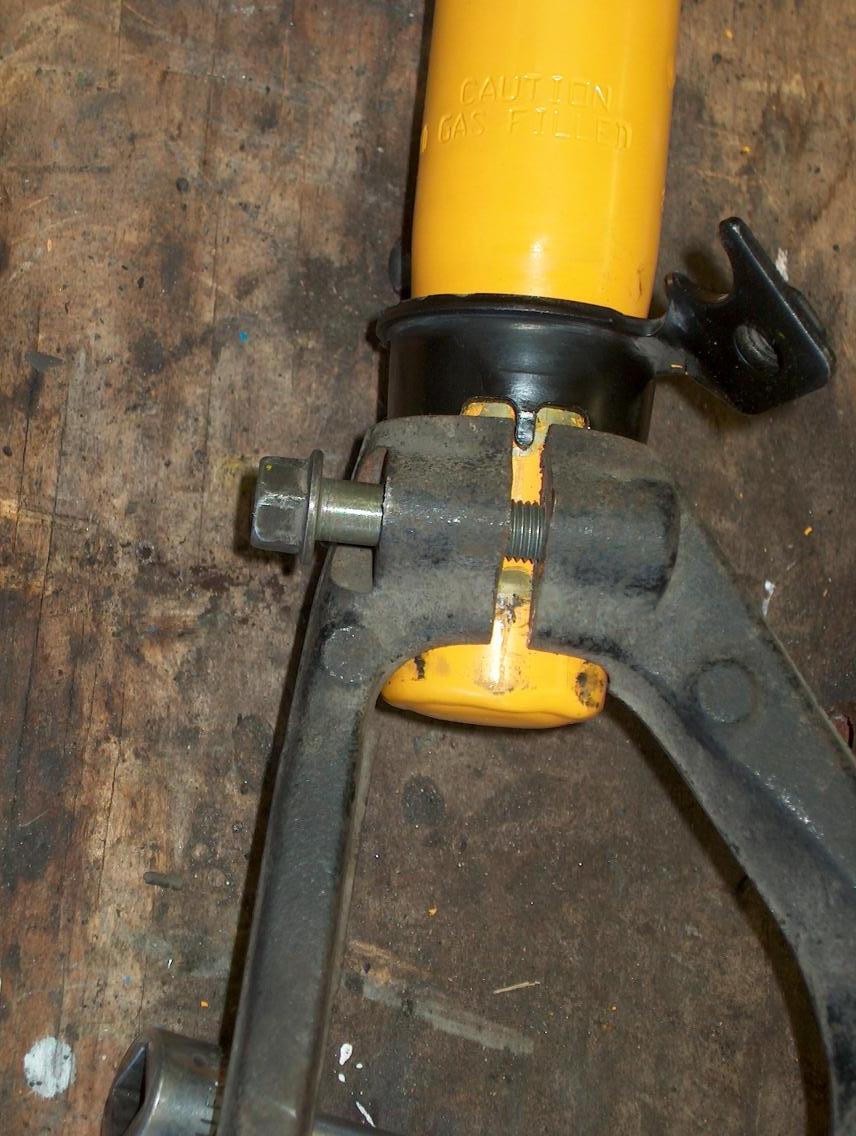
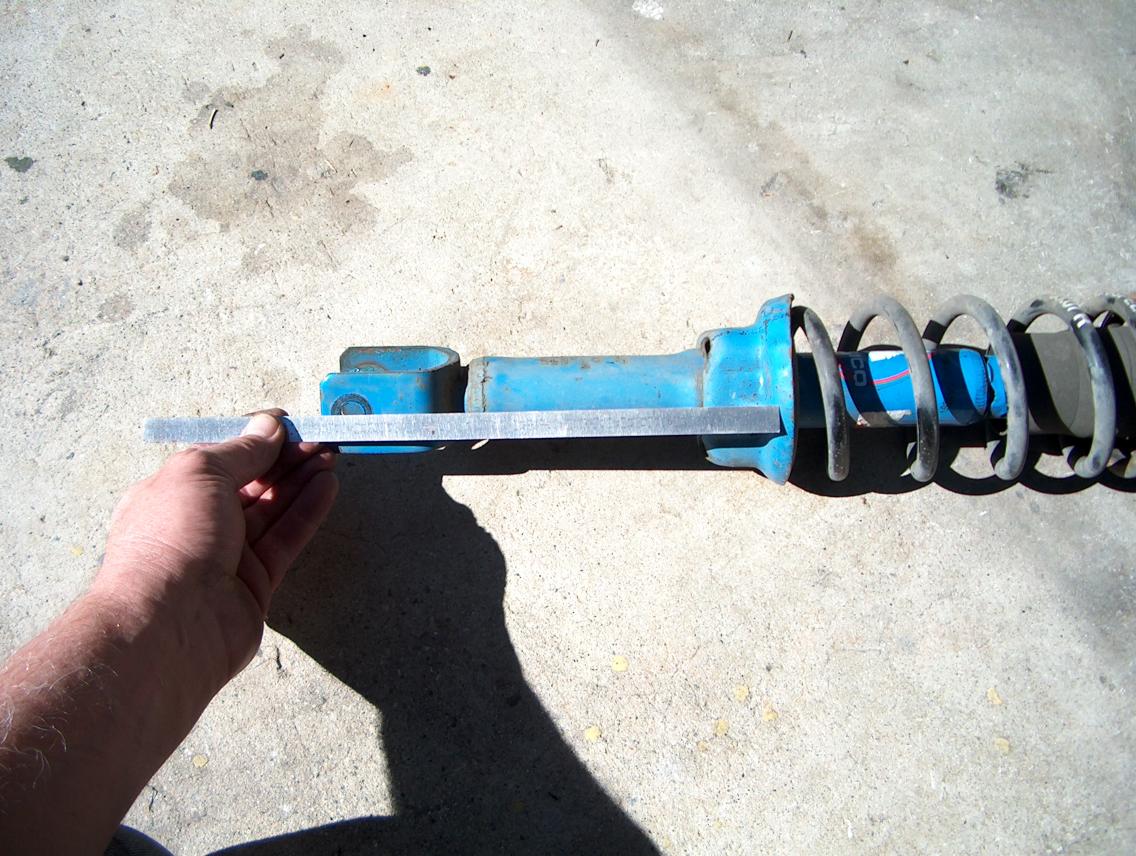
This photo is a little out of sequence, but I have to show what has to happen prior to explaining how. The collar has to be removed from the old shock and installed on the new shock (they were not removeable from the Tokico shocks and I had to buy a pair of junk shocks just for the collars). Look real close and you will notice that there is a little "tang" on the collar and that has to go between the gap in the shock fork. It is pointing directly at the divot that is in the shock body. If all this isn't correctly positioned, then you can't install the bolt as shown!!
Now here is the part that is a major bitch on doing this install!!
The collar is easy to hammer off of the original shock. The problem is that it's way too tight to easily hammer on the new shock.
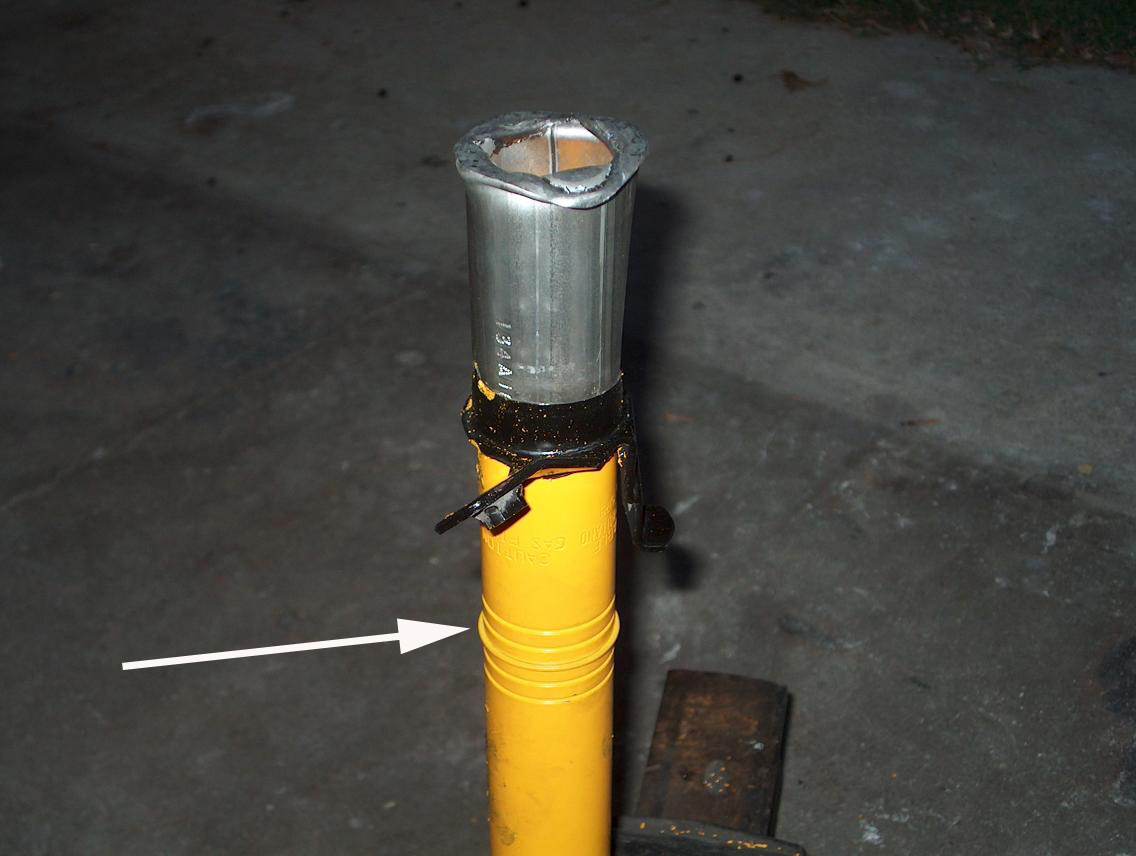
After making real sure that the tang on the collar is pointing at the divot on the shock body, I started hammering it down onto the body. In order to do this, I took a section of muffler pipe and cut out a small area to clear the tang. Then, with the shock body supported, I banged on it with a big f-ing hammer. You have to do this until it's on per the measurement that you took before removing it from the original shock. How hard do you have to hit it, dang, look at the damage on the top of the pipe. And, yes, I did put grease on both items so that it would go together easier.
Once this is done, do a test fit of the shock fork and pinch bolt (as shown in the prior photo). The problem is that the shock fork is too tight to easily slide on. What I did was hammer a screw driver into the gap and let it sit around for a while. This allowed it to slide on if promptly put on. The gap does close over time to it's original size.
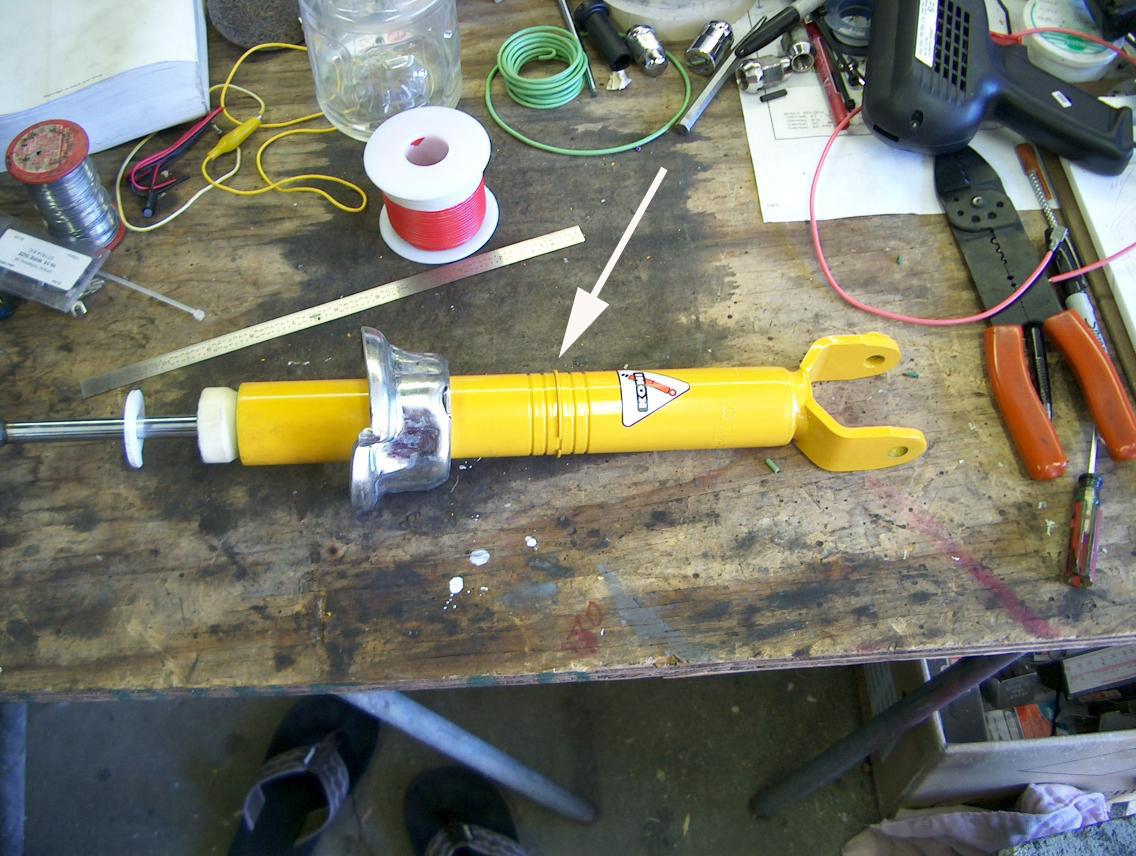
The arrow in the photo above shows the snap ring and grooves in the shock body that allow you to adjust for height. The center groove is for stock height if you are using stock height springs.
Slide the spring seat onto the body until it sits on the snap ring. Then measure from the low point on it to the bottom of the collar. Compare this to the measurement that you got from the original shock. When I was changing from the Tokico shocks, I wanted to raise the car slightly, so I ended up moving up the snap ring by one groove.
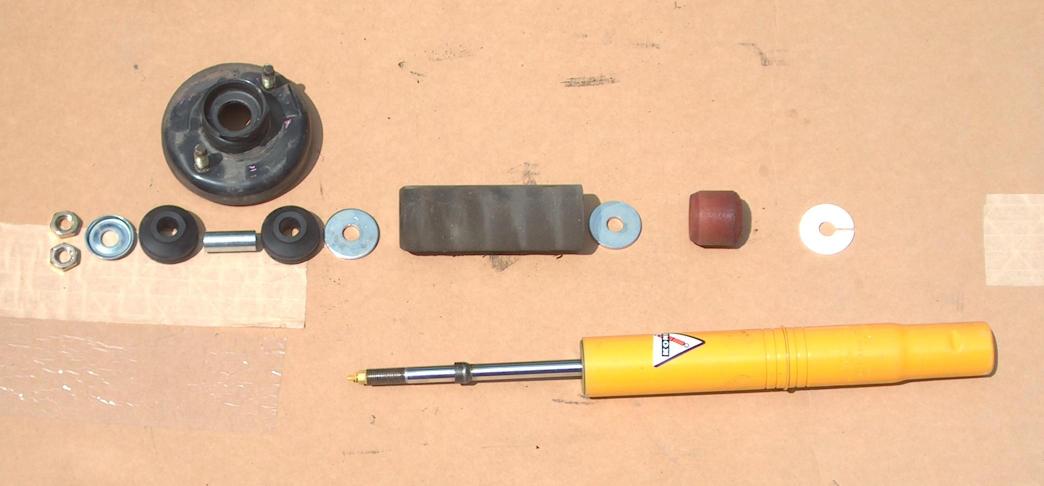
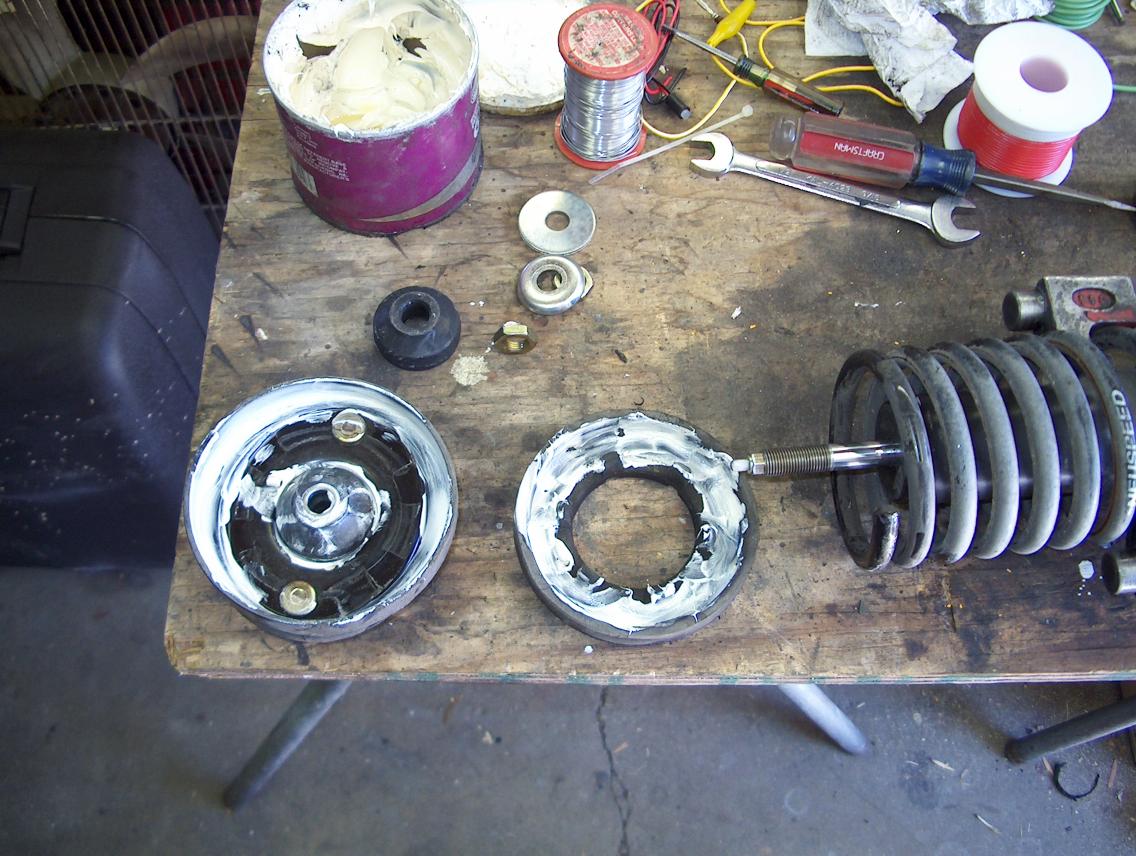
This photo shows most of the parts required to put it all back together.
I'd recommend that you get new shock bushings (two at each shock) from Honda. I'd also recommend that you get new "bump stops". The old bump stops just tend to rot apart!! I just get a total of two bump stops and cut them in half.
The dust shield (the black tube in the photo) has to have it's hole opened up. I used a 31/64" drill so that it's as accurate as possible. If you use a rat tail file to do this and it's not perfectly on center, the shield can rub on the shock body.
There are two washers shown in the photo and they are provided with the shocks. It's important to note that the outside diameter is not the same. The smaller one has to go inside the dust shield in order to position it correctly.
Here is the assembly all ready to do back into the car. And once again, I hope that you have had the shock fork sitting with a screw driver hammered into it.
Putting it all back together is just the reverse of taking it apart.
Doing the rear shocks;
Under the car, remove the three bolts shown in the photo shown below. (the bolt that you can't see is for the sway bar if you have one) This will allow you to swing the lower control arm downward and out of the way.
From within the passenger compartment, remove the two nuts that hold the top of the shock assembly. (that bracket in the photo is for the cross-brace) One of the nuts is hidden from view. Do not remove the nut on the top of the shock shaft!
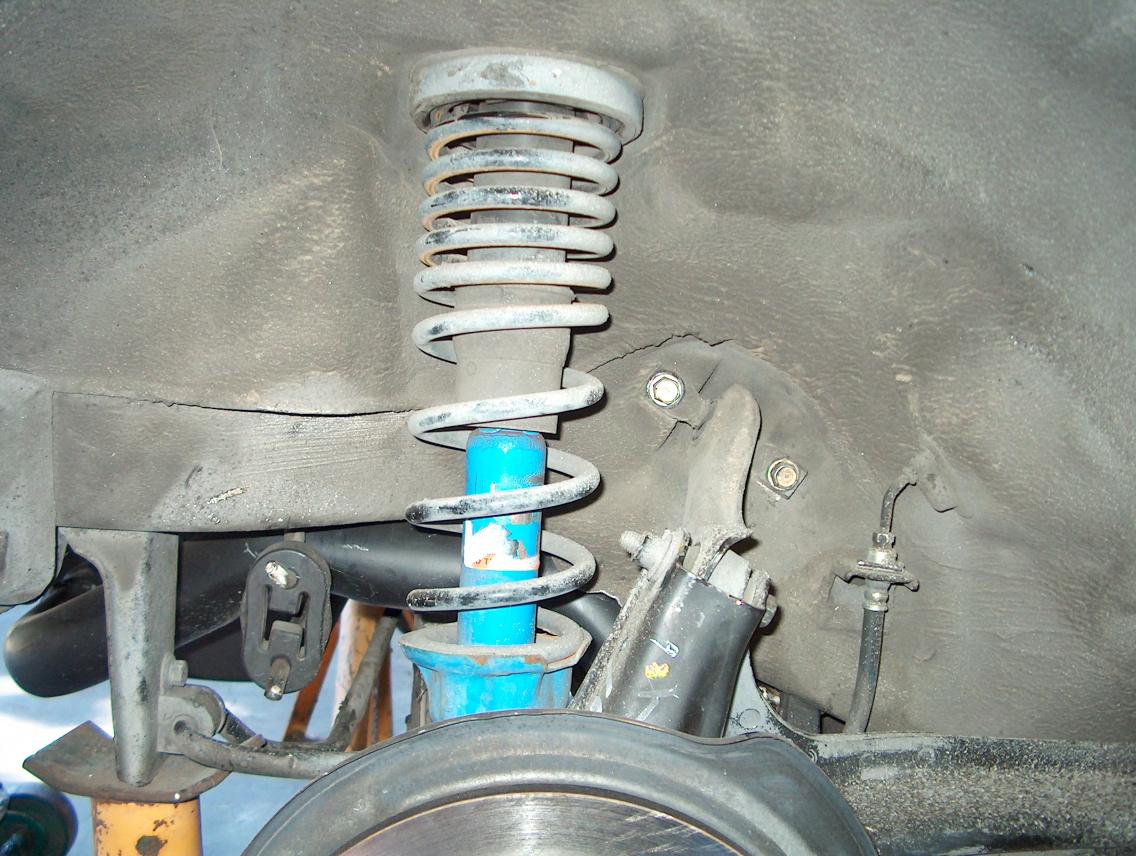
Here is a quick photo of the assembly in place.
At this point, you can remove the assembly and go to work on it.
Here is a photo of a different spring compressor that I used.
Here I'm measuring from the bottom of the spring seat to the mounting bolt hole. Use this measurement to move the snap ring on the Koni to the position that you want.
This photo shows the snap ring and grooves that can be moved to adjust the height. The spring seat is just sitting loose and will slide down onto the snap ring.
What I wanted to show in the following photo is that I've found it's easiest to grease up the rubber upper spring bushing and place it on the spring before putting on the metal top cap. The reason is that it seems easier to get it around the spring while still free of the cap. There are a bunch of "fingers" that have to go on the inside of the spring and they don't really want to position themselves if done at the same time as sliding on the cap.
Once the assembly is back together, installing it is just the reverse of taking it apart.
Closing comments;
Use jack stands!!!
return to my site's entry page
Wes Vann