Installing a remote oil cooler
Originally written; August 05, 2006
To start off;
I'm posting this information as "food for thought"!
Your installation may be easier or harder. Due to what I wanted to do, I think mine was just about the hardest it could be!!
At the bottom of this page, I show how a friend (Erik Kroese) did it on his hatchback with B17. It's a lot more straight forward and typical of a normal installation. If you want, just click here and you can jump right to that section. What's fun is that I can say all the good and bad things about it!!
Originally this page included the information on my re-installation of the AC in my car. It was done at the same time, but the combined write-up got a bit too much reading.
Most of the photos can be clicked to see a full screen version. Use your "back" button to return here.
Why and what did I have to do.
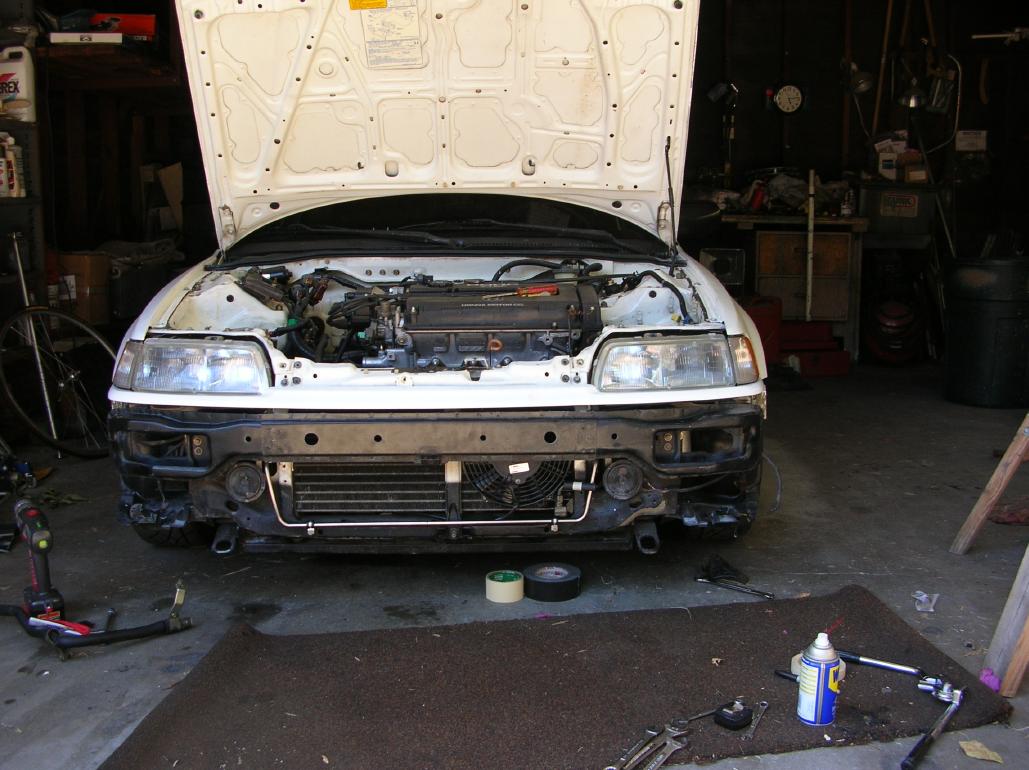
First off, I've got a 89 SI hatchback with a GSR (B18c) engine. I want to add a Jackson Racing Supercharger at a latter date, and that dictated some of the routing of the oil cooler lines.
I wanted to add a remote oil cooler even though the engine has a factory "oil intercooler". There are two things I don't like about the factory inter-cooler. One is that it's limited by the temperature of the engine water. The other is that I don't like all the water hoses required on the back side of the engine where if they leak, it would be a major problem. (at a latter date, I'm going to remove all the water feed lines and put in a different water cross pipe)
I've always tried to keep the car stock looking. That means that I'm keeping (for the time being) the USDM bumper. The cross-beam behind the bumper skin limits space and needs to be modified. A JDM bumper would have made this a whole lot easier!!
The Mocal oil sandwich adapter;
Here are a couple quick comments on doing a remote oil cooler.
There is several ways of doing a remote cooler. A lot of it is "personal taste" and you can't say that one particular way is the best.
I'd highly recommend having a oil thermostat so that the oil comes up to temperature quicker. This would be more critical if you live in a cold area. Mocal sells remote thermostats, so it doesn't have to be part of the sandwich adapter, as in the one I'm using.
It's possible to mount the oil filter remotely, making it easier to replace. This also opens up the type filter that you can use. I didn't want to do this because by keeping the filter in the stock location, it's out of site and doesn't take up other space within the engine compartment.
There is a major clearance issue if you want to use a sandwich adapter (which goes between the engine block and the filter)!! Due to the oil lines coming out the side, they tend to hit all sorts of items in that general area. You need to space out sandwich adapter about an inch from the block! Now nobody makes a spacer that I know of, but the solution isn't that hard. By keeping the original GSR oil intercooler, it spaces it out enough that everything fits well (see photos below). (permacool makes a sandwich adapter that is real tall and it may work)
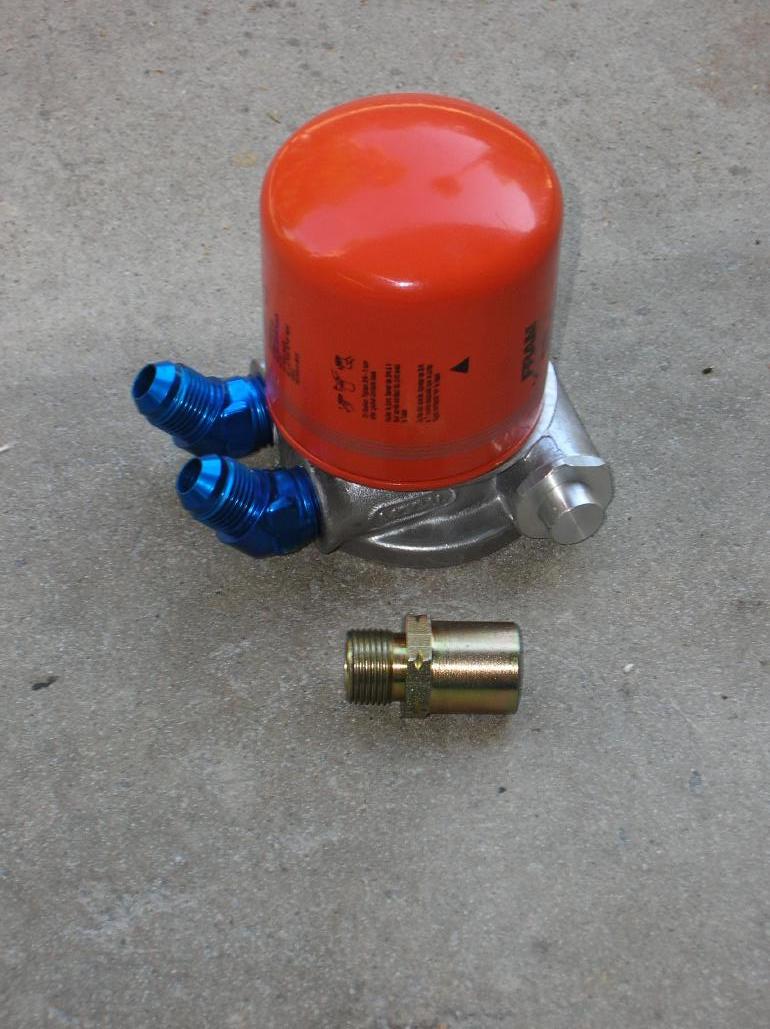
This is a photo of the Mocal sandwich adapter that I used. What's nice about it is that it has a thermostat in it so that when the oil is cold, it doesn't go to the cooler.
The brass piece in the photo above is what holds the sandwich adapter in place and then in turn the oil filter screws onto (the filter is just sitting there in the photo).
Here are photos of the installed adapter and also with the oil filter installed. The blue fittings are 45 degree #8 AN to pipe thread.

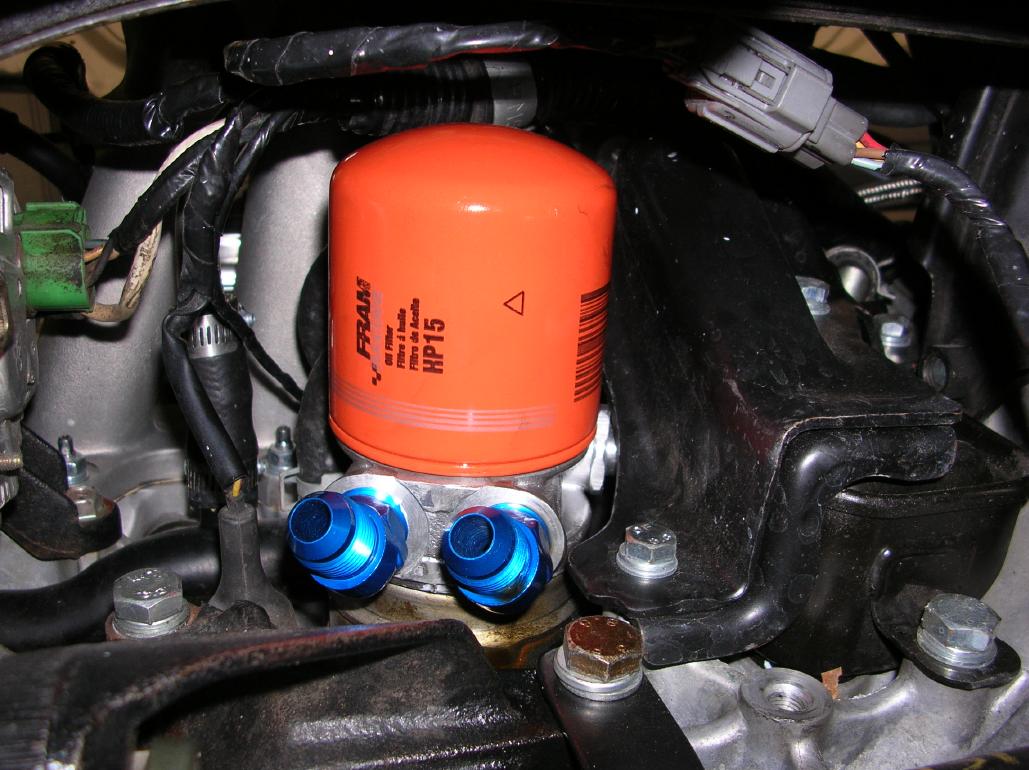
If you look at the photo on the left, you will notice that I've not yet removed the water feed lines going to the factory intercooler. For those that don't know, the brass piece under the sandwich adapter is the factory intercooler I'm talking about.
If your engine didn't have one of the factory intercoolers, be very scared if you have to buy one from the dealer! They are something like $400 if ordered new. So, keep an eye on the junk yards and pick up one along with the center mounting piece!
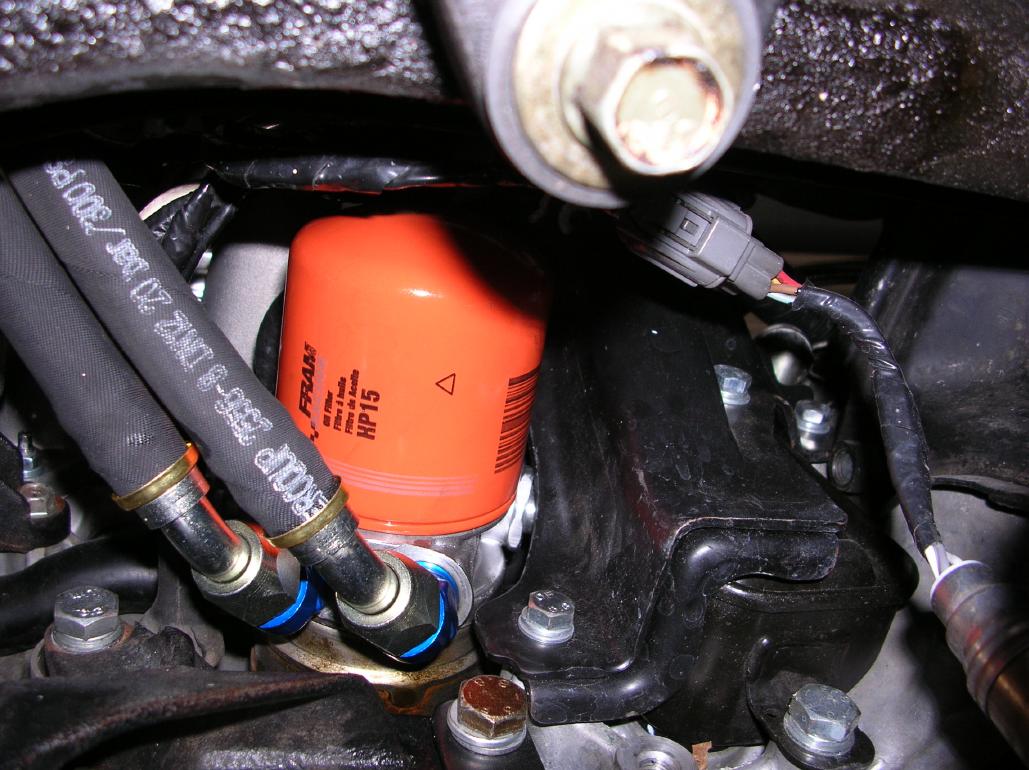
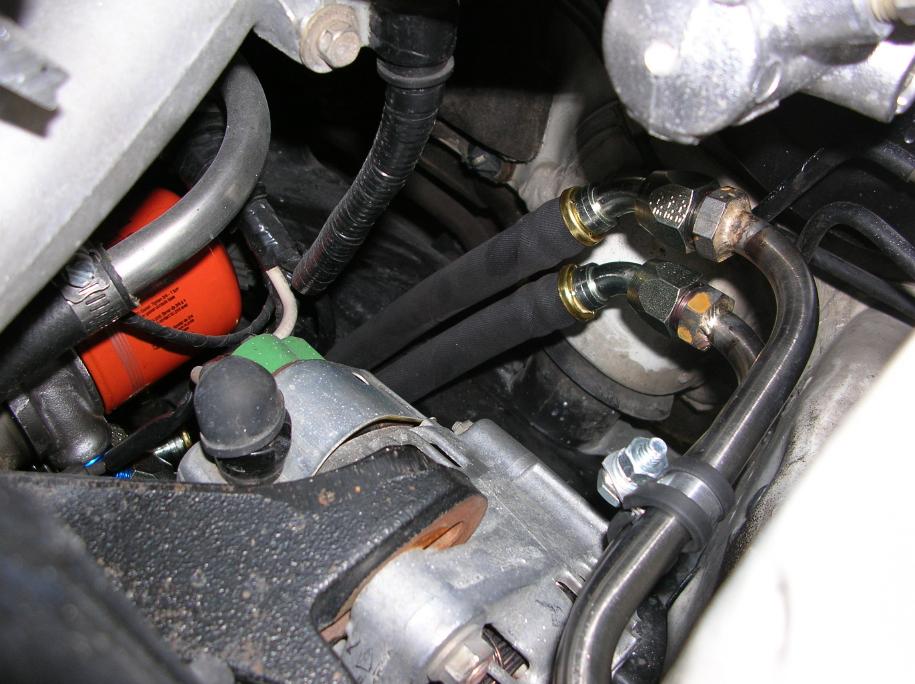
Here is a photo showing the attached oil lines that have 45 degree #8 hose ends.
This brings up an interesting question; "Wes, why not just use 90 degree fittings coming out the sandwich adapter?". There are two reasons. One is that the cast 90 degree fittings don't flow worth a shit. But the real reason is that due to how close the two lines are, they would hit one-another when trying to screw them in!!!!!
You can't use straight adapters coming out the adapter and then 90 degree hose ends due to the location of other stuff.
This is pretty much the only configuration that works, as far as I can figure.
Plumbing the oil lines;
The easiest method of plumbing the oil lines would have been to just have a rubber line from the sandwich adapter all the way to the cooler. It just seems like I always want to do it the hard way (I don't know why).
I wanted to do stainless hard line within the engine compartment (actually I do have some reasons) and getting the line through the radiator core support is an issue due to the AC lines!
Starting from the front;
Although not hooked up yet (I'm waiting for some hose connectors to come in), this photos shows where I mounted the oil cooler.
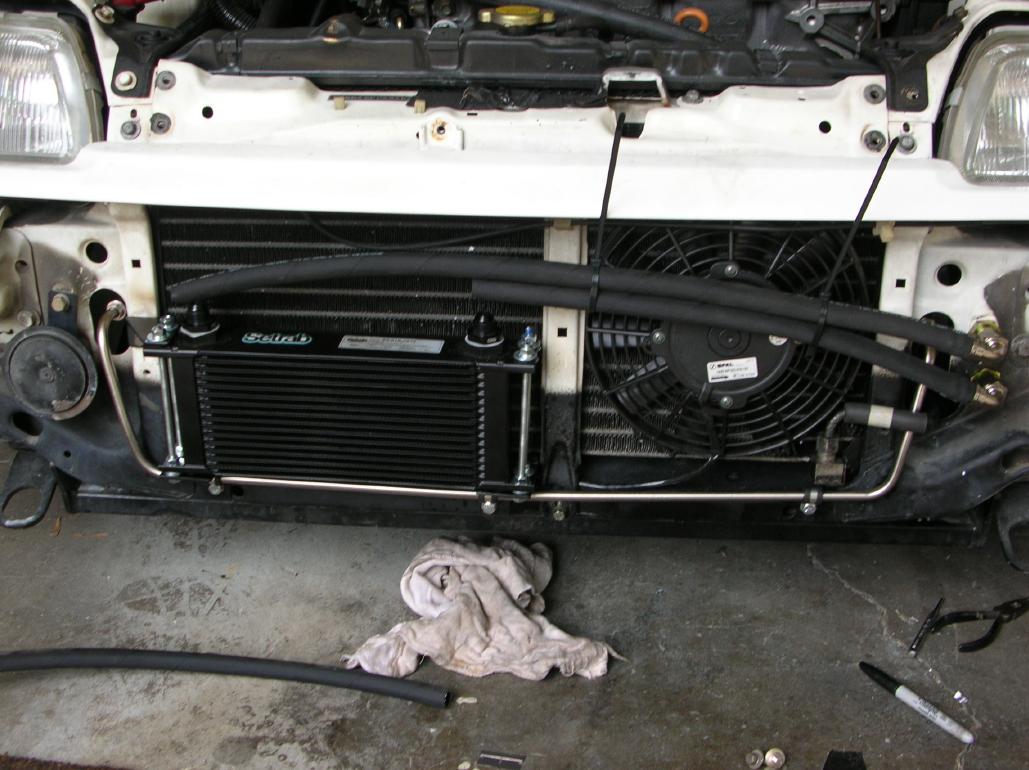
The two rubber lines will get hooked up to the cooler with 90 degree fittings.
On the right are 90 degree fittings (the bent tube type, not cast) that are attached to "bulk-head" fittings that pass through the radiator core support. The location of the bulk-head fittings is problematic due to how the AC lines run on the other side of the radiator core support.
I'm using Aeroquip "socketless" fittings that just push on. A clamp isn't required.
The next photo shows the lines on the engine side of the radiator core support. The radiator wasn't installed at the time the photo was shot. What looks like the radiator is the AC condenser.
The two smaller lines closest (one is painted black) are AC lines.
The two larger lines in the background are the oil lines. They are stainless steel hard-line. They are attached to the bulkhead fittings on the radiator core support.
That's the AC compressor on the left.
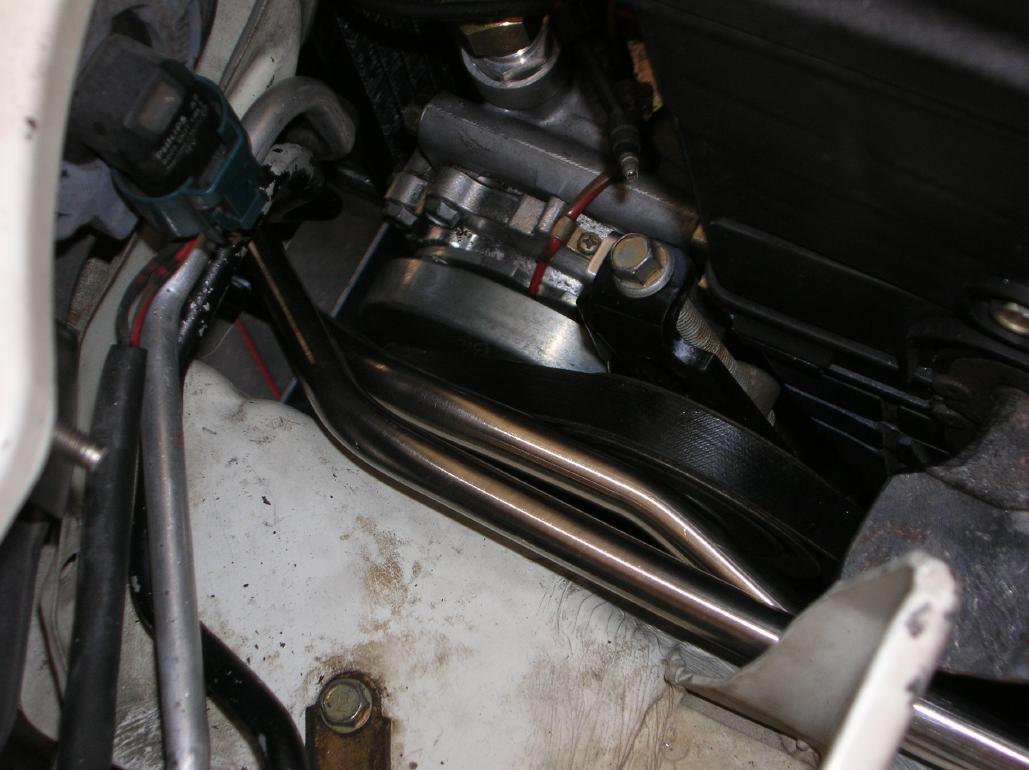
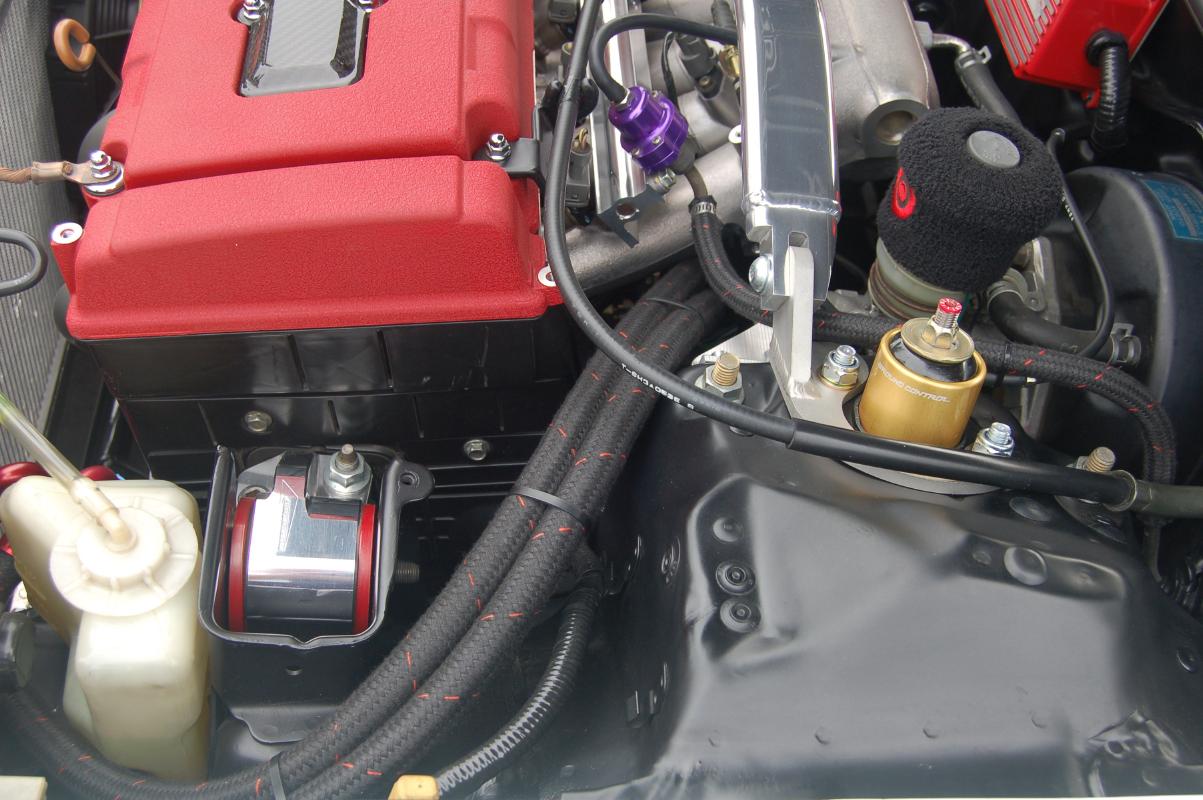
This next photo is looking down into the engine compartment and shows how the hard-lines dodge around the AC compressor and then run down the frame rail. The photo makes it look like there isn't any clearance, but everything clears just fine. (Ya, I can remove and replace the AC belt)
The following photo was shot during the time that I was "fitting" the lines. That's why the engine mount is removed.
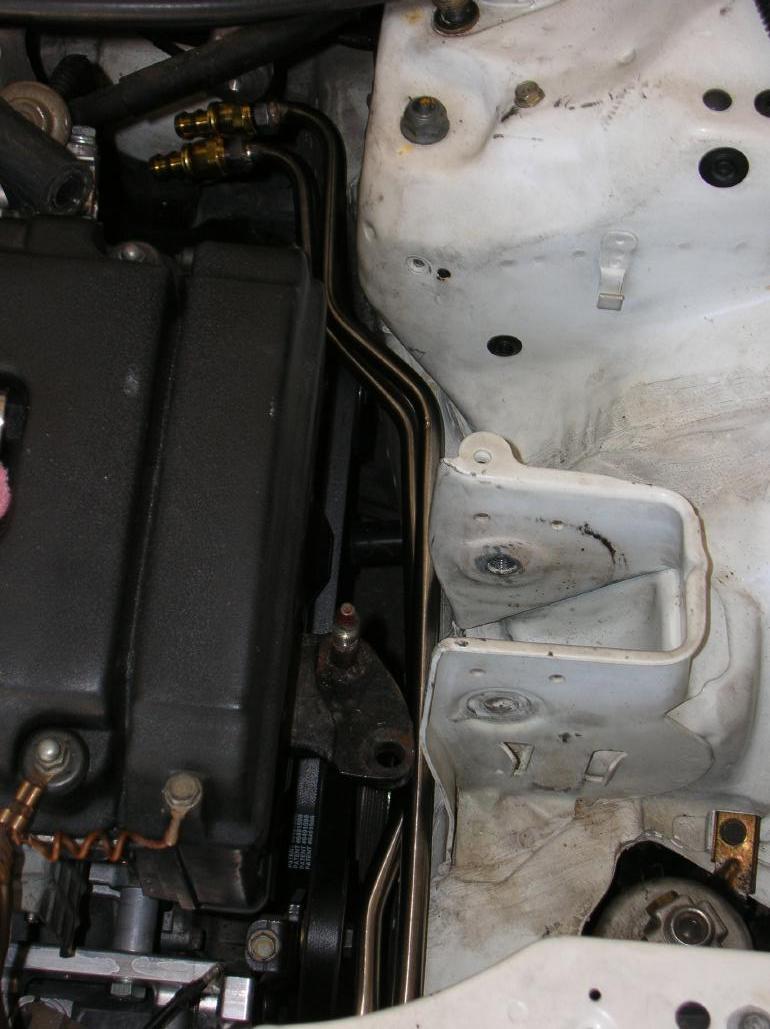
Keep in mind that there are no supporting brackets when the photo was shot. That's why the tubes at the top of the photo don't line up very well.
This next photo pretty much tells the whole story.
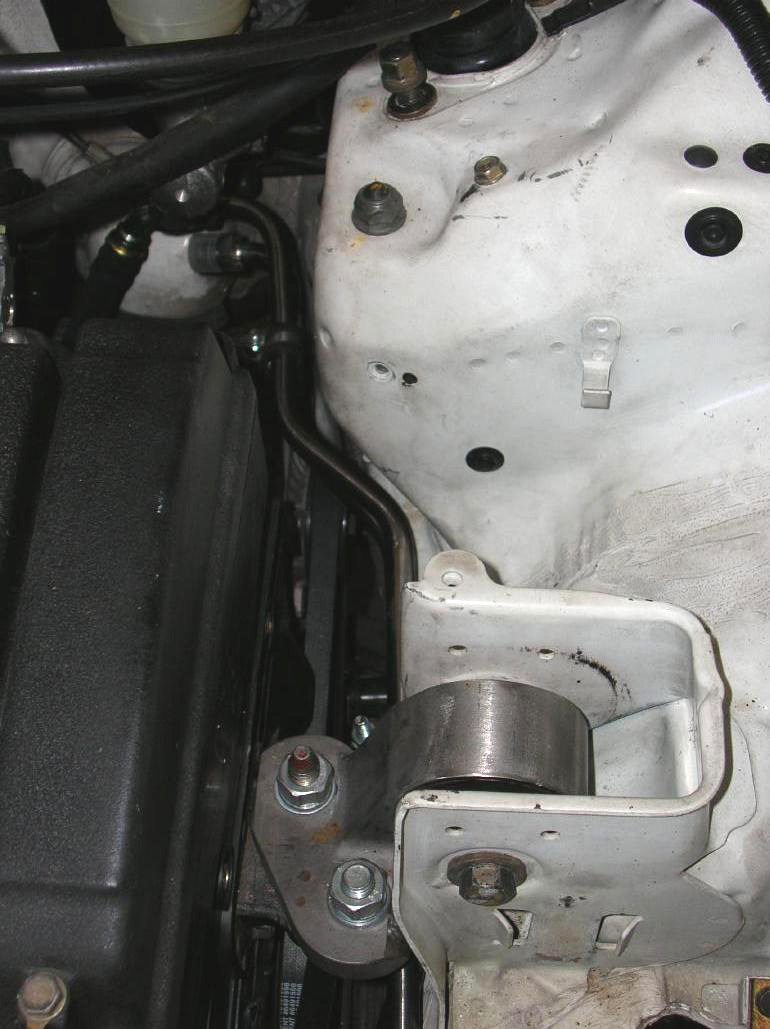
Click on the photo and look at it closely!
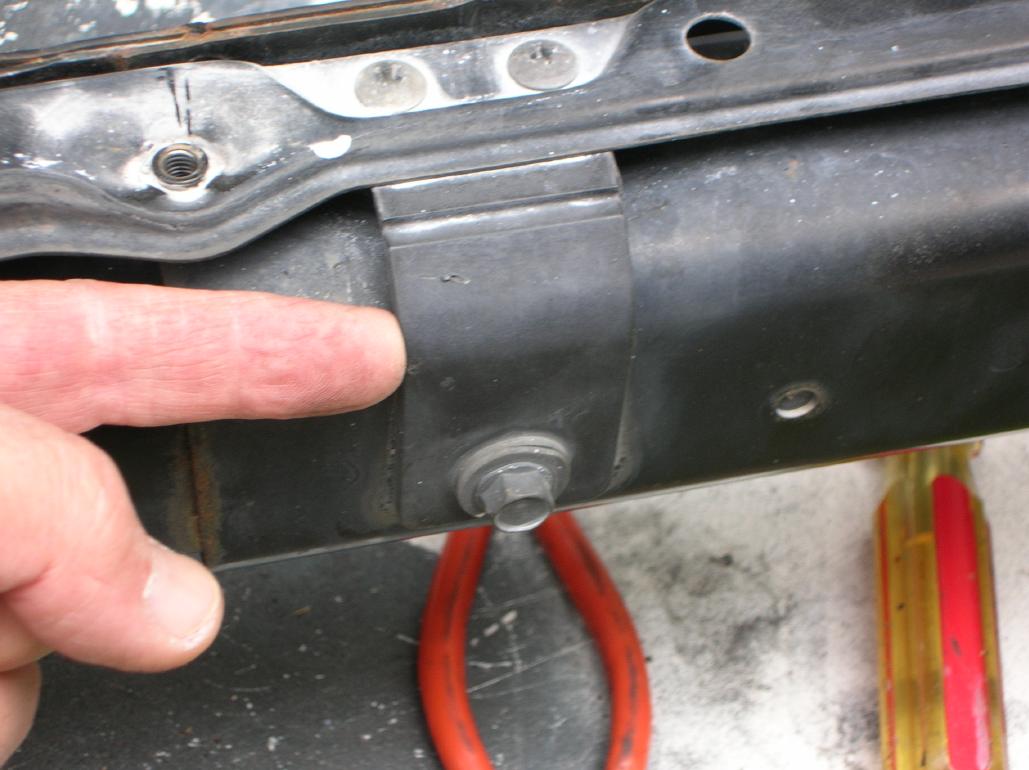
The oil lines run under the engine mount and go along the frame rail, turning toward the left under the brake master cylinder. At that point there are #8 weld-on fittings that the rubber hose from the sandwich adapter will be attached to, as shown in the next photo.
This shows one of the hard-lines so you can get an idea of the shape required.
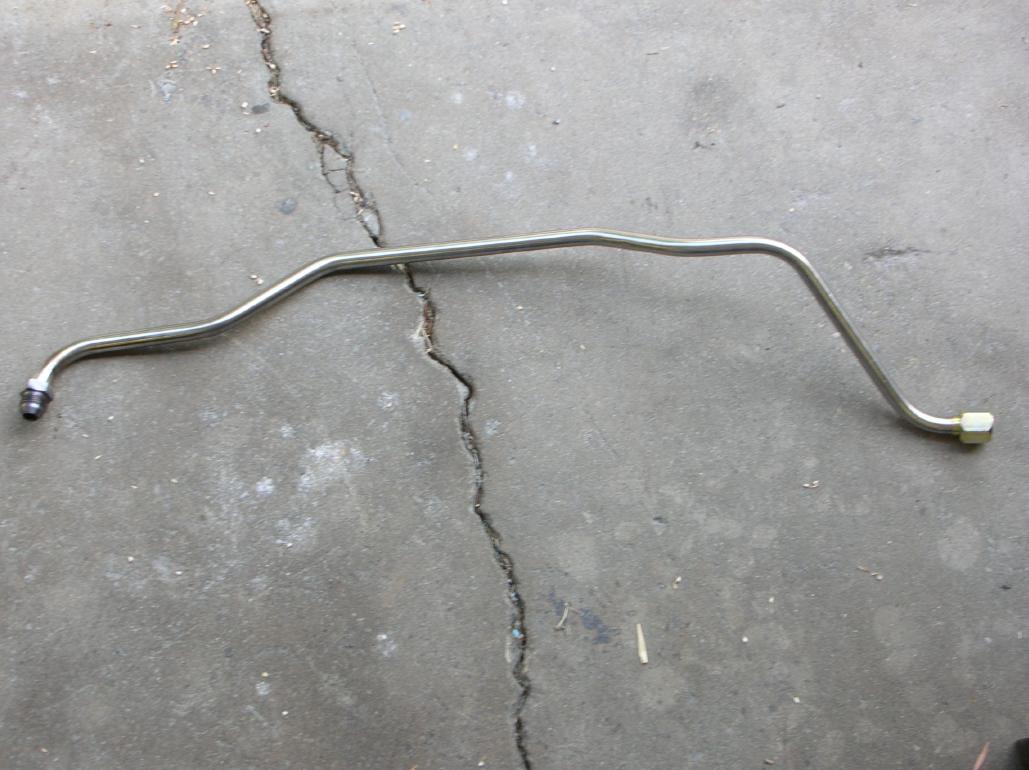
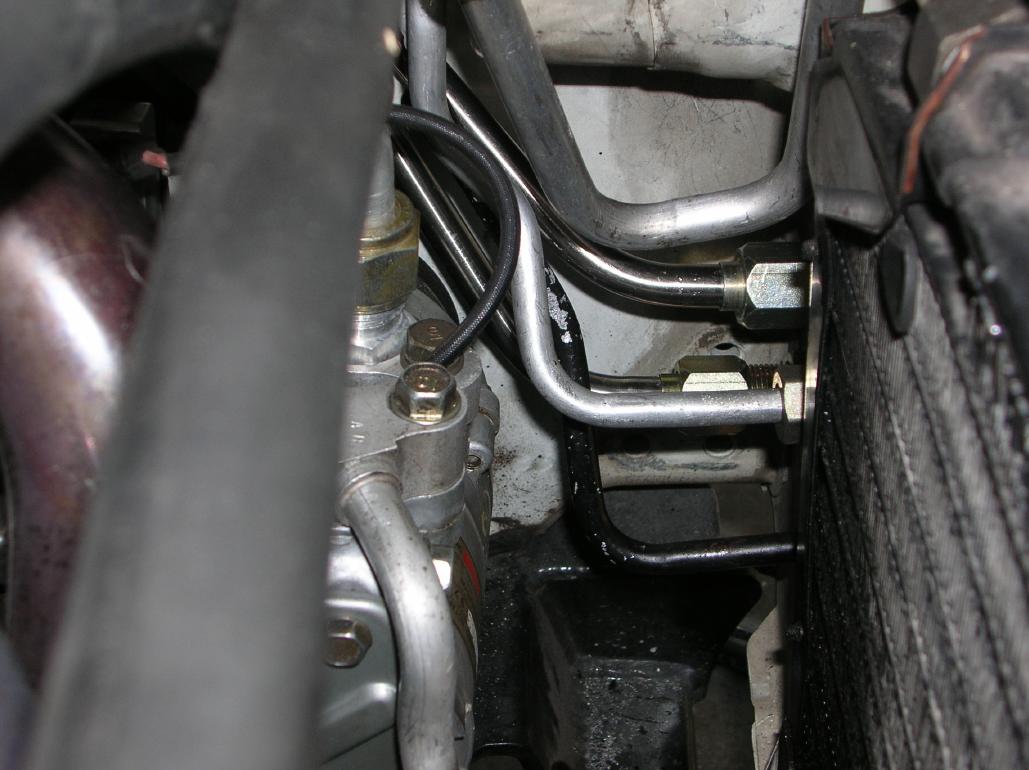
On the left is the male #8 weld-on fitting (that is under the brake master cylinder. On the right is a female "B" nut fitting (requiring the tube to be flared) that is what attaches to the bulkhead fitting at the radiator core support.
Bending and fitting the oil hard-lines was extremely time consuming!! It would have been easier with the engine removed, but then you wouldn't know what areas have to be avoided.
Modifying the bumper cross-beam for clearance.
You may find it interesting to know that I decreased the weight of the cross-beam from 18 pounds to 11 pounds.
Before you jump in and say that the car isn't safe after cutting out major sections of the cross-beam, here is a photo of what's behind a JDM bumper skin. There isn't any cross-bar, just a support for the upper edge of the urethane skin. (thanks to Erik for the photo)
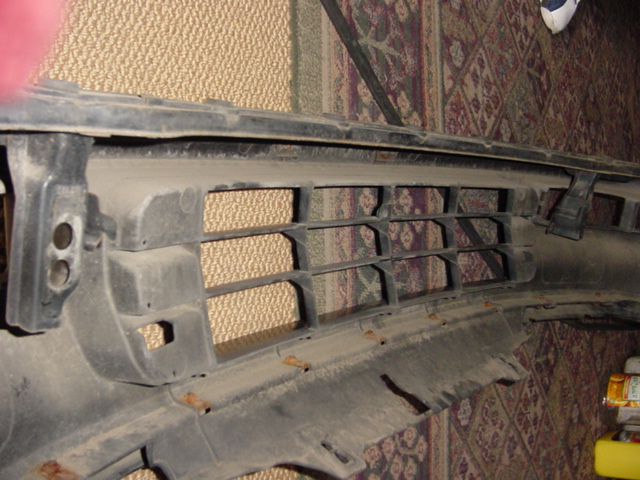
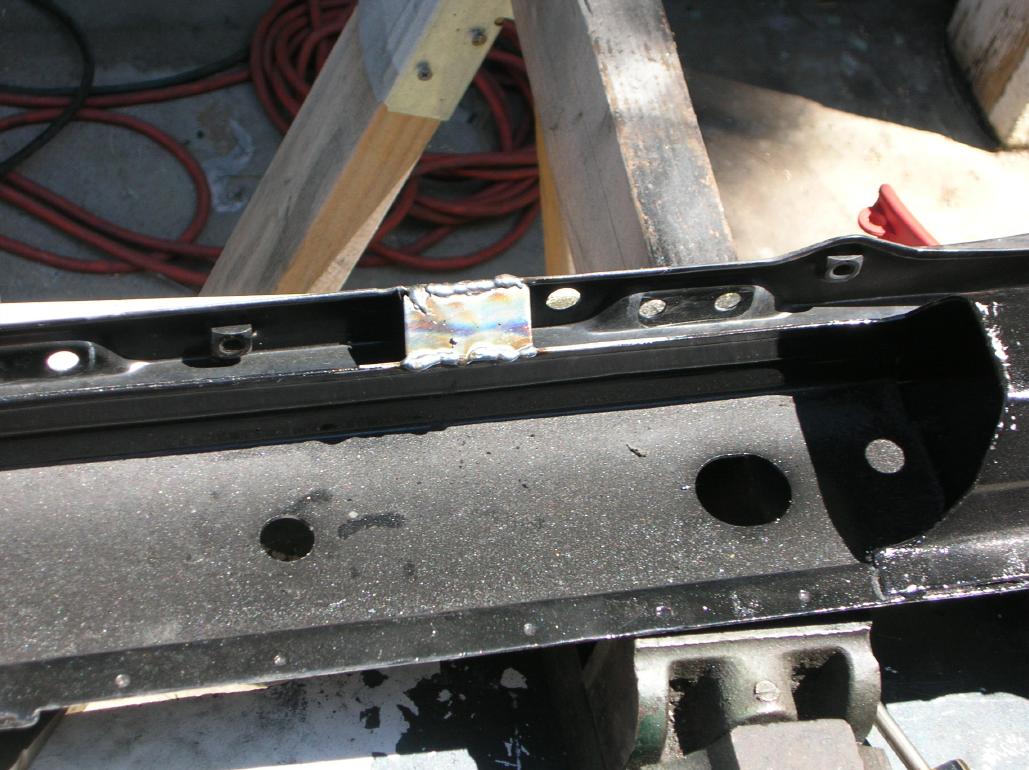
As shown in the next photo, there are a bunch of brackets on the cross-bar that don't do anything at all. All I can think is that they were for some "option". I cut them off and ground it flush.
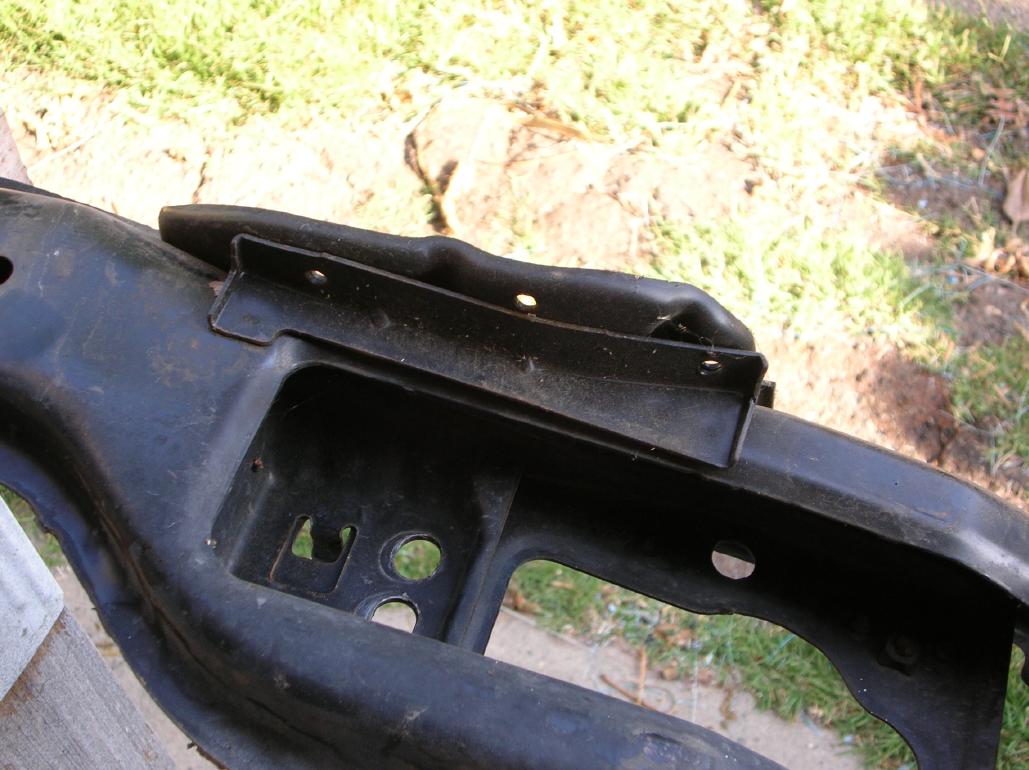
In the next photo you can see the angle bracket that holds the bumper skin support (the upper metal piece). I removed them due to having to cut out the metal where the single bolt is.
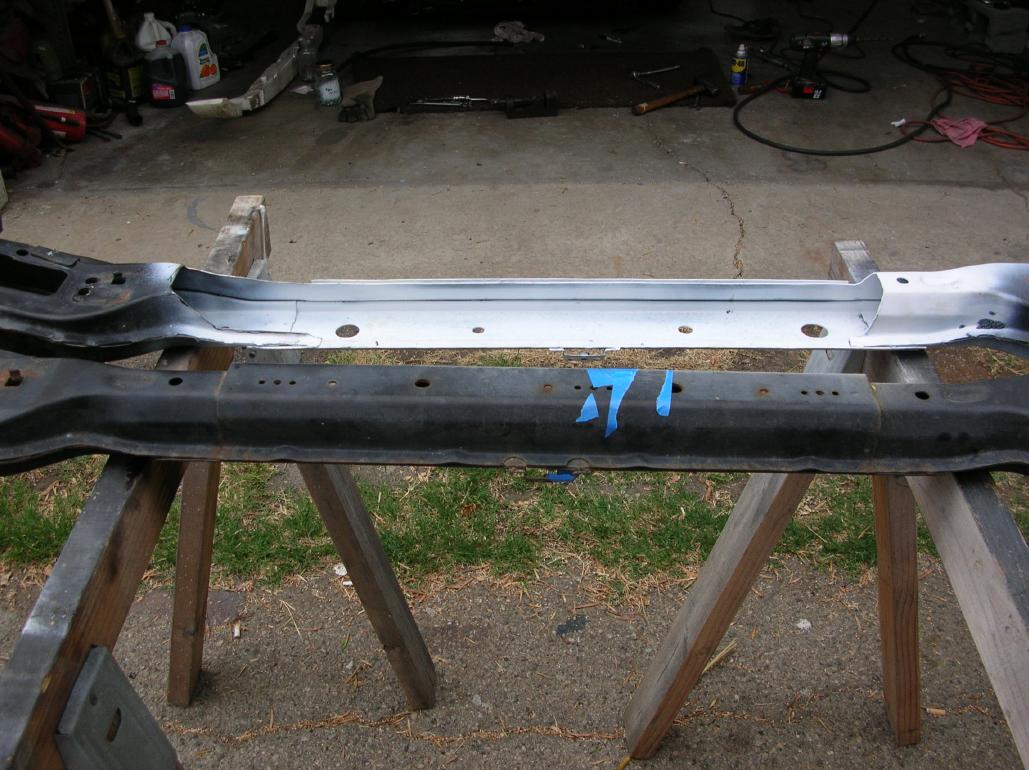
Here is a photo of the modified cross-beam and also a un-modified cross-beam.
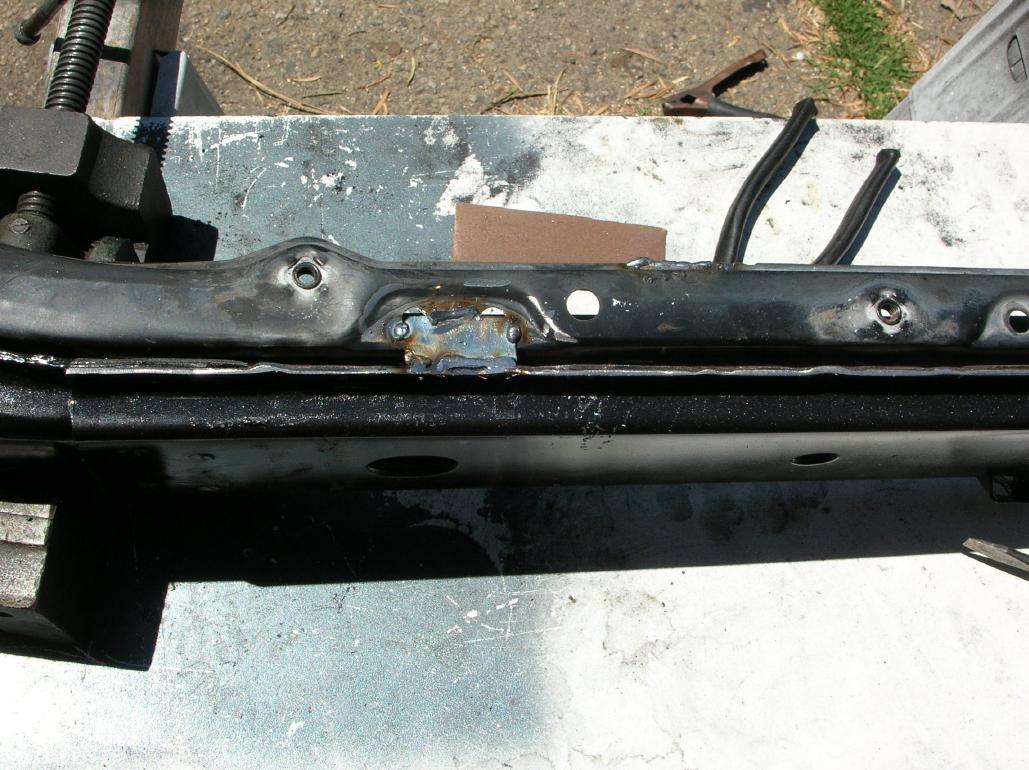
In order to re-attach that upper metal piece that the urethane skin bolts to, I had to weld on a couple metal flanges.
And here is a photo of the cross-beam on the car. (at the time the photo was taken, the oil cooler wasn't installed)
Finished unit;
As I said at the top, I was going for a stock look.
In the following photos you have to look real close to see the oil cooler even though I opened up some of the bumper openings that Honda blocks off.


This installation was done by a friend named Erik and it's more typical of what others would do. What isn't typical, is the quality of work that he did. It's about as clean a job as you can do.
Erik's car is a 4G civic hatchback with B17 engine. He used a block adapter that removed the oil filter from the original location and results with the oil line connection pointing directly at the fire wall prior to using any angle adapters. As a result, an oil filter has to be mounted remotely.
Erik used 90 degree hose ends at the block adapter and you can see how the oil lines come between the shock tower and the engines head. One line goes directly to the cooler and the other goes to the remote oil filter. Look real close and you can see two red fittings behind the overflow tank (on the left).
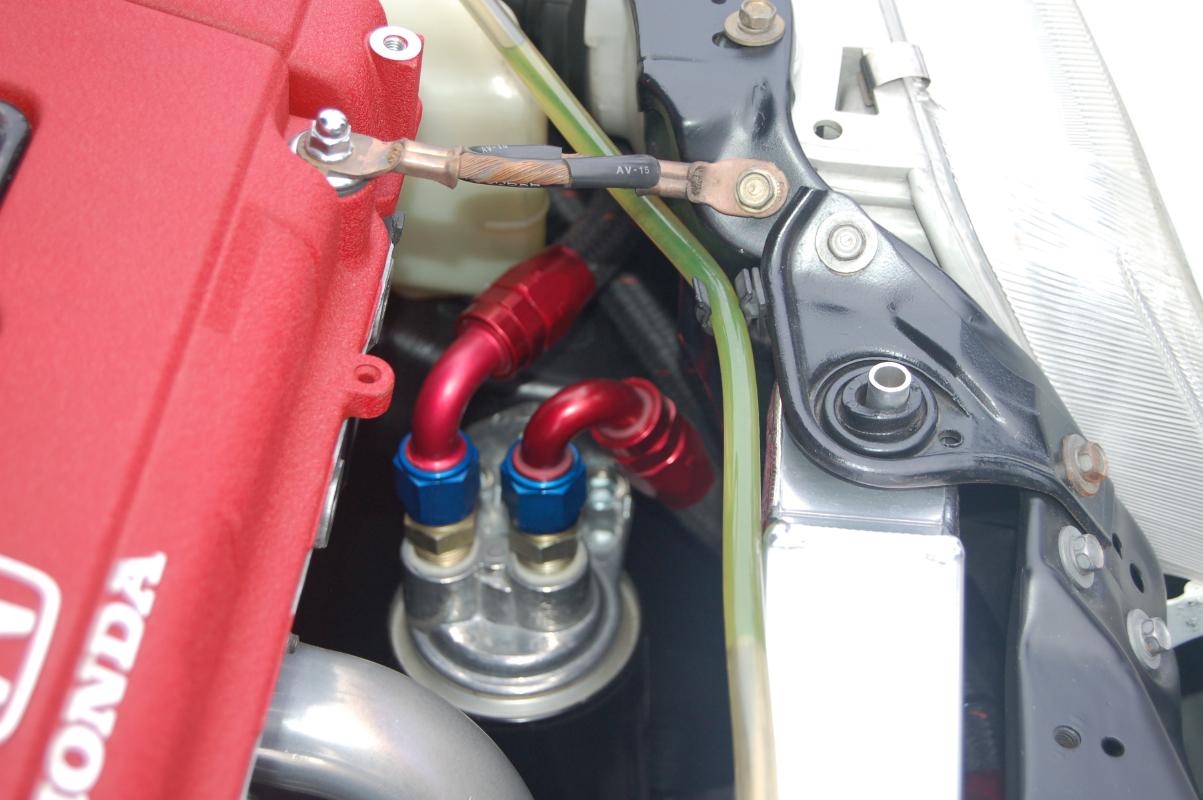
This photo shows the remote oil filters location. The hose with the 90 degree fitting goes to the block adapter, the hose with the 135 degree fitting goes to the cooler.
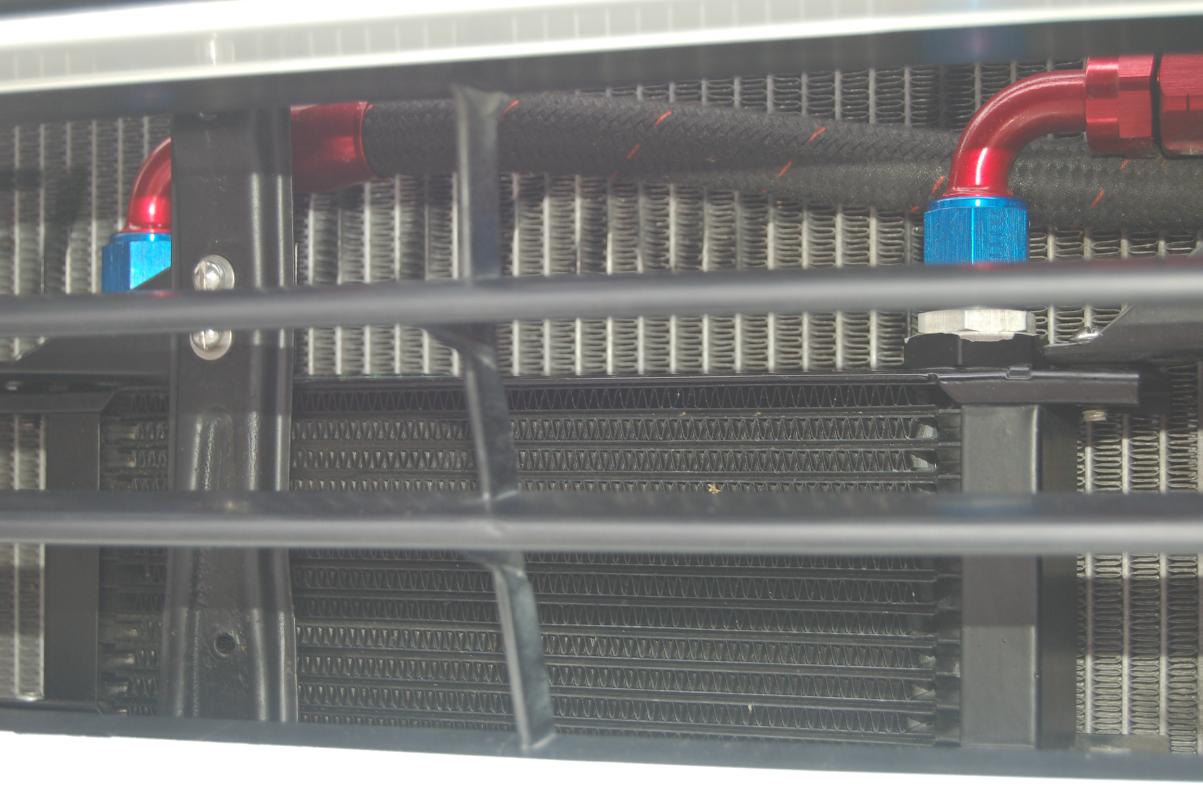
This photo is looking through the grill opening (it's a JDM bumper) showing the cooler and it's hose hook-ups.
Comments on Erik's installation;
1. Erik didn't feel the need for a thermostat. We both live in California and I agree that it's not really a necessity. If you want to add one, Mocal sells one that just plumbs into the lines. Keep in mind that you have to plumb it after the oil filter or when cold, the oil will not be filtered!!
2. Do as Erik did and have the oil filter pointing downward! This makes it a lot cleaner when you have to change the oil filter.
3. Having a remote oil filter opens up all sorts of options for what type filter you can use.
4. By having as few as possible hose connections, there are less points where a leak can occur.
5. I personally prefer to have the oil filter in the stock location so that it doesn't take up other space within the engine compartment. When Erik and I discussed it, he felt that it was good to have the filter in a location where it is easier to get to due to how often he replaces it. I don't drive my car that much, so the fact that it's harder for me to replace the oil filter, it's not really an issue.
6. Erik used Startlite (ya, it's really spelled start-lite) hose which has a black nomex cover. It costs more than doing it in braided stainless hose and also requires pricey connectors (not hose clamps!!). I like it due to not being "bling", but that's a personal taste. I also like the fact that it will not abrade against everything it touches. The reason for the cover is for fire resistance. The big selling point for racers is that it's as light as you can get.
7. Erik used #10 hose and fittings. That's 5/8" inside diameter. I used #8 for my lines (1/2" inside diameter). I can't really say if it's worth going to #10 or not. When I started my project, #8 was recommended by the plumbing shop that normally go to and trust, so that's what I did.
Closing comments;
Always use the hose end fittings that are correct for the type hose you use!
Get information on how to install the hose ends from the manufacturer and follow it!!
return to my site's entry page
Wes Vann