Replacing the Rear Wheel Hubs
(on a disk brake Honda)
December 16, 2004
To start off;
I guess that you could consider this a "how to". It's pretty much straight forward and easy.
The car that I'm working on is a 89 Honda Civic hatchback that I converted to rear disks by using Integra trailing arms and brakes. I cover doing that in one of the other pages within my site. If you were dealing with a Honda CRX Si with rear disks, the process is exactly the same thing.
I did this work due to having a "noise" in the rear that sounded like a bearing. Jacking up the rear and spinning the wheel didn't show any problem, but after doing this, the sound has gone away.
All of the photos are "clickable" to a larger version.
Start with getting the parts you need;
I got the hubs from Autozone and they were about $70.00 each. They come complete with the wheel studs and bearing seals. I don't know if the ones from the dealer do or not.
You should get from the dealer the two phillips screws (per side) that hold the rotor on the hub. The reason is that the suckers tend to get junked up real easy. It's real common for individuals to have problems with them and mess up the heads. Don't re-install junk ones! They will come back to bite you at a latter date.
You will need a 32mm socket and breaker bar. You will need a 14mm wrench. Other that that, it's a bunch of things like screwdrivers and such.
Doing the work;
Put some blocks at the front wheels, jack up the car, and put jack-stands under it. Keep the parking brake on.
Remove the wheels and then remove the two screws that hold the rotor to the hub.
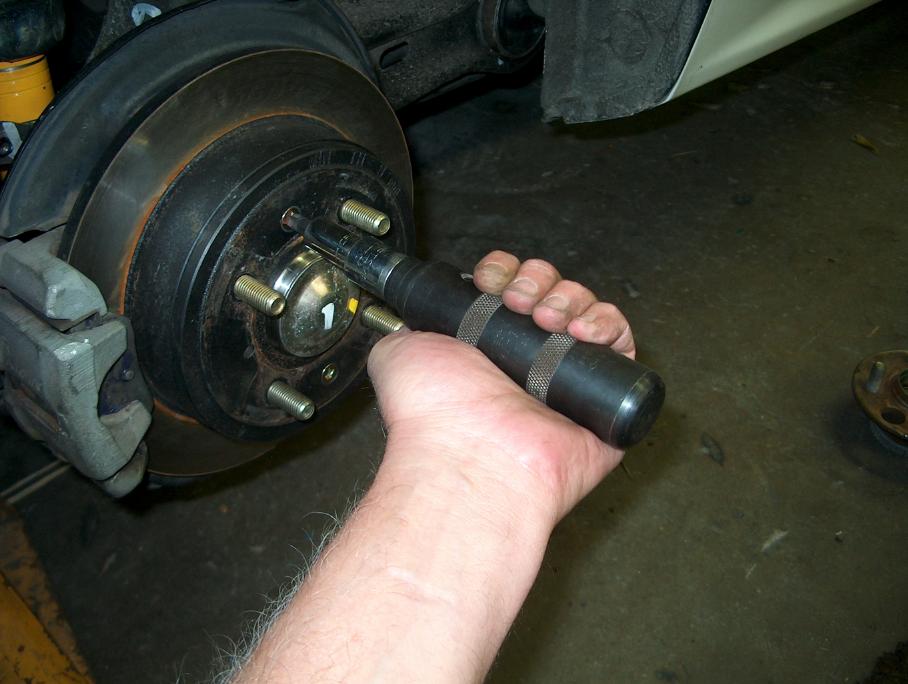
The tool that I'm showing in this photo is an impact wrench. On the tip is a phillips screw bit. When you hit the end with a hammer, it forces the bit in tight and rotates it slightly. You would use one if the screw heads are messed up and a normal screwdriver can't get a good bite. In reality, I didn't need the tool due to having installed new screws when I first installed the disk brakes.
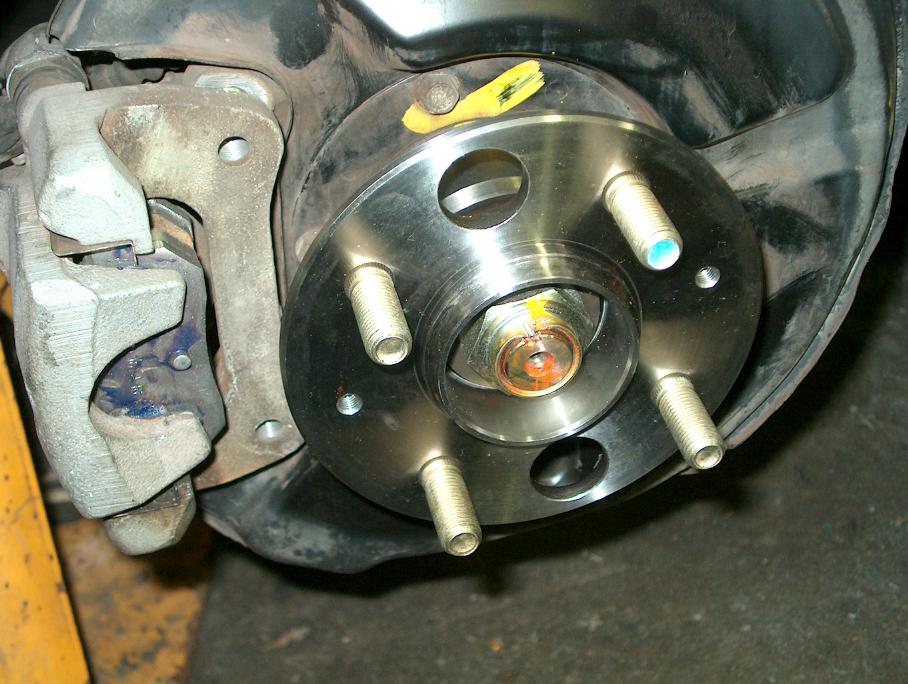
Now release the parking brake and remove the two bolts that hold the caliper on it's bracket. Once it's loose, you can pull the caliper off to the side and remove the rotor.

Before you go any further, put one of the caliper bolts back in place to hold the caliper up. If you look at the photo above, you can see where the two caliper bolts go. The come in from the back side.
Remove the dust cap that is in the center of the rotor and you can see the 32mm nut that you will have to remove.
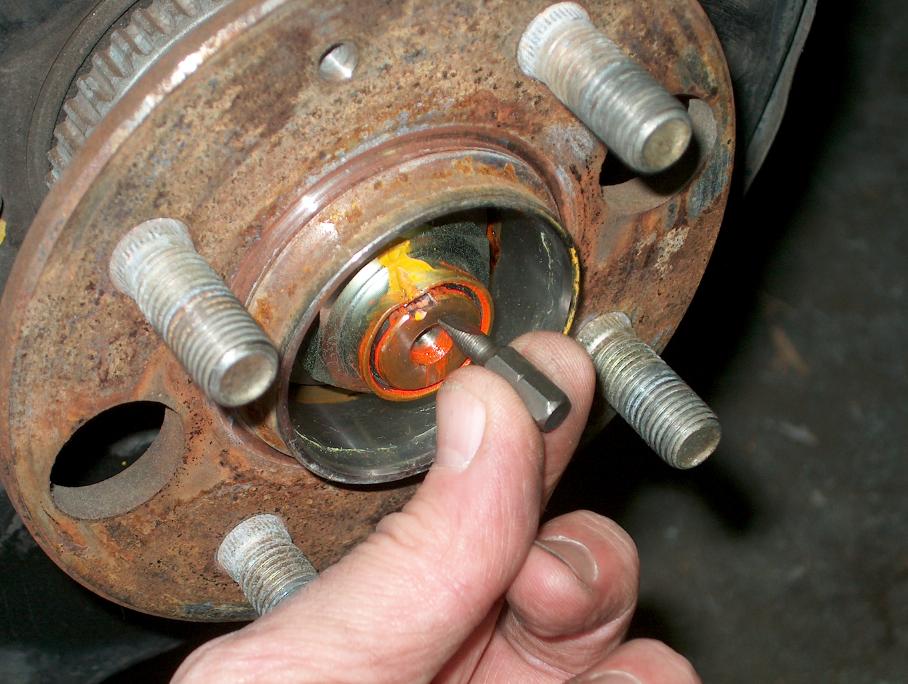
The nut has an area that is "staked" down into the stub axle. You need to pry this up so that you can remove the nut. What I found to work well was to hammer in a screwdriver "tip" to pry it up. You can use a normal screwdriver (I've done it in the past), but it tends to just drive the screwdriver shank into the handle.
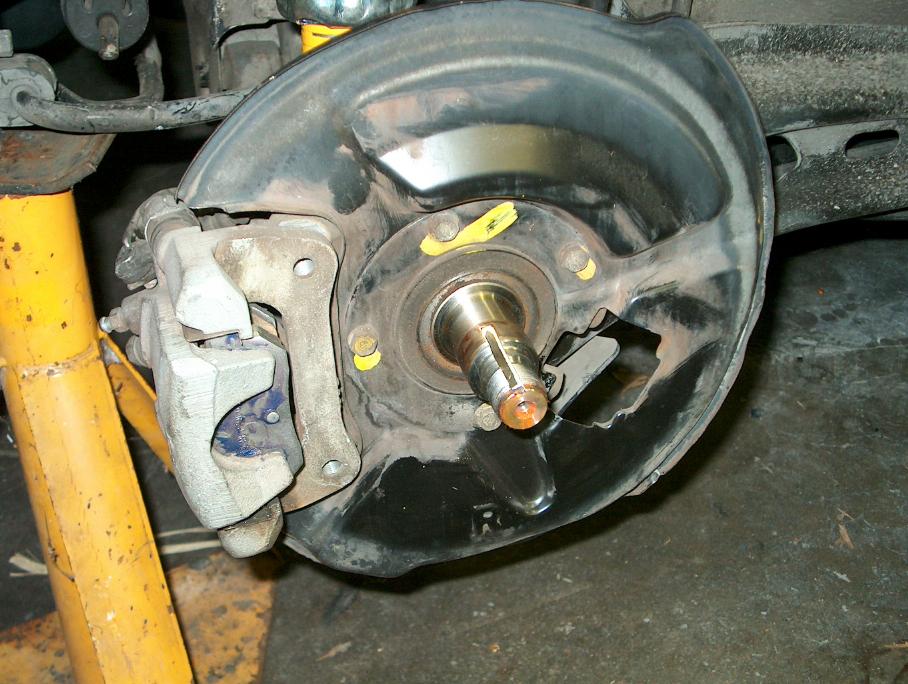
Once the nut is off and also the index washer, the hub will pull free.
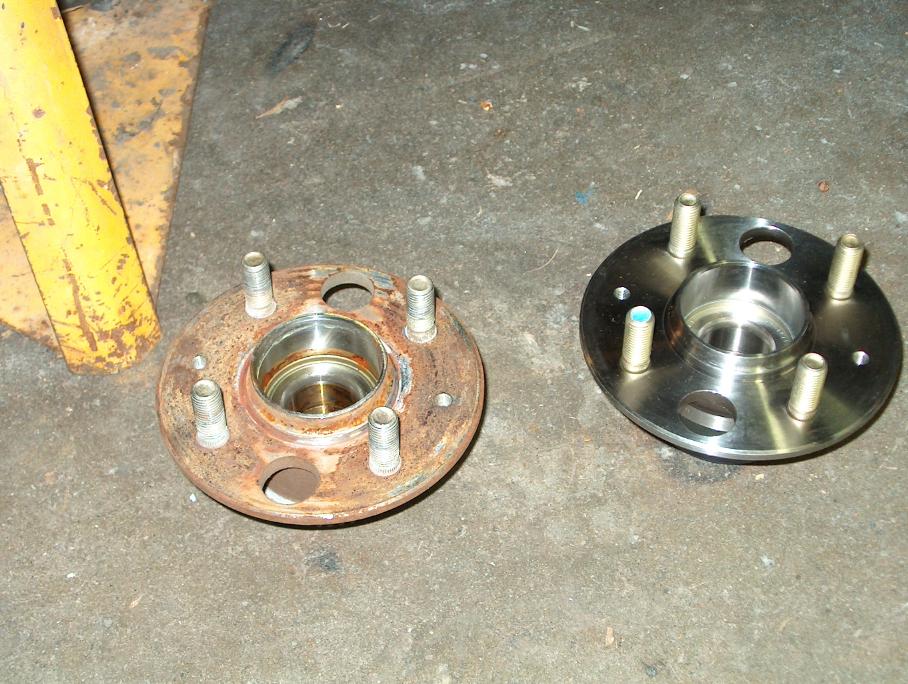
Here is the two hubs.
All you have to do is slide on the new hub, put on the index washer, and tighten the nut. Well then you also have to stake down the nut.
Then it's just putting everything back together as you pulled it apart.
Closing comments;
Use jack stands!!!
return to my site's entry page
Wes Vann