
My Flare Diary
(July 7, 2008)
(addressing the bottom edges)
July 7, 2008; addressing the bottom edges;
Here is where it may seem like I'm a cry baby bitch. I'd not make an issue about it, but it pisses me off when a company talks about how "perfect" their reproduction part is!! Their write-ups would have you believe that all you have to do is weld them on and that there is no metal forming required.
The curve at the bottom edges isn't consistent with the section a couple inches higher.
This is a hard area for the manufacturer to get the desired shape due to it being on a fold line. Not all of the end points were consistently bad or notable. There is a section that is "flat" and there isn't the curve that would match the curve a couple inches higher.
In the following photo, the blue line is the "flat" section I'm talking about. The yellow line is closer to what it should be. The photo below it shows how I had moved it inward, changing the curve.
The "after" photo isn't the completed work, but gives an idea of what I'm talking about. (when writing this sort of stuff, you always don't have that exact photo you were after.
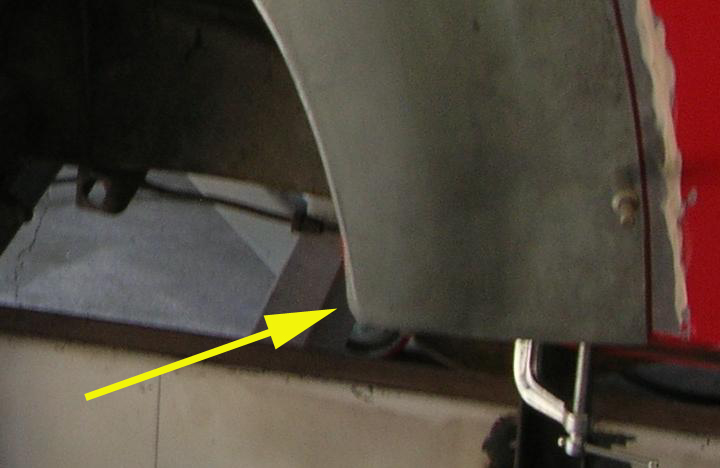
The leading edge at the front fenders is just plain wrong!
Here is a photo with an arrow pointing to what I'm talking about. That bottom edge just doesn't match the factory fender.
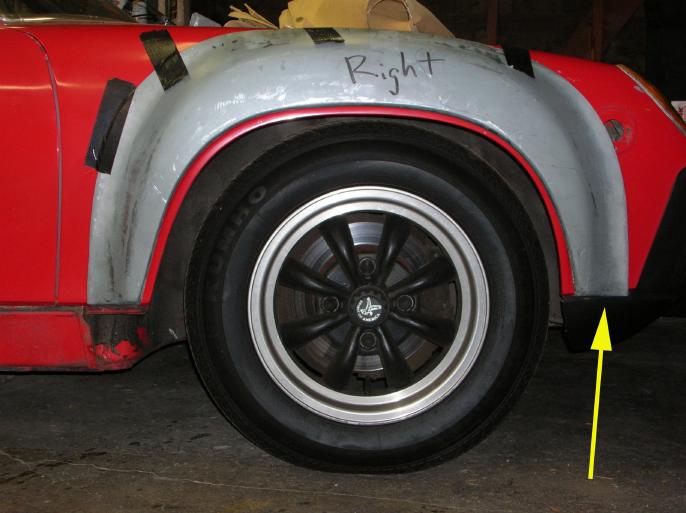
Notice the angle of the red factory fender and then the angle of the flare.
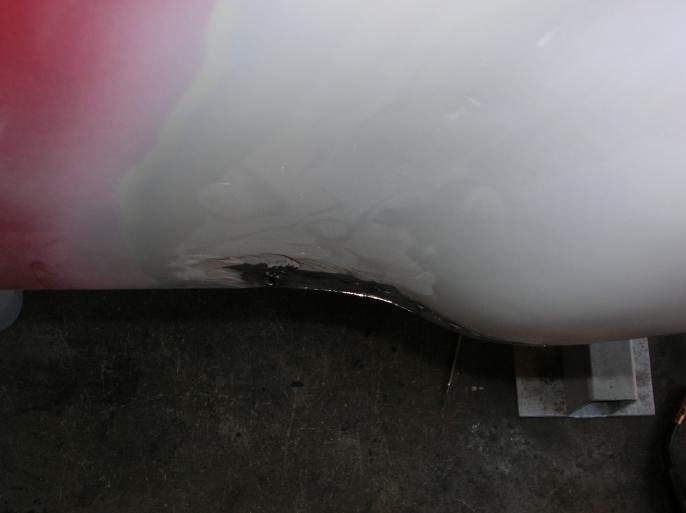
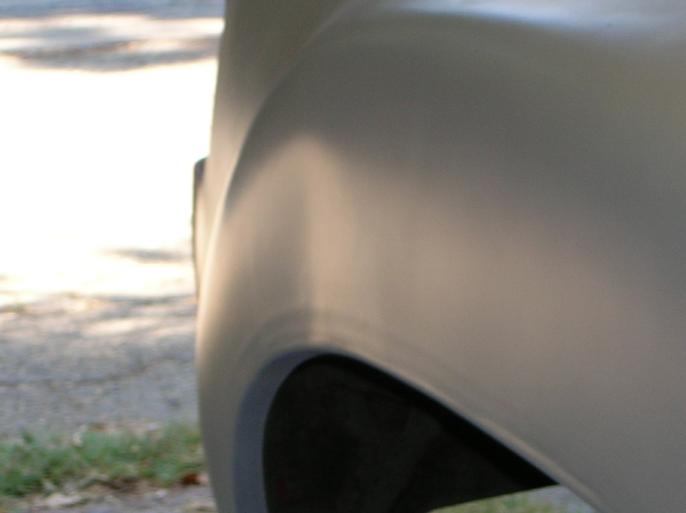
The lip at the bottom edge was bad at a couple places!
I didn't shoot any specific photos to show what I'm talking about and had to pull these up. The problem area is pointed to with the yellow arrow. It isn't just a matter of bending the section back due to it being formed into the lower metal section (that is parallel to the ground).
The next photo is a zoomed in and cropped version of the second photo. You just shouldn't be able to see the lip when viewed at this angle.
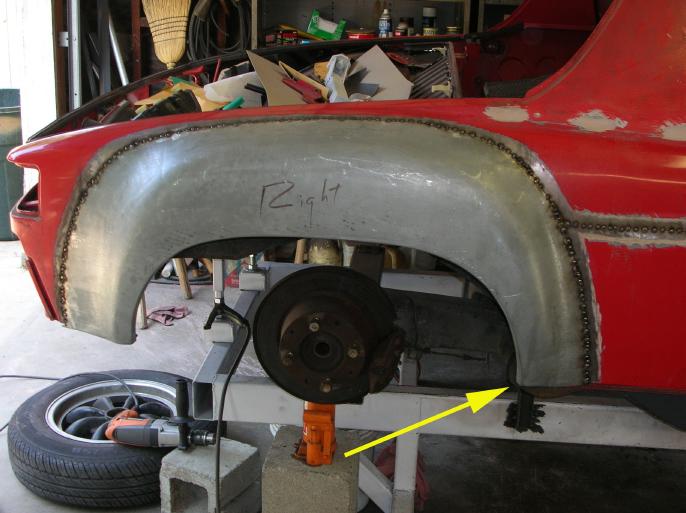
This next issue has to deal with the shape of the body at the bottom edge.
This isn't unique to the AA flares and also happens with the factory flares (although the factory flare has a cleaner pressing in this area). This occurs (or is significant) at the rear of the front flares and at the front of the rear flares.
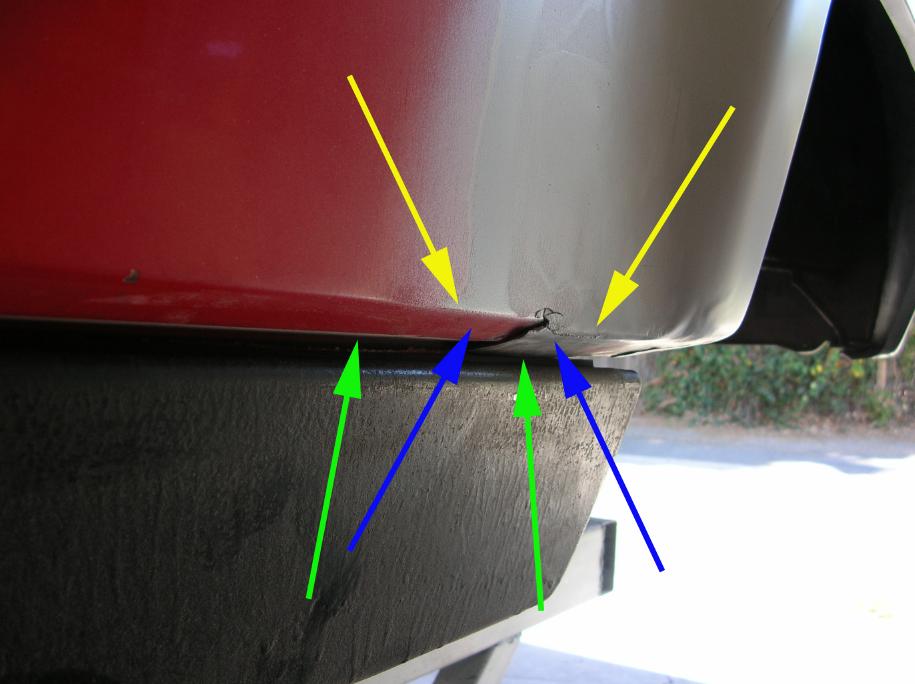
The fold line pointed to by the yellow arrows should transition smoothly and maintain a horizontal line. This is real important and is something that your eye will catch if you are standing near the car or viewing from a distance.
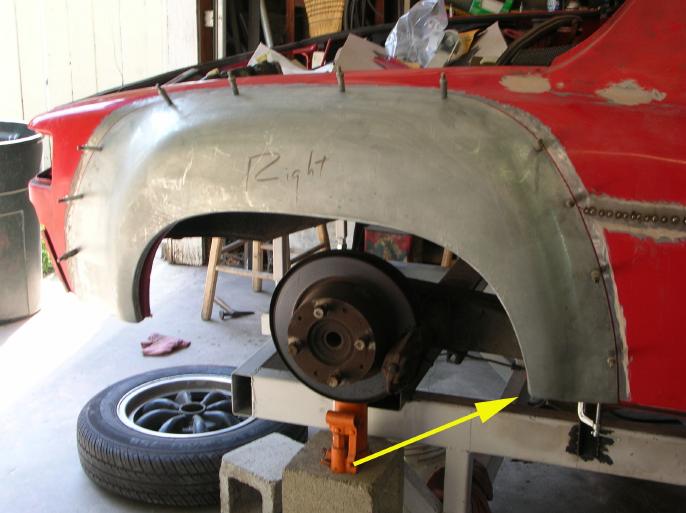
The surface pointed to by the blue arrows should also transition smoothly and die out at the "curve out" of the flare.
The surface pointed to by the green arrows is horizontal to ground and should also transition smoothly, but really isn't seen unless you are down on the ground.
The passenger side rear flare had a big honking dent in it!
I can't believe that I didn't notice this before welding it in place! It's even bent at the lip. My guess is that AA would replace it if I requested, but it's rather hard after welding it on, so I haven't even called to talk to them about it. Plus there is the fact that I didn't notice it for the 6 months that it's been in the garage attic. The lesson to be learned by others is that they should inspect their flairs when they first show up and not when you get around to installing them.
The repair of this is something that will be addressed at a latter date. (another page)
I'm done bitching and now come the disclaimers!
I'm not a professional body man! Let me say that again, I'm not a professional body man!!
I normally like to press my limits, but I also know where to draw the line.
An individual that is good at metal shaping would do things differently. (I've got to say that I deeply respect those that can do it, but they are rare!!)
As a result, I don't have a problem with doing a certain amount of sculpting with bondo. If you don't like it, suck off.
I'm going to break this down showing what I did at the four points, from front to back. Keep in mind that there are a total of eight points that I had to work (both sides), but by doing this I can select the best photos. I can also not show some that were part of the learning process. It's not that I'm trying to hide anything, but I really did learn as I progressed.
The front edge at the front fender.
This photo shows what I did on the drivers side, front edge, front fender.
The lower 2" section was cut off and then trimmed so that the lower lip was at the same angle as the bottom of the fender. It was button welded to the bottom edge of the fender and tack welded to the upper section. It's hammered down (upward) to sit in contact with the angled section of the original fender. Then fully welded.
So, the fold line has a small section that is lower. Bondo will smooth this out (on the original section of the fender).
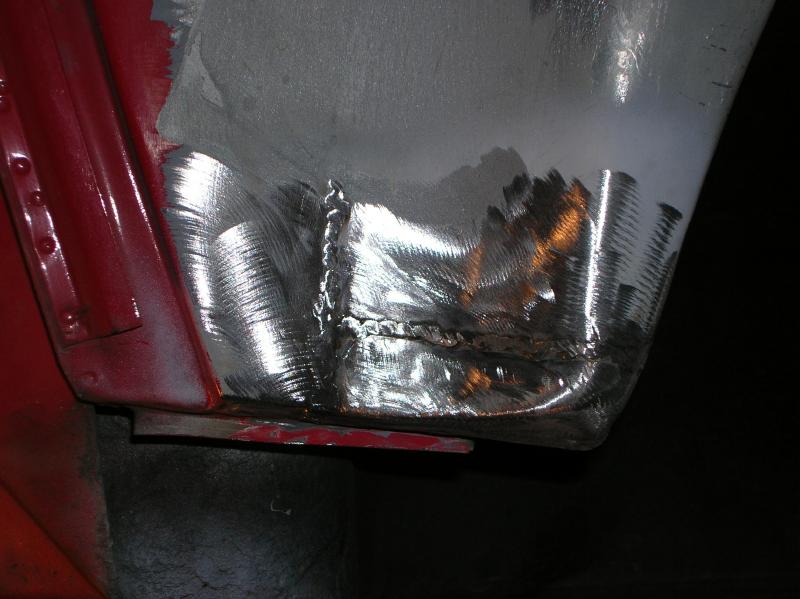
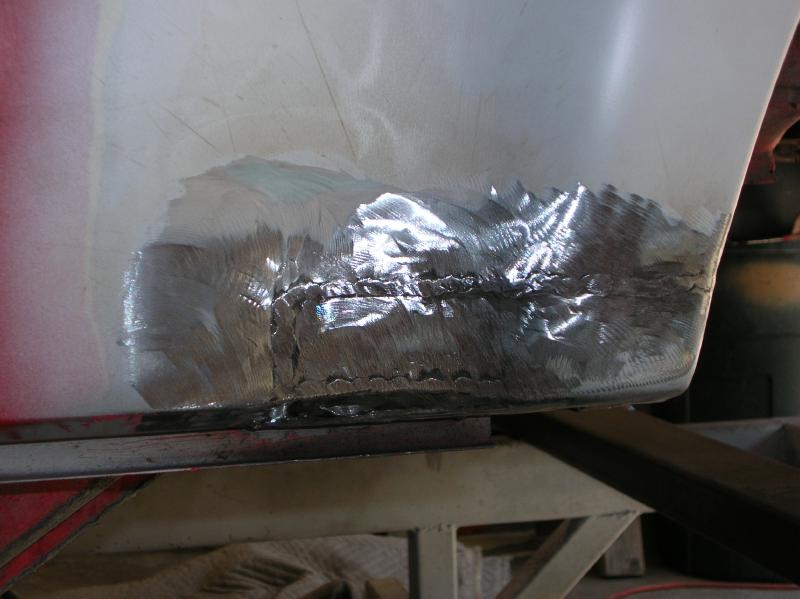
The rear edge at the front fender.
The photos shown here are from the drivers side, rear edge, at the front fender.
On this section, I had to make the transition to the angled section of the body and also take out that "straight" section to establish the curve to match the upper section.
Here I cut out the lower section and also cut out the angled section of the body. The angled section has to be cut out so that the filler piece can be butt welded smooth to it.
I then cut out where the filler piece would be.
I had to hammer the remaining section of flare to make a better curve (I'm assuming that you read the upper section of this page).
Here is the piece held in place and you can see where I hammered..
At this point, I did the button welds on the bottom and tack welds just to the left of where my thumb is.
The "flap" section of the removed piece is bent to the desired shape. That's why there is a (vertical) gap at the right.
After more tack welding and trimming, a filler piece goes in that big opening and is butt welded to the angled section of the body.
I've taken out the "straight" section, established the correct curve, and also have a smooth (after playing with bondo) transition to the angled section of the body.
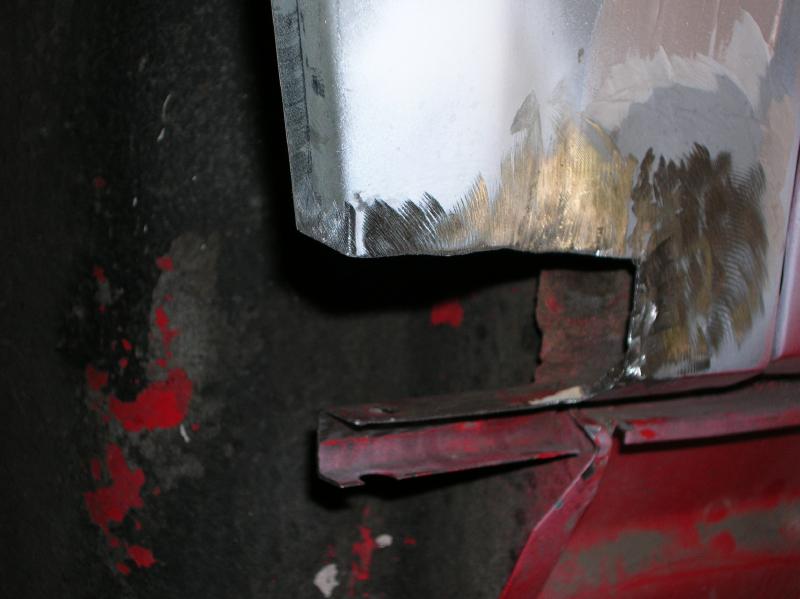
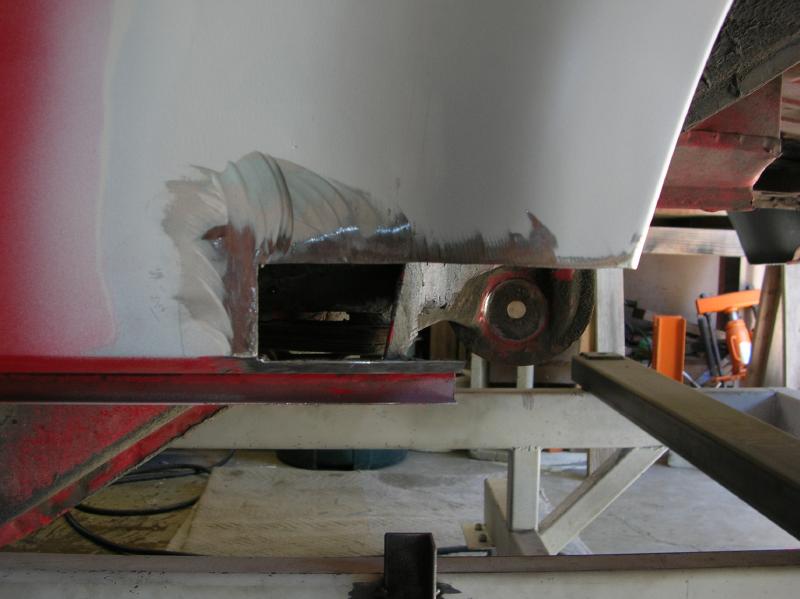
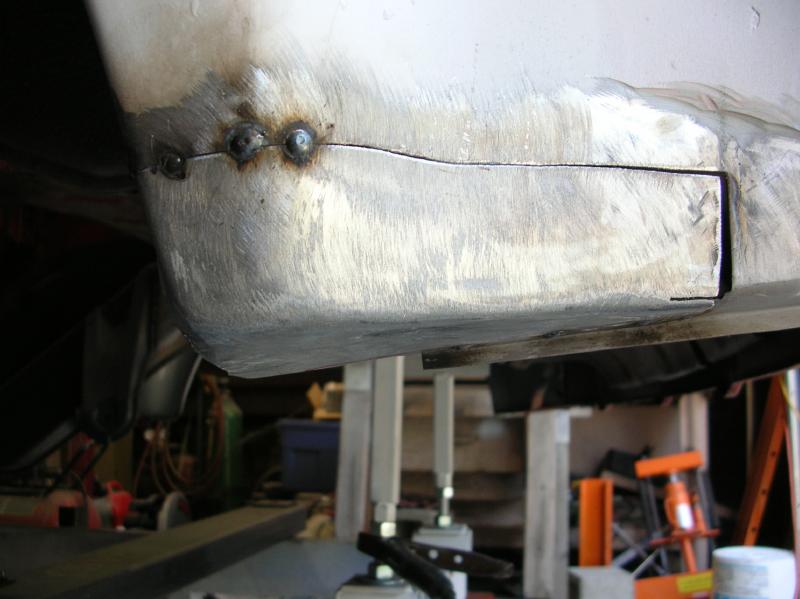
The front of the rear fender.
Here I'm doing the front of the drivers side rear fender. This was the first one that I did and sure was a learning thing! I'd have rather shown how I did the passenger side, but I didn't shoot enough photos.
I have to take out that "straight" section and also provide a smooth transition to the angled section of the body.
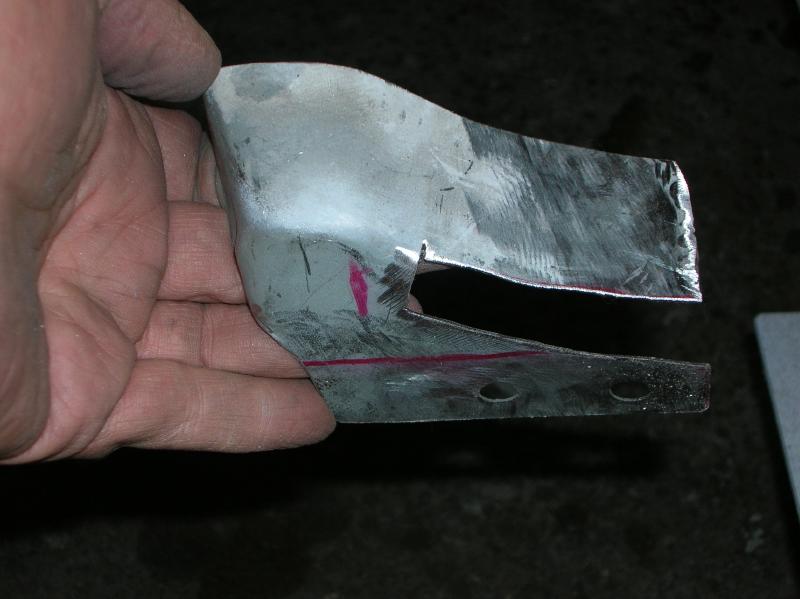
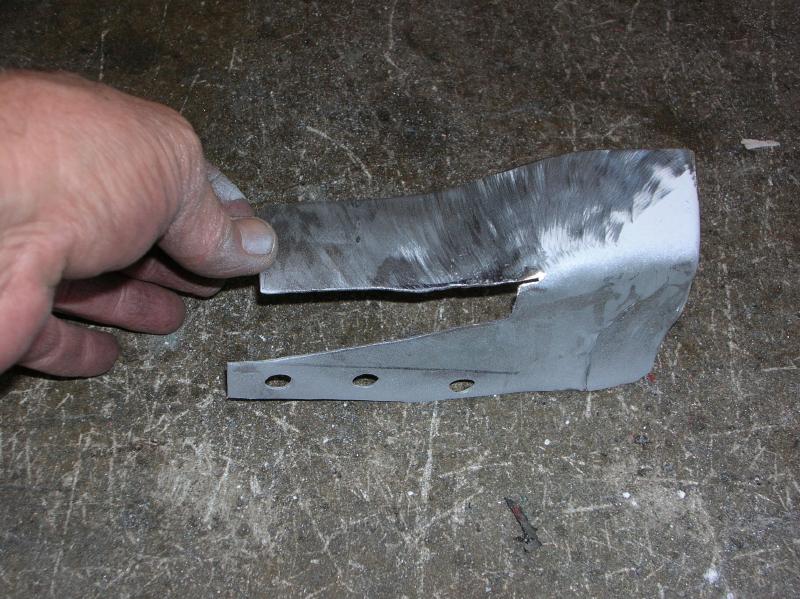
This is the cut out section. At the time the photo was taken, I hadn't cut out the angled section of the body.
Here is the removed section with an area cut out for the filler piece. (I did a crappy job cutting out the opening!)
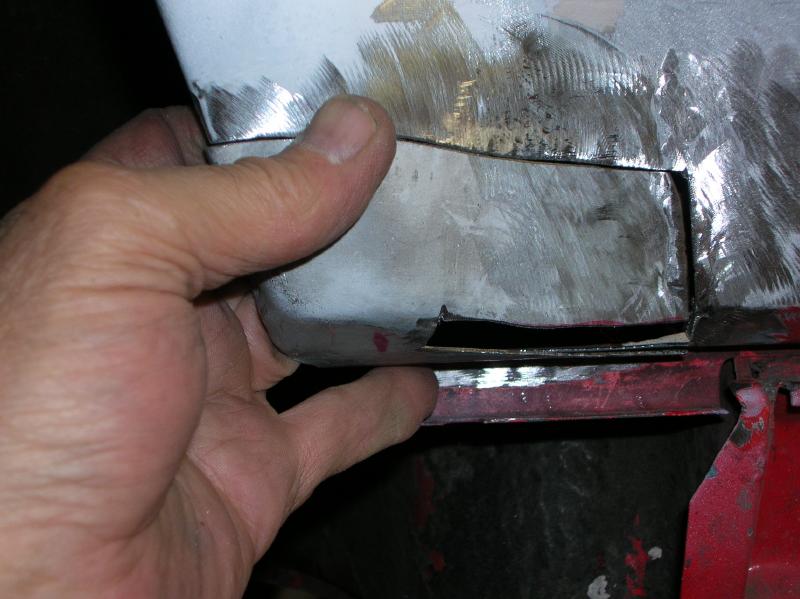
This is holding the piece in place. Notice that I've cut out that angled section of the body so that the filler can be butt welded to it.
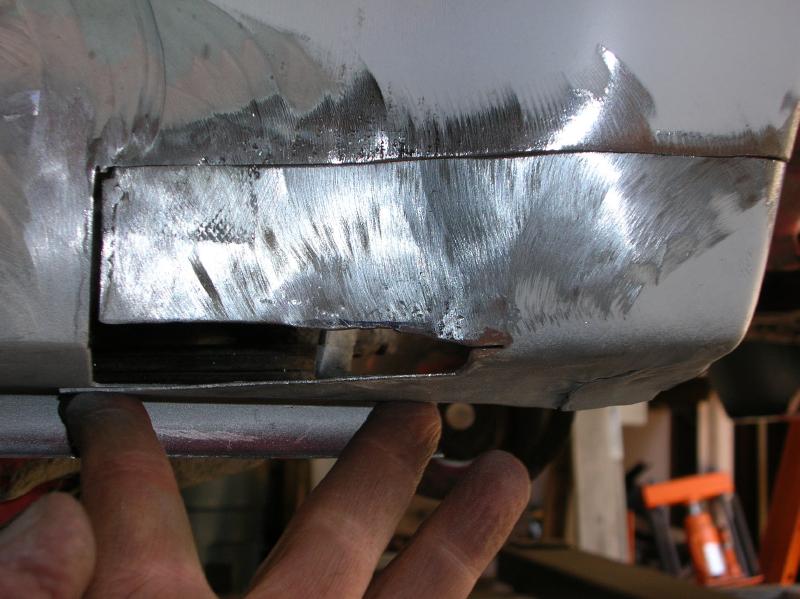
You can see where I hammered down a section of the attached flare in order to establish a better curve.
That top edge of the opening is messed up due to my trimming it wrong. It should line up with the fold in the body.
Then it's button weld the piece to the bottom edge and also tack weld it at the lip. At that point, you can bend in the "flap" for the correct curve and also fabricate the filler. Once again, the cause of large vertical gap at the left is due to working the curve.
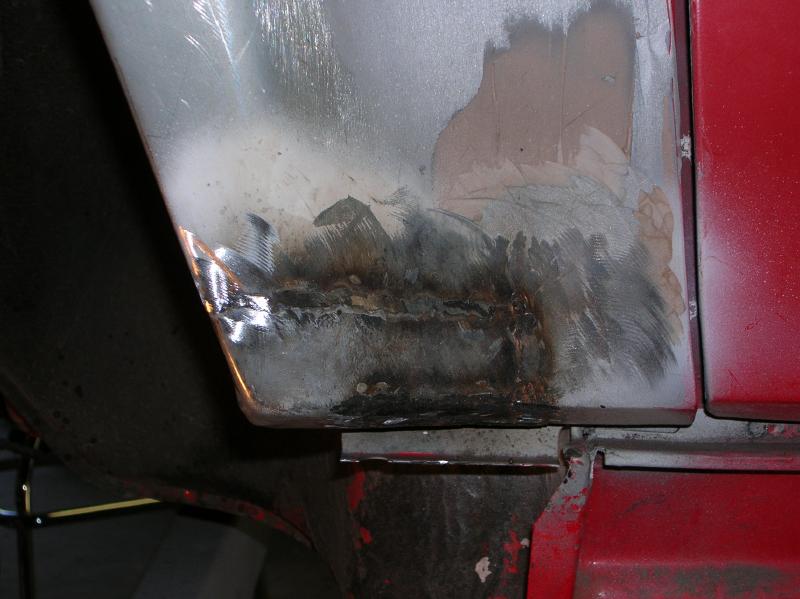
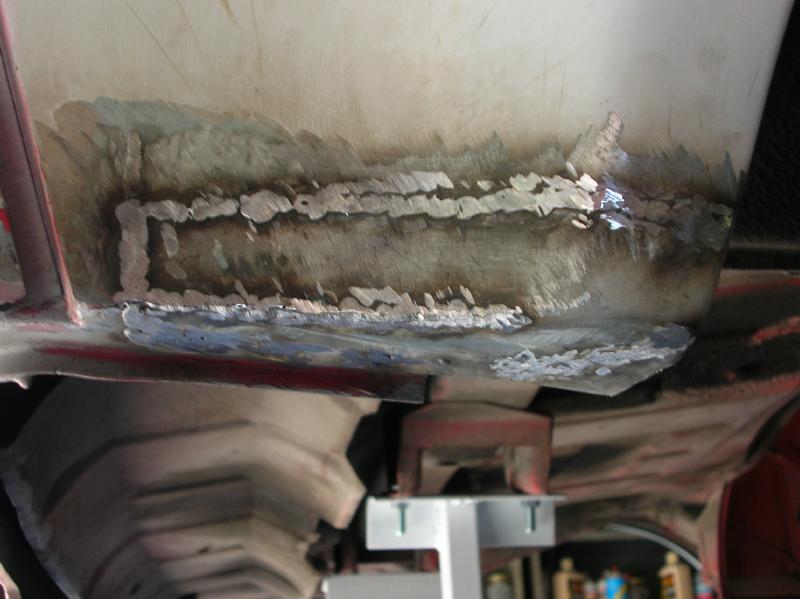
Here is the filler piece tacked in place.
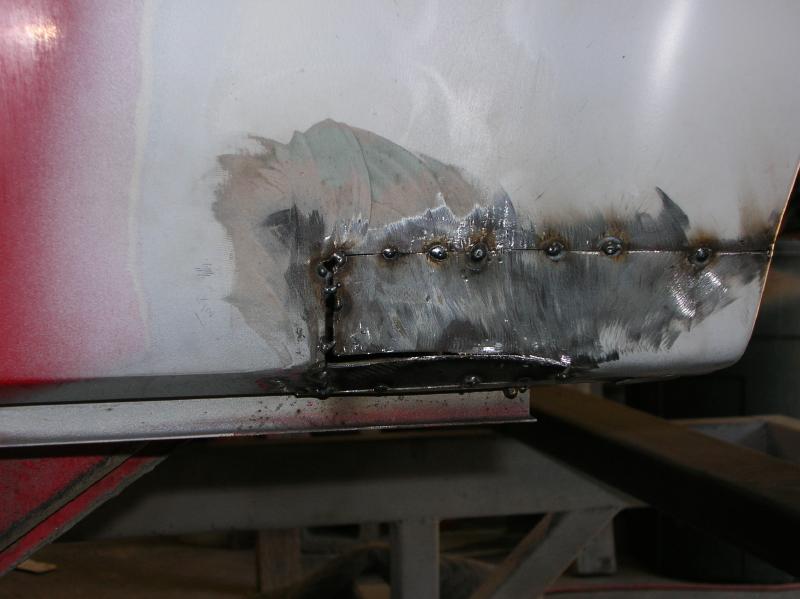
And finished welded.
The angled section at the bottom isn't all that great, but will get finished shaped with bondo.
The rear of the rear fender.
Dang, it's almost impossible to be sure you got enough photos! Some of these photos are of the drivers side and others (the last one) is from the passenger side.
The issues addressed are taking out some of the "straight" section and also the fact that the "lip" wasn't bent in enough.
The lower section was cut off and a small saw cut made. After trimming, it was button welded on the bottom and also tack welded as shown.
Then the cut was extended out and welded as shown.

At this point, I could hammer in the surface, taking out some of the "straight" section. The next photo shows it from above.
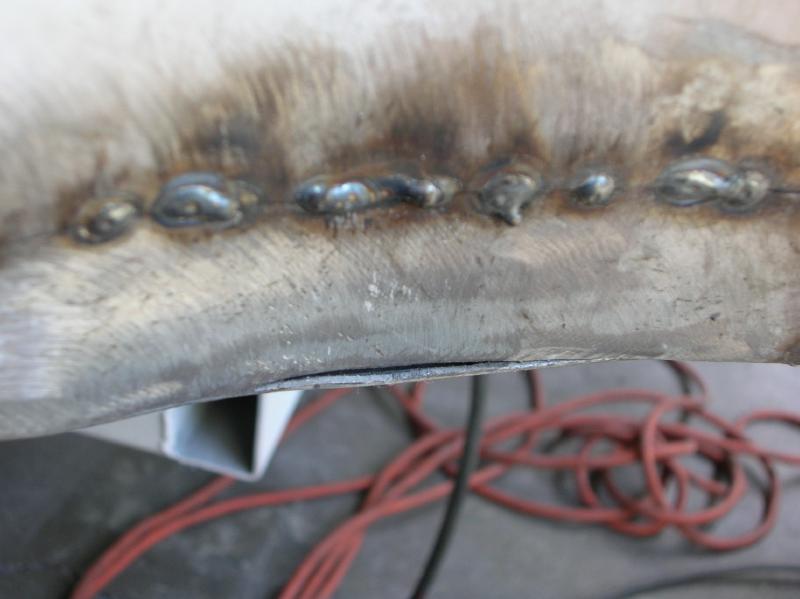
After cutting out a section of the lower piece, it's hammered into place and welded.
The next photo is from the other side (passenger side) and you can also see that I pie cut the lower surface in order to make the lower section of the lip correct.
That's it for now. Next up is fixing that big honking dent and also showing the bondo work.
go to the next "flare diary" page
go to the prior "flare diary" page
return to my "flare diary" entry page
return to my site's entry page
Wes Vann