Everything about my brakes
Major re-write; October 30, 2006
To start off, I really love my brakes!!!
After doing a lot of swapping stuff around, my brakes are pretty much everything I could ask for. They bring the car down quickly and have good pedal feel. And they fill out the wheels well.
Here is what I've got (and I'll let you how to do it);
The front brakes are Integra DA's on Honda EX spindles
The rear's are Integra DA disks.
The booster and master cylinder are also out of an Integra DA.
I don't remember what the proportioning valve is from, but it's a 3540 unit.
The hose lines are nylon covered stainless braid lines I had custom made up and the brake pads are from AEM.
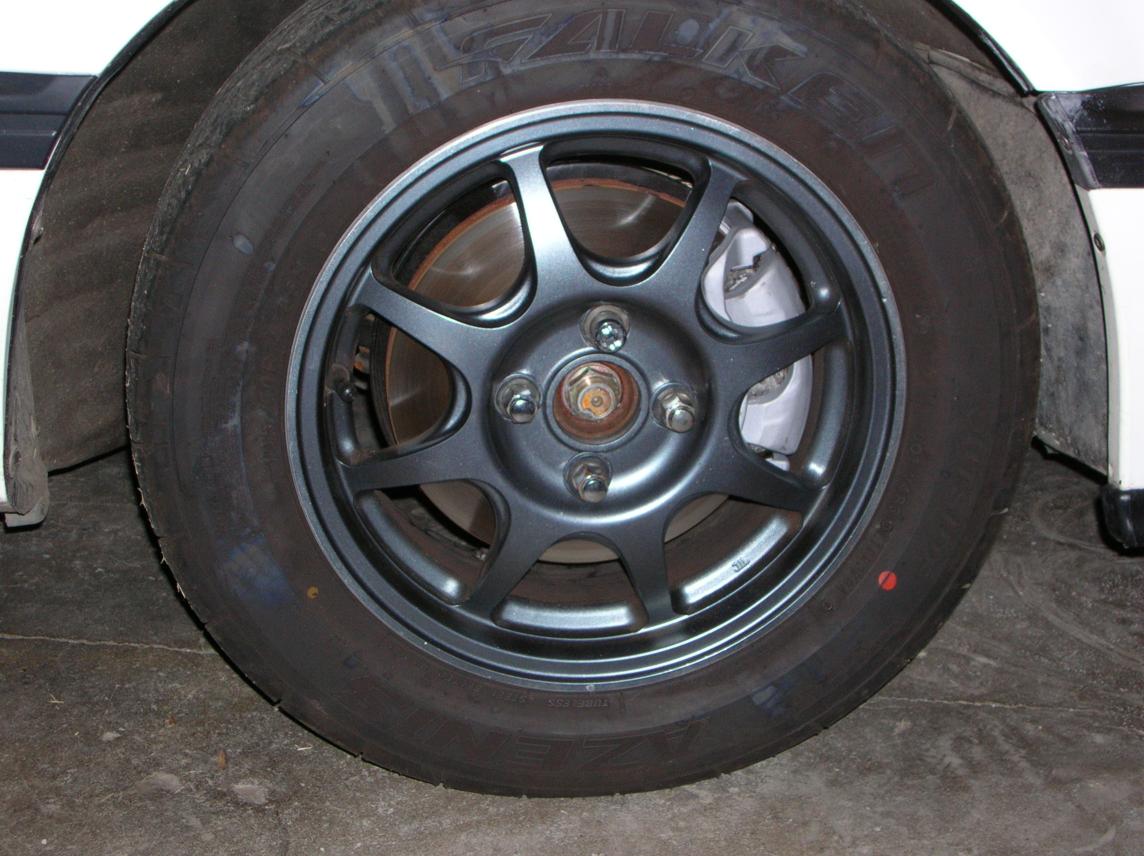
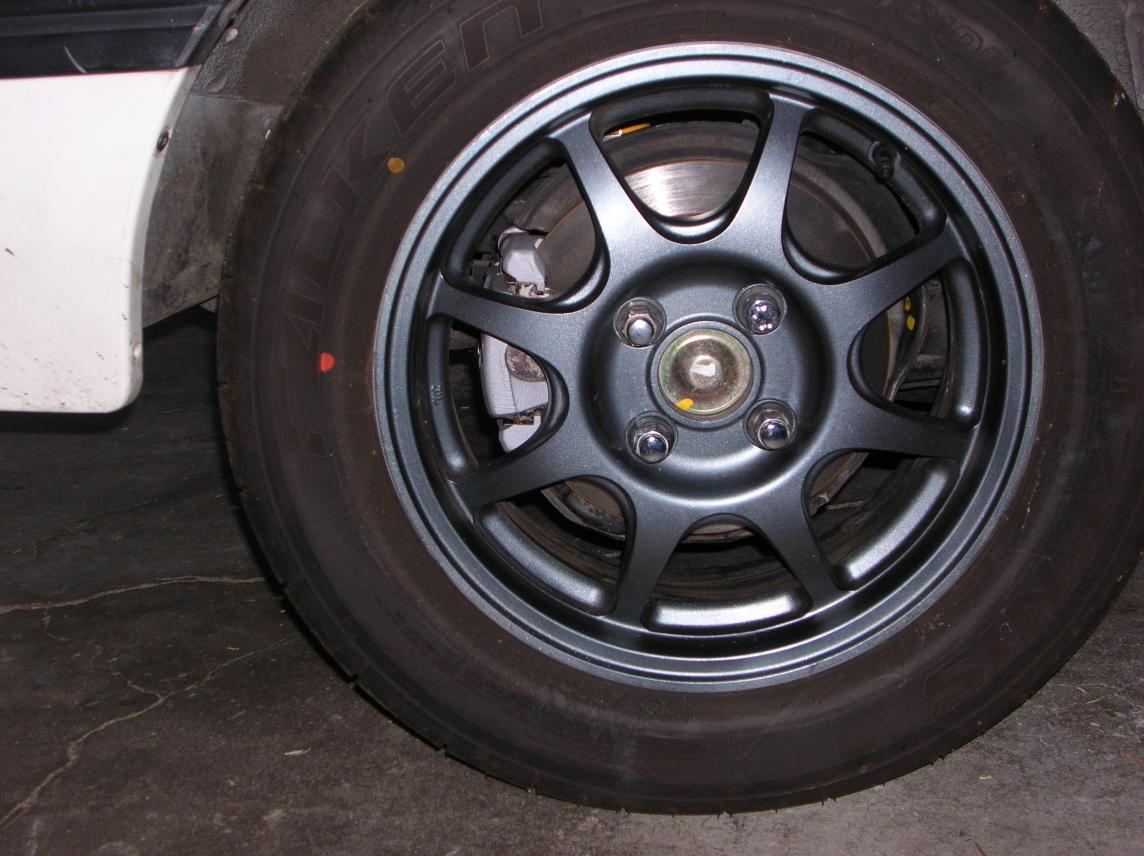
The rims are 14" HX's.
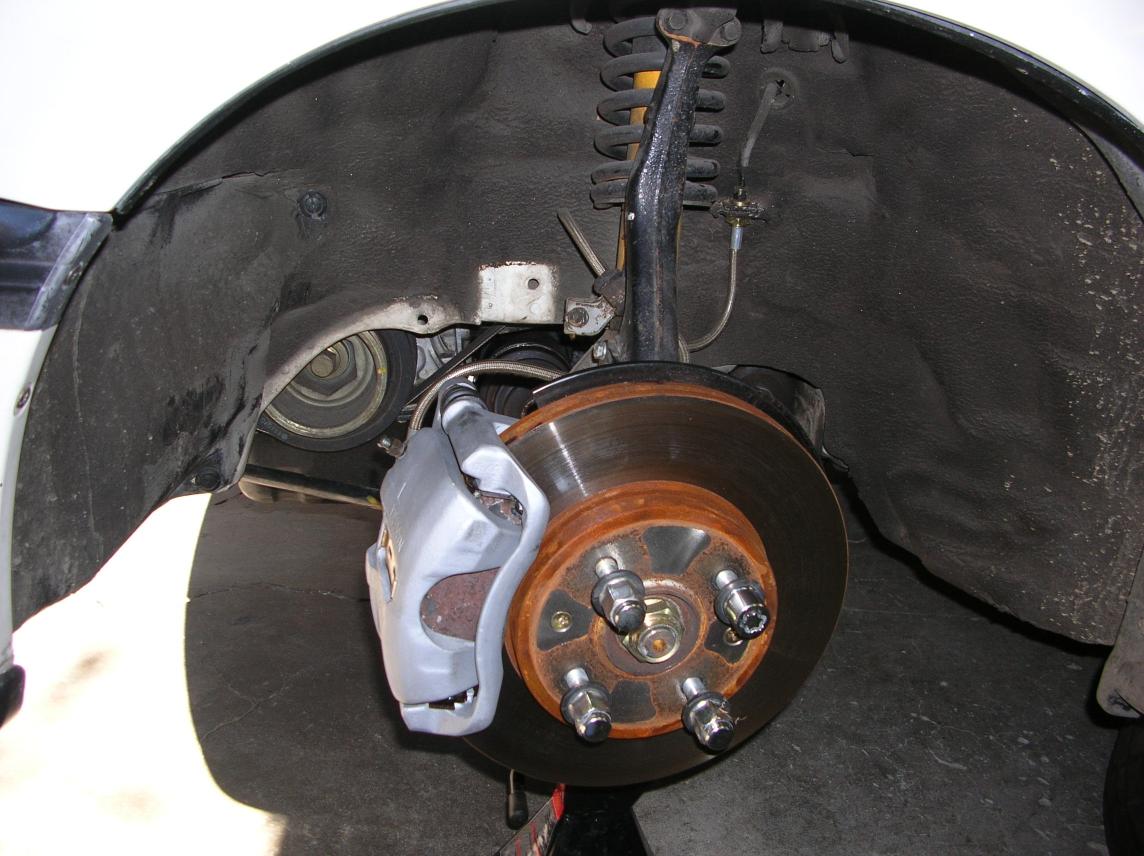
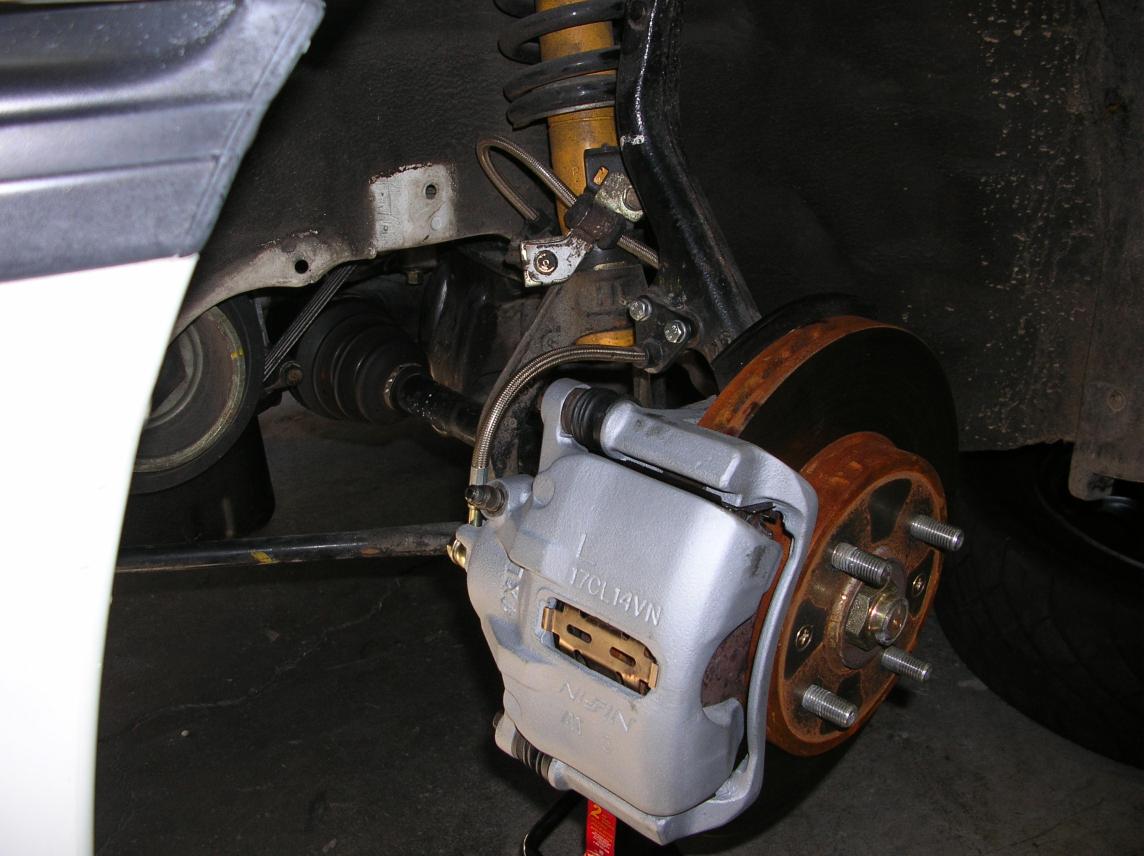
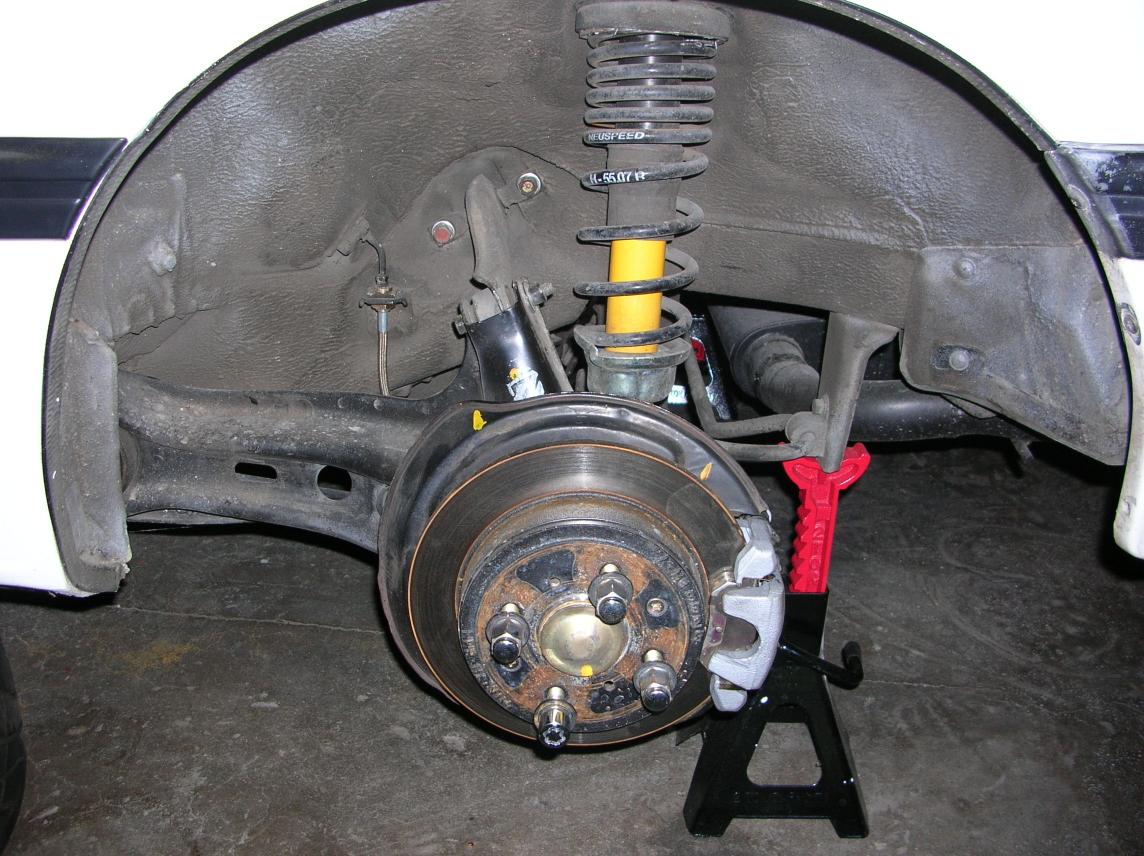
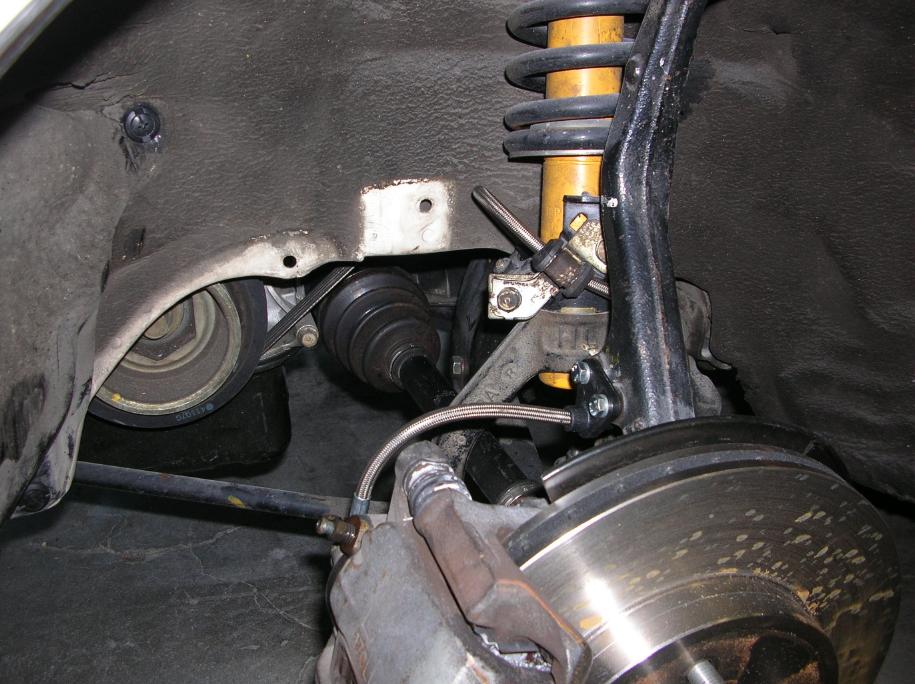
This is the front with the wheel removed;
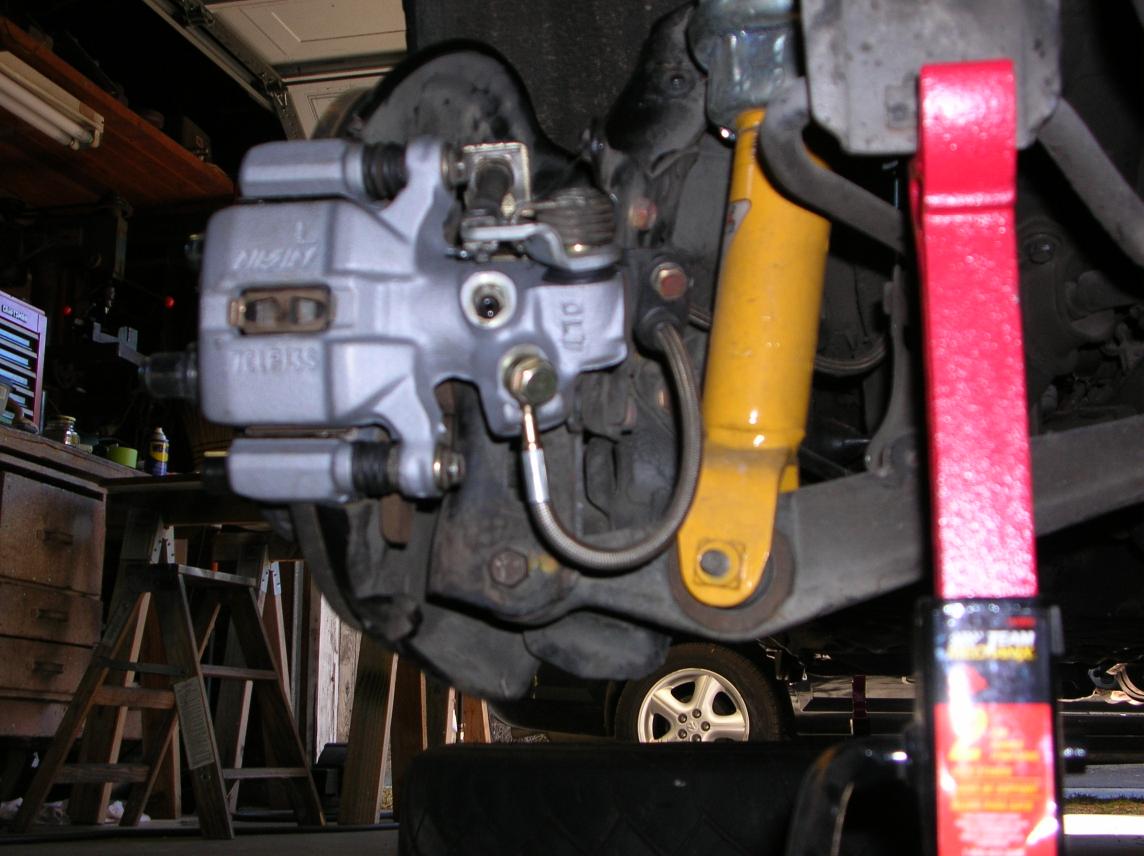
And this is the rear with the wheel removed;
Changing the front disk brakes, EX spindles;
The stock front brake rotors are 9.5" in diameter. The "EX" spindles use the same rotors and calipers as the Integra, and are rotors are 10.3" in diameter.
The stock caliper is 1.95" in diameter. The Integra one is 2.25" in diameter. This will result in a larger clamping pressure.
When you talk about the "EX" spindles, you have to be real specific. It's only the 1990 and 1991 Civic EX 4 door spindles that you want! They are hard to find! The spindle that goes on the left side has "LH3A" cast into it. The right side has "RH3A" cast into it. It's not "engraved" in, it's raised cast letters and if they are not there, they are not the spindles you are looking for.
Then there is the question as to just using the complete Integra spindles. There are dimensional differences with the attachment points on the Integra spindles, and it will change the suspension geometry. I don't personally feel that it's problem, but just wanted to do it "correct" and paid a lot more money for it.
I managed to locate the spindles on the Web from a guy in Texas. He made it clear that he had pulled them from a car in a junk yard, so I wasn't expecting them to be a quick "bolt-in". I paid $180 for them and this included shipping them 3-day. Get the brake hoses with them.
I replaced the bearings, seals, backing plates, and the lower ball joints. (order parts through Majestic Honda!) What got real weird was finding a shop to press the stuff back together. I wanted it done at a Honda dealer due to them having the correct press "jigs". (keep in mind that all the parts were new and clean) The first Honda dealer wouldn't do the work unless I brought in the complete car. (I asked him how I was going to do that what with having the spindles in the back of my Mazda, he didn't have any idea, just refused to do the work) The next dealer wanted to charge me for 1 1/2 hours work (at $85 per hour). I then went to an Acura dealer and they said that it would take 3 hours to do it. I ended up at a machine shop and the two of us did the work in 1/2 hour. (before doing the work, he said he wanted $40 to do it. I gave him $80 when we were done due to his being willing to do it right away and with me there helping)
I got the rotors and calipers from a local junk yard (Integra parts) and rebuilt them. I'll show you how latter in the page.
Installing the spindles was a direct "remove and replace"! (I hope you already have your Helm's factory manual)
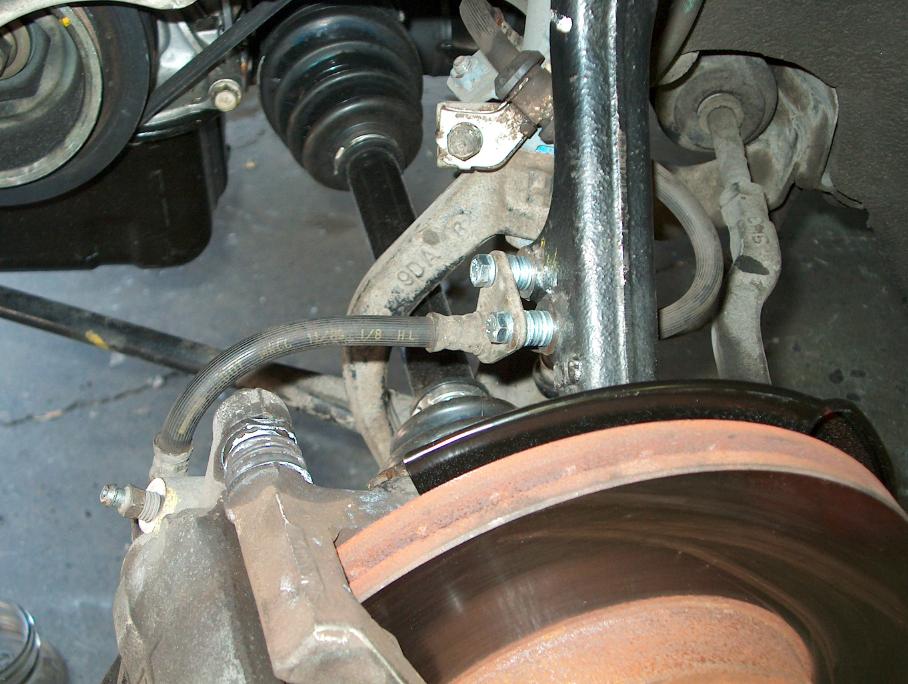
The only "issue" I had was with the hose! What may have caused some of the problem was that I was using Integra calipers. There shouldn't be any difference (I believe that they have the same part number as the EX caliper), but there may be a difference in the casting where the hose banjo fitting attaches. There are two cast "tabs" that prevent the hose from rotating and as a result they "point" the direction of the hose. On the hose is a bracket that bolts to the spindle arm. I couldn't use the stock brake hose due to it not reaching the attachment point on the spindle arm (already attached to caliper). The EX hose would reach, but was real "tight" and it really shouldn't be that way. What I did was use a stack of washers to relieve the stress on the hose. It's not pretty and I'll make up a spacer latter.
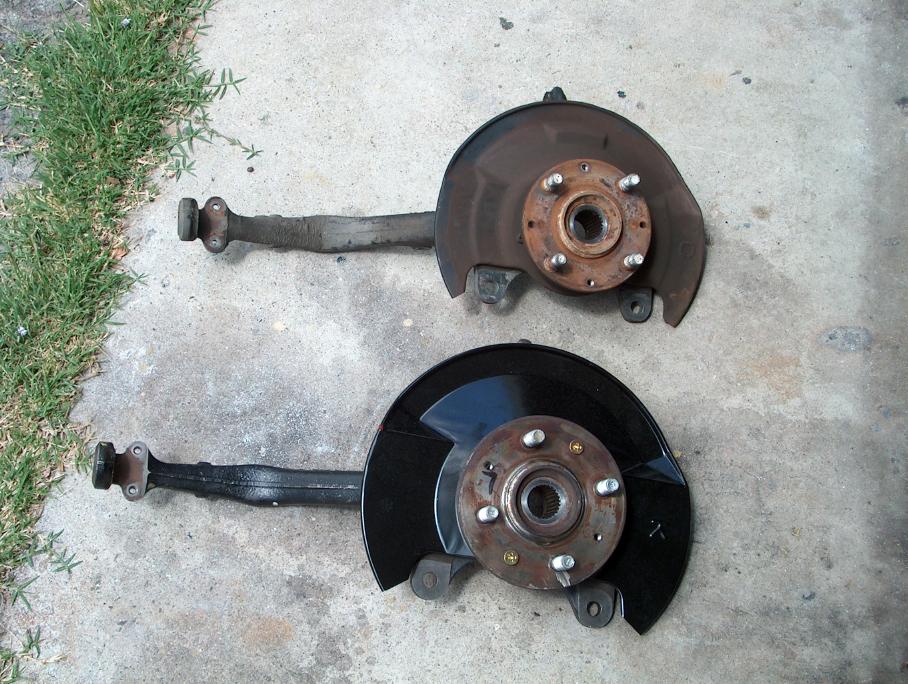
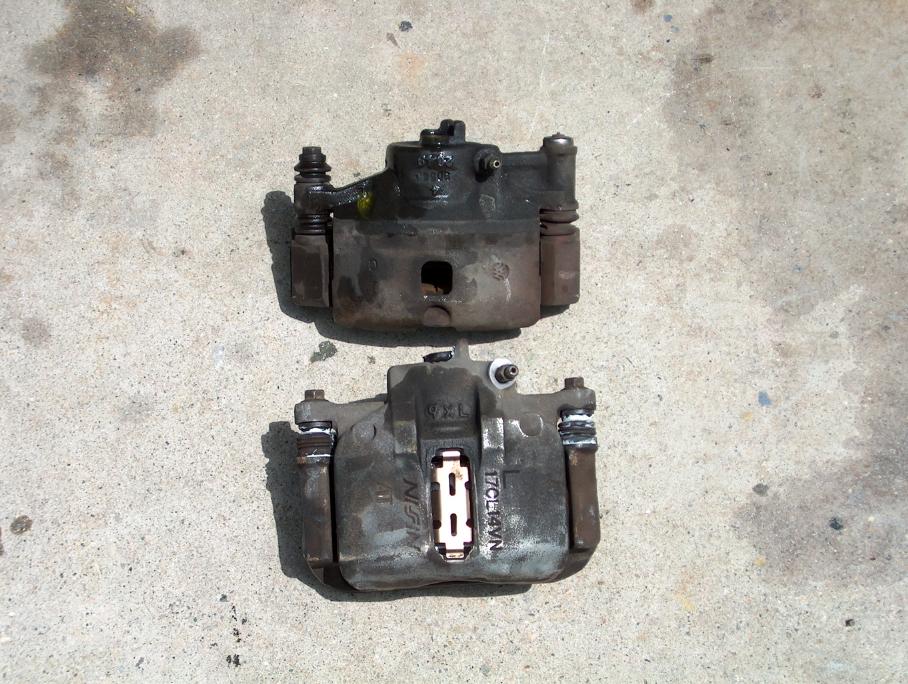
That photo at the upper left is a bit deceiving! The arms on the spindle are the same shape and size.
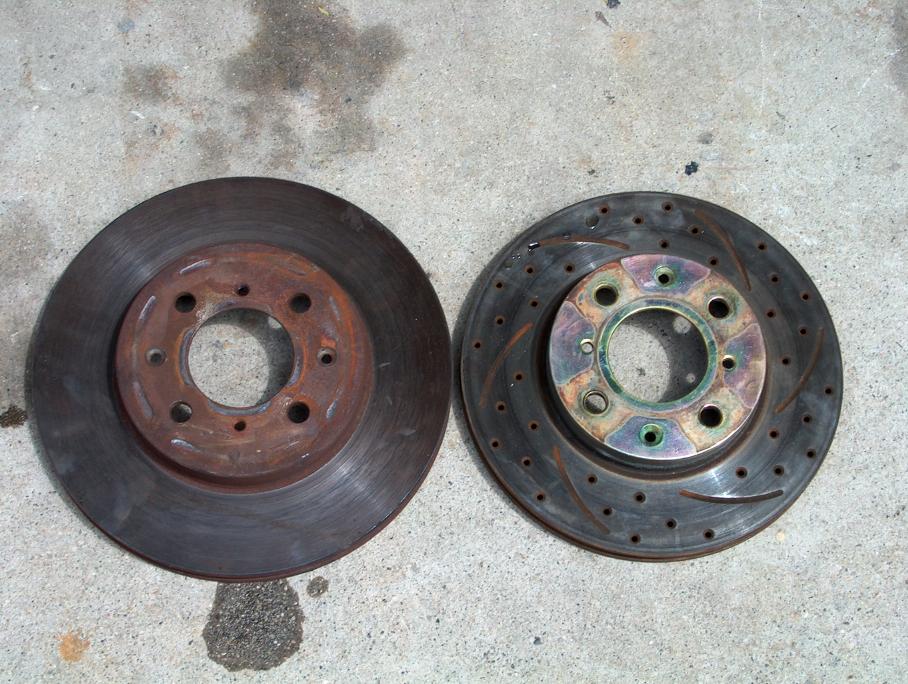
The upper right shows the DA rotor next to a stock size one.
In the lower left, at the top is the stock caliper and below it is the DA one.
The photo on the lower right shows the washers I used to prevent tension on the hose. The hose was latter replaced with a stainless steel braided line that didn't need the spacers.
Changing to rear disk brakes;
The reality is that unless you race (and tend to over heat the brakes), you don't need rear disk brakes. Then there is the fact that they weigh more than drum brakes. However, I just had to do it!
It's an easy and straight forward swap that is covered in several web pages better than I can do! Basically, you just get the complete rear arms with brakes from a 90/91 CRX Si, or Integra. The only real issue is to get ones that have the correct length parking brake cables.
The ones I got at a local junk yard (that specializes in Hondas) were from different year Integras. Both cable lengths were the same and when I got home, I checked the length against the original ones. (I think that it's the CRX that has different length cables, but don't trust me on it)
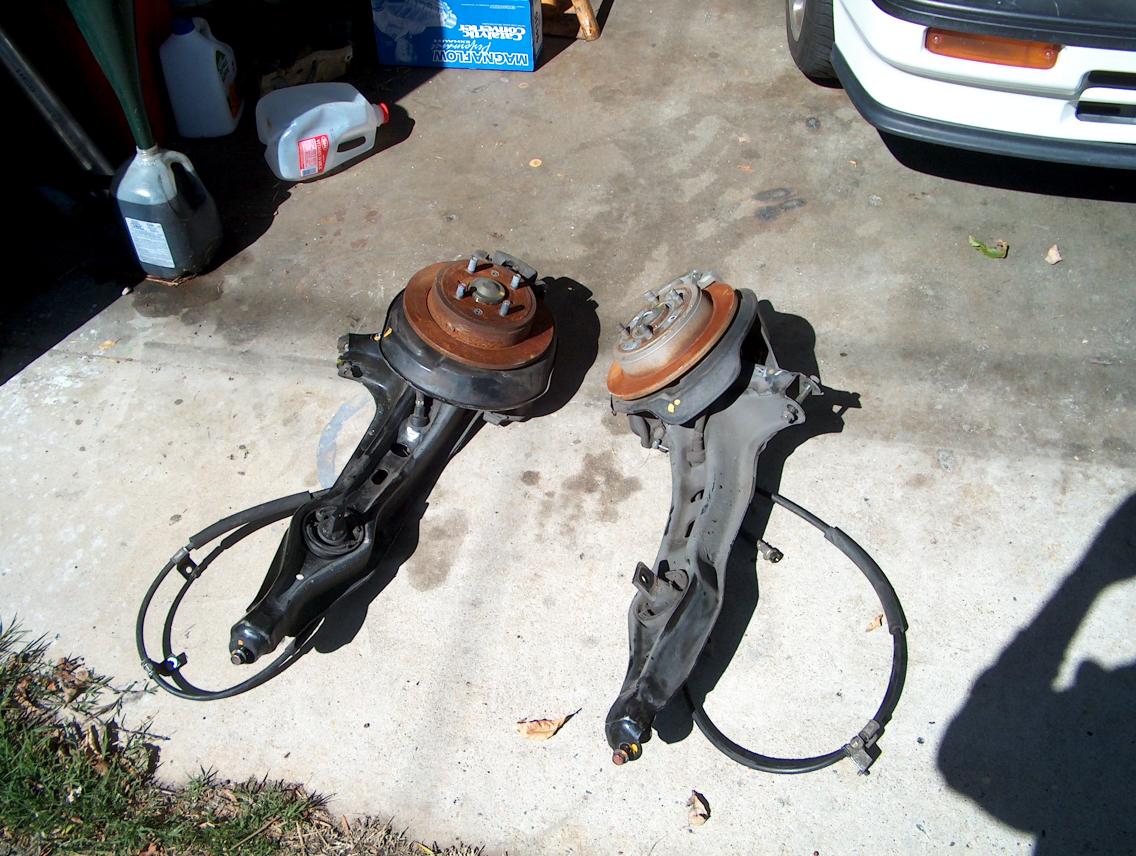
Routing the parking brake cables was the worst part of this swap.
Changing to stainless steel braided hose lines;
There are several "kits" out there, but I really can't say if they are any good or not.
I've always had a shop near me called Orme Bros. build up my brake lines. I brought in the original hoses and they replicated them right down to all the attachments. Let me say that again, they have all the factory attachment points!
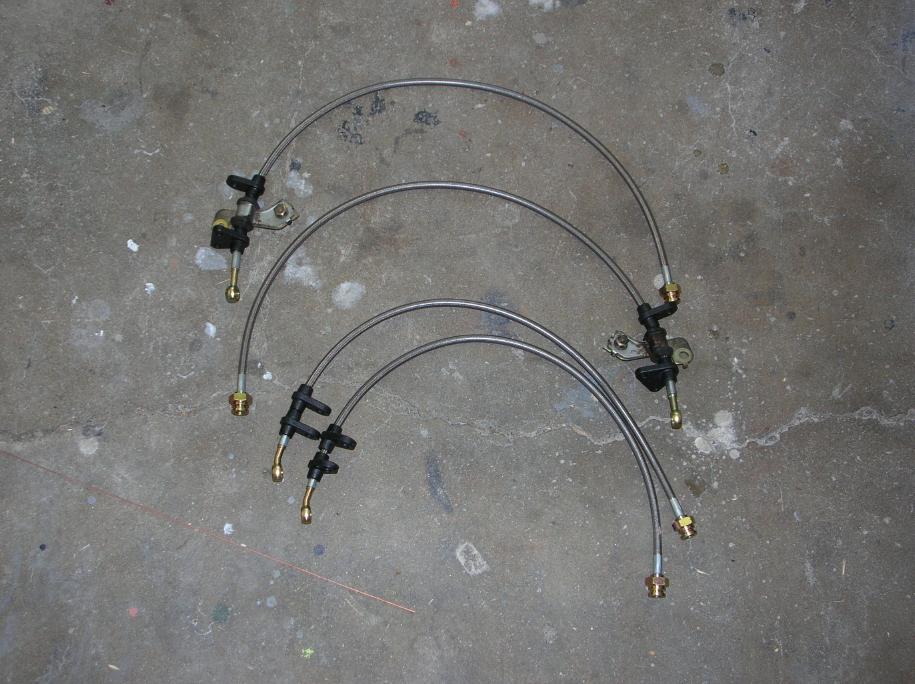
The hose is different than what normally comes with a kit. It's got a clear nylon covering that prevents dirt from getting under the braid. That's a big thing when we are talking about something that is exposed to road crap.
Here are photos of the installed hoses.
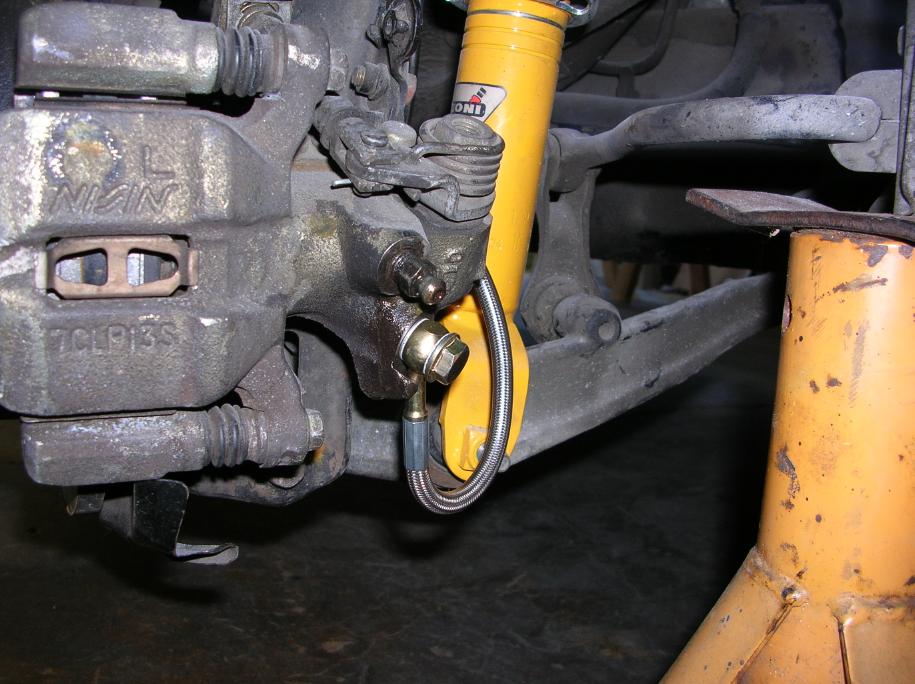
Also notice that in the photo on the right, the banjo fitting has the hose coming off at a slight angle, as it does with the factory hose.
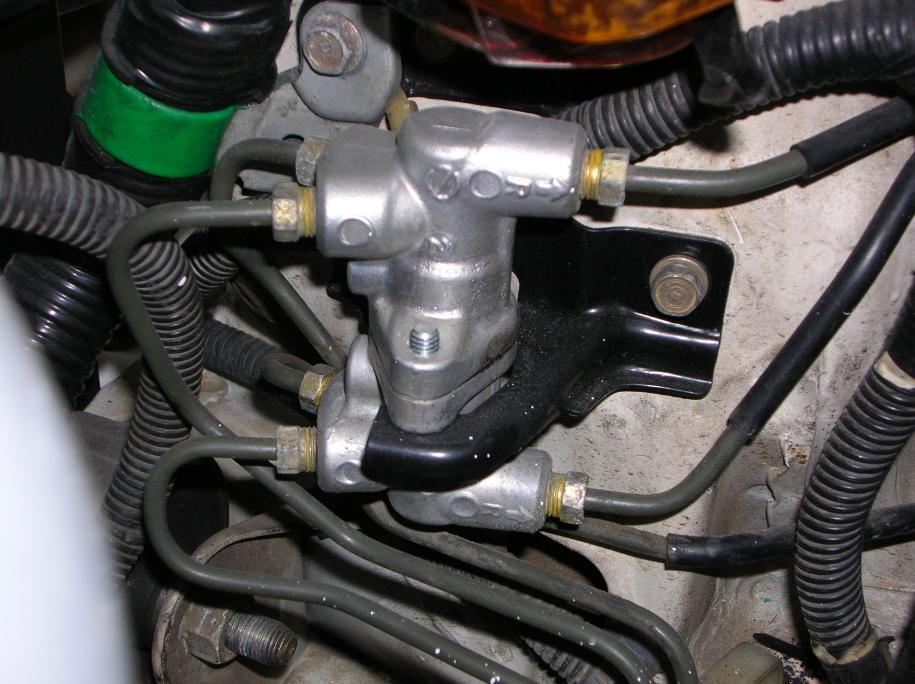
Changing the proportioning valve;
When you swap around brakes, you should also change the proportioning valve so it balances out how the brakes work. The weight distribution is also a factor.
This gets into a real "dark" subject that nobody has valid answers for!
The early Hondas and Integras use proportioning valves that are all the same on the outside. There are numbers stamped in them and the idea is that it has something to do with the proportioning "ratio". However, I couldn't find anybody that could tell me what the numbers really mean. Believe me when I say that I looked real hard. The information is not available outside of the factory in Japan, as far as I can tell.
The most common recommended valve is marked "4040". I couldn't find one and got a "3540" from a car that had similar brakes and weight distribution. It's worked just fine!
There are just two things that have to be addressed.
The first is that you have to use a flare nut wrench to prevent rounding off the nuts.
The other is that the steel bracket needs to be swapped. All you have to do is use some vise grips to remove the two screws and then replace them with normal bolts.
Here is a photo, but it pretty much looks exactly the same as it looked before.
Changing the brake master cylinder and booster;
Ok now, you may ask what swapping the master cylinder and booster will do for you. Here is the answer;
Due to changing the size of the brakes, the master cylinder has to pass more fluid. Now it's possible to just push the pedal further, but that's not optimal. You are better off going to a larger diameter master cylinder. But that causes another issue.
When you go to a larger master cylinder you actually lower the line pressure (the pressure in the brake lines) for any given pedal pressure. If you don't change the booster, you have to press harder on the pedal to get the same pressure that the brake slave cylinders see!
So, what does Honda (or any other manufacturer) do? They install a larger booster. That way you don't have to press on the pedal any harder. The booster does it for you.
An easy swap is the Integra DA booster and 15/16" master cylinder. All the lines hook right up.
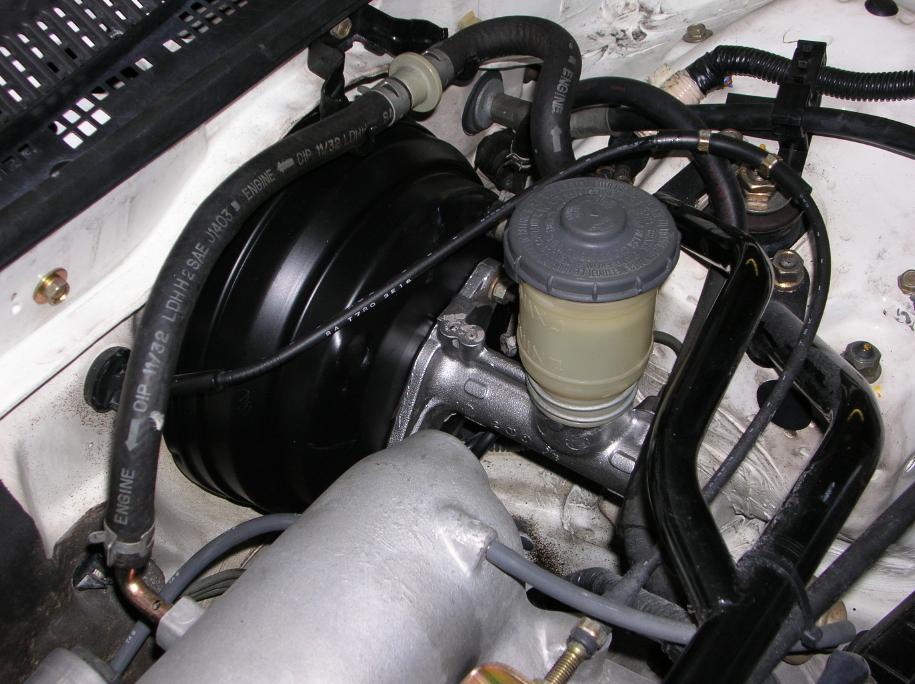
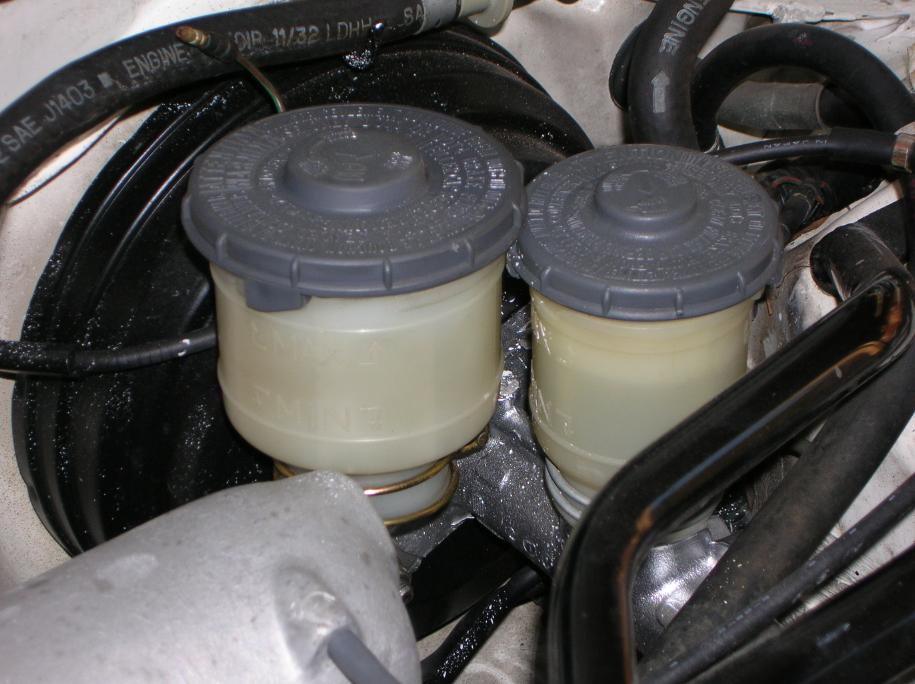
In the photo on the left, it looks totally stock. The reason is that the fluid reservoirs can be swapped. Just loosen the clamp at the bottom and they come off. Once the brakes are bleed, the level doesn't change that much and using the smaller reservoir isn't a problem. Just keep an eye on it as the brakes wear down.
It's always best to have the master cylinder and booster come from the same car so that they match. It's possible to mix and match some, but I don't really know what will work. What I do know is that you can not swap between cars that have ABS and non-ABS. The reason is that the length of the shaft coming out of the booster is different lengths. The master cylinder that would match has a piston that accounts for that length.
I installed the booster with the master cylinder removed. I found that the best way is to remove the clevis from the booster. The clevis is the item I'm holding in the following photo. Once the booster is in place, re-install the clevis, then put on the four firewall attachment nuts. (this assumes you have the engine installed.
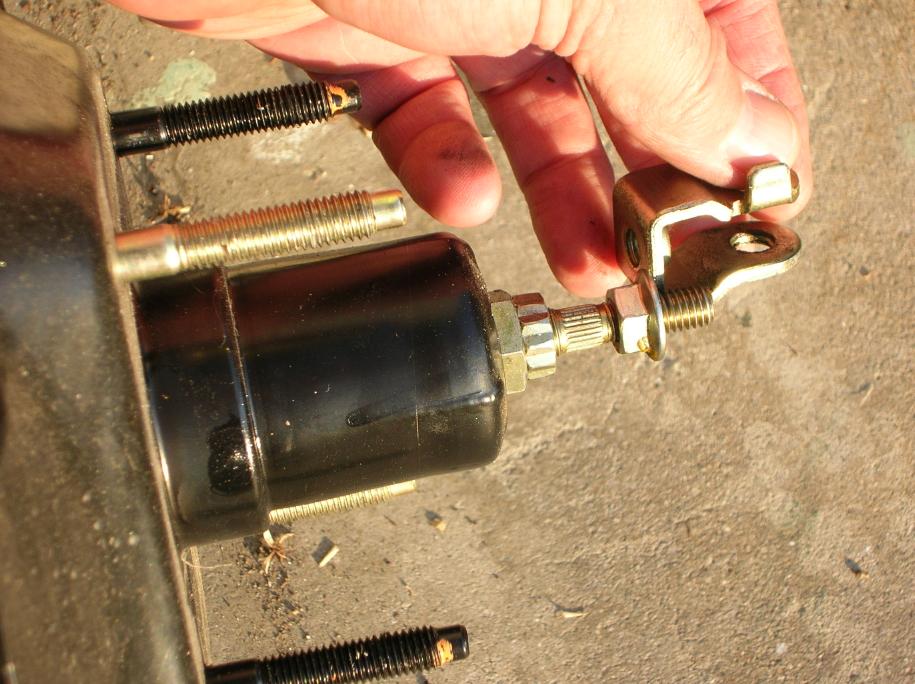
Now there is something that should be noted about that clevis!! It's possible to position the clevis on the boosters input shaft. By playing around with this, you can raise or lower your brake pedal for heal & toe usage.
Rebuilding the brake cylinders;
I decided to put the "rebuild" stuff on it's own page.
Bleeding the brakes;
For some unknown reason, I'm shitty at bleeding brakes, so it will not hurt my feelings if you want or feel that it should be done another way! I get them pretty good and then just go to the dealer to have them pressure bleed.
I put the car up on jack stands and remove all the wheels. I hook up a hose to each of the caliper bleeder valves and have it sitting in a bottle that has a certain amount of brake fluid in it so that the end is under fluid. The reason is so that the fluid can't "back suck" air through the hose.
Then I have a friend pump up the brakes and hold pressure while I bleed off one caliper at a time. I keep going around the car until I don't get any bubbles coming out.
You have to keep checking the fluid reservoir to make sure the level doesn't fall too far. You should keep the cap on the reservoir to prevent any fluid from coming out and also to keep it away from any moisture (like in the air). You should keep the cap on your bottle of brake fluid for the same reason.
I think the reason that I've never had much luck with this is that without the engine running, the line pressure isn't that much. As a result, air can hide within the system because the fluid isn't moving very fast when bleeding. It would be possible to do it with the engine running, but with the car on jack stands it could get dangerous.
I've tried Accuvac's and have never had any good luck with them. It's a small vacuum pump that pulls fluid through the bleeder valve. In theory it should work, but it's never worked for me.
Some shops use a vacuum set-up that works much like the Accuvac, but are hooked up to an electrical pump. I haven't tried this, so I can't really make an opinion on it.
The best way to have it done is to use a pressure bleeder that pressurizes the reservoir and pushes fluid through the system and out the bleeder valve. It's possible to up the pressure to a point where the fluid moves out very fast and the air bubbles can't hide. This type of bleeder isn't cheap and requires that you have the correct adapter to fit on the top of the fluid reservoir.
Notes about brake fluid;
It's possible to go crazy talking about the different types of brake fluid and I'm sure not the hero here!
My feeling is that on a street car, just use DOT3 fluid, as was in the car from the factory. There are better fluids, but you have to be careful as to what can be mixed with the fluid already in your system!!
What I do feel is real important is that you know that brake fluid sucks moisture out of the air and as a result goes bad over time.
So, it's a good thought of having the complete system flushed with new fluid after a couple years. That means that if you are driving around in that 15 year old Honda, it's about time!!!
Tools;
There are several tools that you will need. Don't be a jerk, just buy the tools (and then rent them to your friends for free beer)!
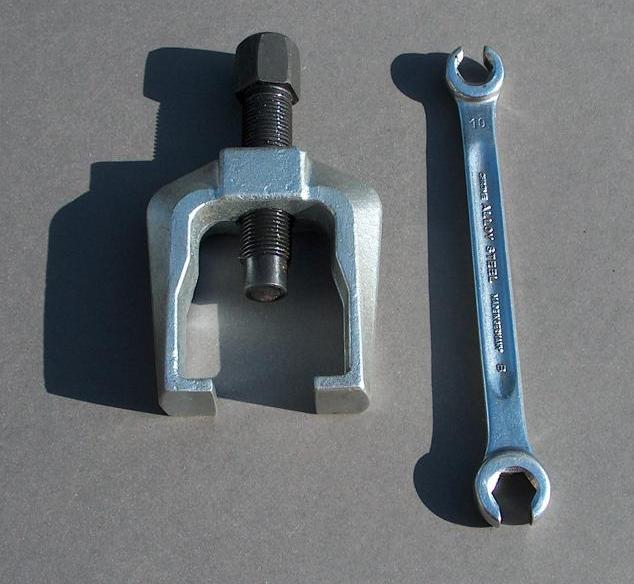
The tool on the left is a ball joint remover. I bought this one from Auto Zone and it didn't cost much. Here is the "correct" and easy way to use one. Remove the cotter pin and throw it away (buy new ones!). Loosen the nut and screw it so it's at the end of the ball joint threads (by keeping it on, you protect your self if things come loose suddenly). Put on the tool and tighten it down real tight. Don't try to tighten it so much that it pops the ball joint loose by it's self. Then bang on the arm (that the ball joint is going through) with a hammer. You don't have to bang hard and the pressure of the remover will cause it to pop loose. This works and you don't need a monster hammer. You will still have clean threads on the ball joint.
The wrench is a "flare nut" wrench and you should be able to get one from Sears. You use these on the hose fittings to prevent them from rounding out.
Buy a 32 mm "impact wrench" socket. You will need it to remove the axle nut. A normal socket of this size will not live long removing the axle nuts!
And of course, get the factory manual from Helms.
Closing comments;
Use jack stands!!!
return to my site's entry page
Wes Vann